Description
One of the drive bays in a multi-bay My Cloud device displays a Red LED. The Dashboard indicates that the drive has failed. One of the internal drives in the device has failed and needs to be replaced.
Resolution
This drive should be replaced as soon as possible.
For maximum data protection, it is recommended that the Cloud Storage device is turned off. On the Dashboard, go to Settings then Utilities and click on Shutdown. Once the device is off, keep it that way until the failed hard drive has been replaced. The drive must be replaced with a drive of identical capacity and rating when used in a RAID environment.
What to expect from a drive failure varies depending on the RAID mode in which the My Cloud Mirror, EX2, or EX4 is set to. For more information, please follow the information listed below:
IMPORTANT:- 4k drives are not supported in My Cloud enclosures and should not be used.
- Certain RAID modes retain data accessibility after a single drive failure has occurred. However, Western Digital still recommends to turn the My Cloud Mirror, EX2 or EX4 off unless extremely necessary. While missing a drive, the redundancy of the RAID array is compromised. Turn the unit off to avoid data loss in the rare case that a second drive were to fail.
 |
Critical: On RAID modes that lack redundancy (such as RAID 0, Spanning, or JBOD). If no backup of the data exists, recovering data located on failed drives may still be possible through Data Recovery. Contact a Data Recovery service prior to replacing the failed drive. For more information on Data Recovery, please see Answer ID 6624: Recover Data from a Drive, Obtain a Circuit Board, Repair a Drive, or Find Data Recovery Partners |
|
|
|
|---|---|
| My Cloud Mirror, My Cloud EX, DL, PR (2-Drive Bays) |
Click here for Instructions |
| My Cloud EX, DL, PR (4-Drive Bays) |
Click here for Instructions |
Two Bay Drive Replacement Instructions
 | While handling an internal drive, ground yourself by touching metal before handling the device, to avoid electrostatic discharge (ESD) issues. Please see Answer ID: 1486 - How to properly handle Western Digital internal hard drives for more information. |
Removing a Drive:
Please follow the steps outlined below for removing the faulty drive from the enclosure:
- Place the powered off unit, with the Ethernet and Power cable disconnected, on a clean and stable surface
- Reveal the hard drives by pressing the indented button on the top of the device and pulling up the door
- Remove the bracket used for holding drives in.
- Pull the plastic tab at the back of the drive, while guiding the drive up and out of the enclosure
Preparing a Drive:
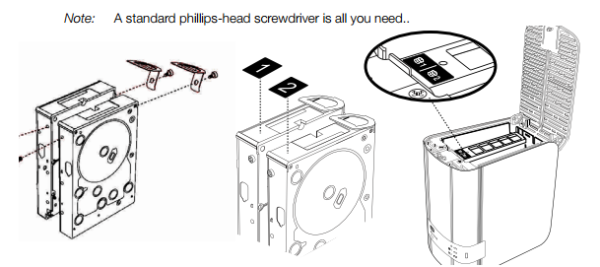
The My Cloud device ships with a bag holding the screws, tabs, and labels needed for inserting the new drive. For WD replacement drives, the parts attached to the faulty drive can be reused. A standard phillips-head screwdriver is all that is required to perform this task.
- Using a screw from the bag, attach a plastic tab to the top hole in the drive's side.
- Attach a screw to the corresponding hole on the other side of the drive.
- Attach label 1 or 2 to the top of the drive. Label 1 is on the left while label 2 is on the right, when looking down on the top when facing the front of the unit. There are corresponding numbers on the cross brace label.
Inserting a New Drive:
Once the drive is prepared to be placed into the My Cloud device, proceed to insert the drive:
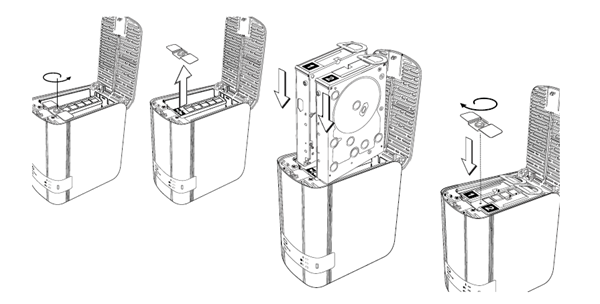
- Press the indent on the top of the unit to open the door, and then remove the bracket that holds the drives in
- When looking down on the top of the unit with it facing inwards, and inserting two drives, arrange them so that the connectors at the bottom face in, the green boards facing each other. If inserting only one drive, the green board faces the middle of the unit
- Gently slip a drive into the slot. Make sure the plastic tab is sticking up at the back of the unit. Repeat with the other drive, if applicable
- Screw the bracket over the tops of the drives. Close the door and firmly push down until it locks into place
- Reconnect the network and power cables of the device
- Power-On the unit. Allow the unit to fully boot-up; this may take several minutes. It is normal to see a red LED because the replacement drive has not yet be prepared for use by either rebuilding the RAID array or formatting and creating a new volume. Proceed to the 'What to expect' section below related to the specific RAID configuration used prior to the drive failure for next steps
What to expect if a drive fails:
- What to expect if a drive fails on a RAID 0
- What to expect if a drive fails on a RAID 1
- What to expect if a drive fails on a Spanned volume
- What to expect if a drive fails on a JBOD setup
Replacing a drive on a RAID 0
RAID 0 stripes data across all drives involved in the RAID to provide improved performance, but does not provide any level of redundancy.It is normal to see a Red LED representing the existing and the replacement hard drive because the RAID is degraded.. Please see Answer ID: 13175 - The front LED on a My Cloud Mirror or My Cloud EX2 displays solid red for more information. Please follow the steps outlined below to prepare the replacement drive and create a new RAID0 array:
- Open the dashboard. Please see Answer ID 27432: How to Access the Dashboard on a My Cloud Device for help with this
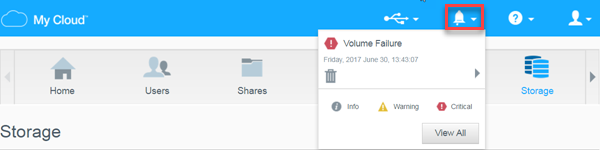
- Click the Alert Icon to confirm the Volume Failure
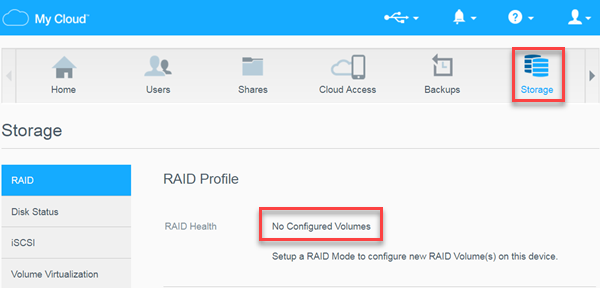
- Additionally, Click the Storage Icon to view the RAID Health to confirm No Configured Volumes
- Click the Set up RAID Mode button to create a volume

- Select RAID 0, check the box next to Switch to RAID 0
click Next

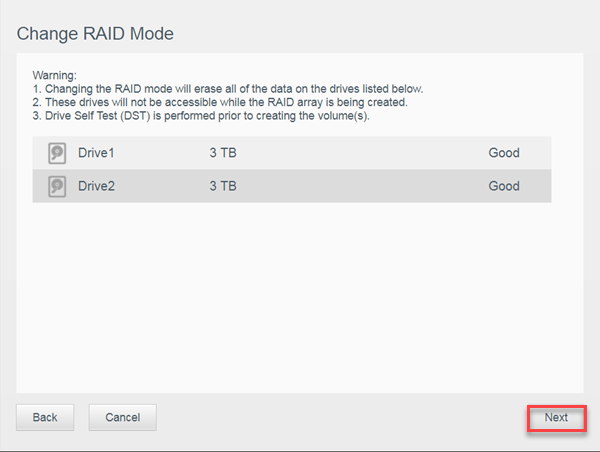
- The system will run a Drive Self Test and prepare the new volume.
The user has the option to go back to create a different RAID Volume or cancel as shown below 
- Click Next to proceed
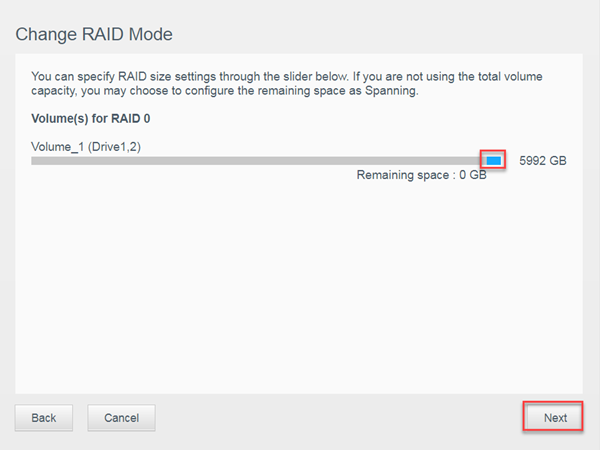
- By default the sliding size button is set to utilize the maximum capacity available. It is best to accept this setting
Click Next
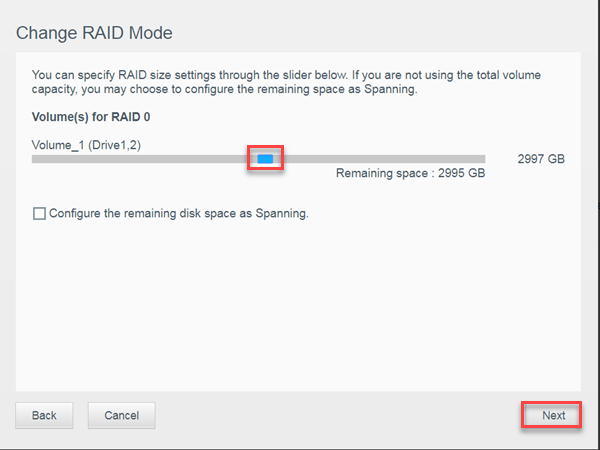
- Optional: It is possible to slide the capacity bar to configure space to be used as Spanning as shown below
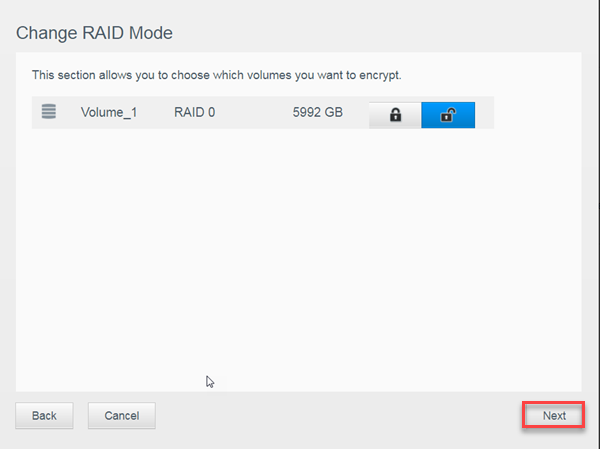
- Choose to encrypt or leave the default unencrypted volume.
Please see Answer ID: 16538 - Encrypting a RAID volume on a My Cloud device for more information
- Click Next to accept the Change RAID Summary

- Click Finish to create the RAID

- Click Close to close the wizard. Note: Drive1,2 used in RAID 0
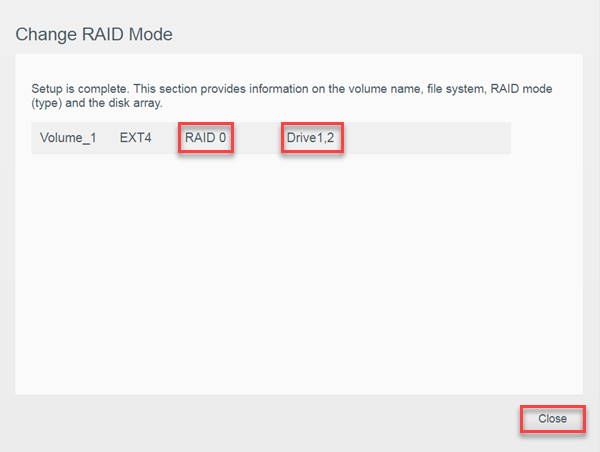
The Front Panel LED's will be blue
Replacing a drive on a RAID 1
RAID 1 duplicates all data from one drive to another providing complete data redundancy. This allows for the data on the Cloud Storage device to still be accessible as normal after a experiencing a single drive failure. To replace the failed drive, follow the steps below:
- Open the dashboard. Please see Answer ID 27432: How to Access the Dashboard on a My Cloud Device for help with this
- Click the Alert Icon to confirm the Volume Failure
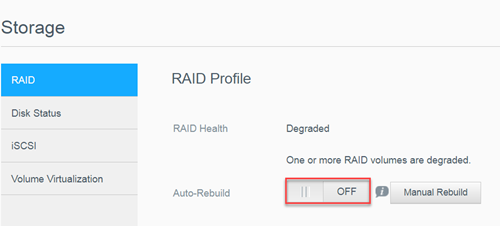
- Additionally, Click the Storage Icon to view the RAID Health to confirm Degraded

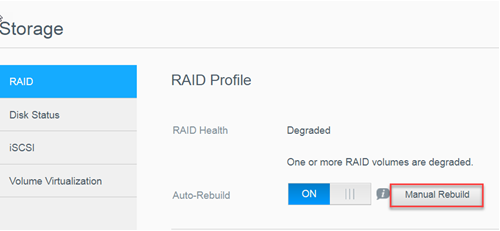
- Click the Auto-Rebuild button to enable the RAID to automatically rebuild. The My Cloud must be rebooted for changes to take effect
- Select Manual Rebuild, to initiate a RAID1 rebuild without a reboot
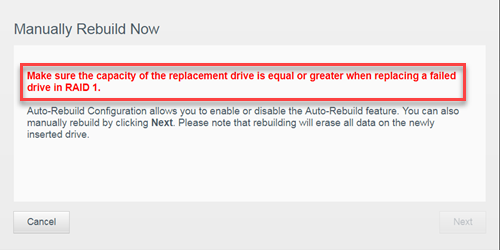
- The Manually Rebuild Now dialog will prompt the user to click Next.
This dialog warns all data on the newly inserted drive will be erased.
- The RAID Health will show Healthy as shown below. The rebuild completed successfully.
The Front Panel LED's will be blue
Replacing a drive on a Spanned Volume
When a My Cloud 2-Bay NAS has a volume set to Spanning, both drives in the array work together to create a single large volume. Data that is transferred to the device fills up one drive at a time, filling the next in line once the previous becomes full. When a drive fails, the volume is no longer accessible from the network drive. It is important to know Spanned Volumes do not have redundancy and therefore any attempt to recover the data must be accomplished before attempting to rebuild the array. To replace the failed drive, follow the steps below:
- It is recommended turning-Off the My Cloud as soon as the RAID is found to be degraded to avoid further loss of data. Leave the device off until a replacement drive is inserted into the failed drive's drive bay
- Replace the failed drive. For assistance replacing the failed drive, please see Answer ID 10336: Steps to Get a Warranty Replacement, Power Supply, or USB Cable
- Once a replacement drive has been obtained, insert it in the failed drive's drive bay
- Turn the My Cloud device on
- Open the dashboard. Please see Answer ID 27432: How to Access the Dashboard on a My Cloud Device for help with this
- Click the Alert Icon to confirm the Volume Failure
- Additionally, Click the Storage Icon to view the RAID Health to confirm No Configured Volumes
- Click the Set up RAID Mode button to create a new volume. Note: All data stored on the My Cloud will be erased
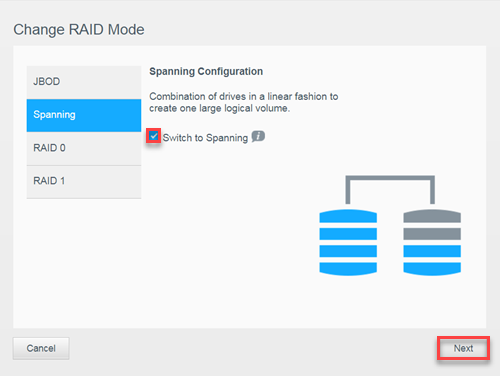
- Select Spanning, check the Switch to Spanning box to configure the storage mode and click Next
- The Change RAID Mode dialog will display the Drive Self Test
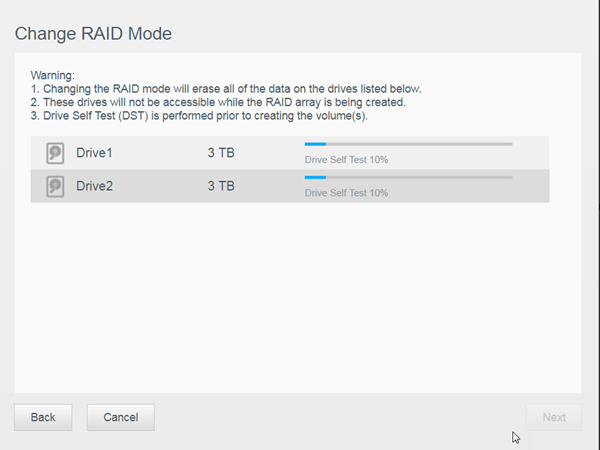
- Click Next to proceed

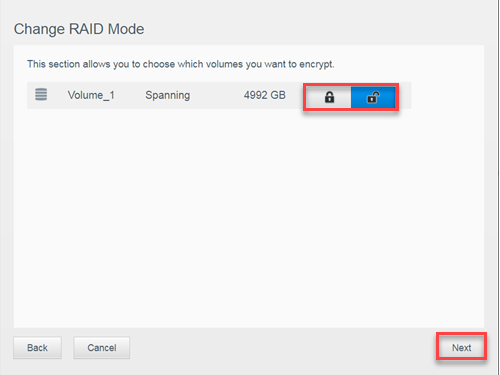
- Choose to encrypt the new volume or leave the default No encryption. Click Next
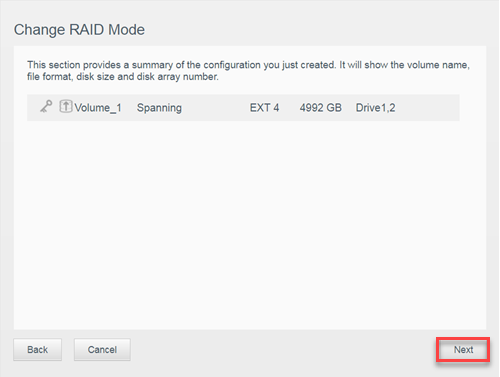
- Click Next to confirm create a Spanned Volume as shown below
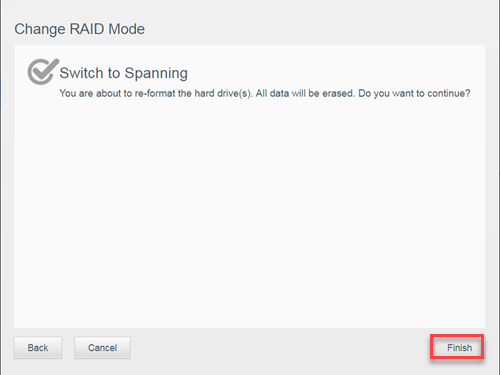
- Click Finish to initiate the partition and reformat the drives as shown below
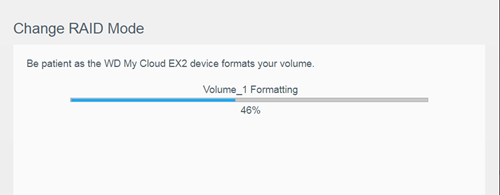
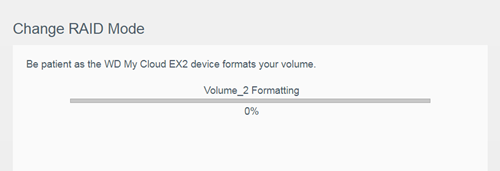
- A new dialog box will display the volume formatting progress as shown below
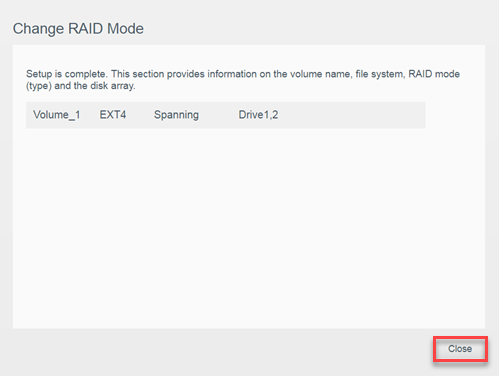
- The RAID Health will show Healthy as shown below. The new volume completed successfully. Click Close
Replacing a drive on a JBOD Setup
Just a Bunch of Drives, or JBOD, allows for every physical drive to have its own logical volume, enabling every drive to work independently from the rest. If one of these drives fails, the data stored on the rest is not only still intact, but also accessible as normal. To replace the failed drive, follow the steps below:
- If a drive set to JBOD fails, it will not affect the rest of the drives in the My Cloud device. The network storage can continue to be used as normal
- Replace the failed drive. For assistance replacing the failed drive, please see Answer ID 10336: Steps to Get a Warranty Replacement, Power Supply, or USB Cable
- Once a replacement drive has been obtained, insert it in the failed drive's drive bay
- Turn the My Cloud device on
- Open the dashboard. Please see Answer ID 27432: How to Access the Dashboard on a My Cloud Device for help with this
- Click the Alerts Icon to view messages related to the red LED on the front panel of the NAS. Click the expand dialog Icon as shown below

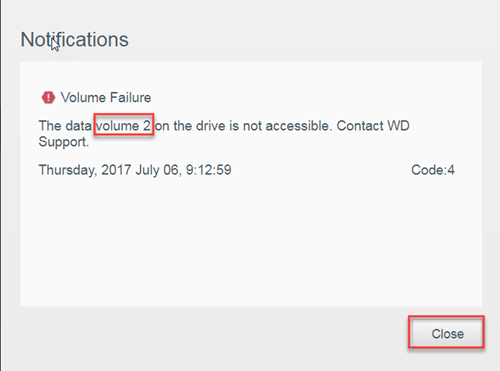
- A Notifications dialog will appear providing more information about this alert. The data volume 2 is not accessible, as shown below, indicates the array needs to be addressed to bring volume 2 online
- Click the Storage Icon and view Disk Status to verify the replacement hard drive is mounted

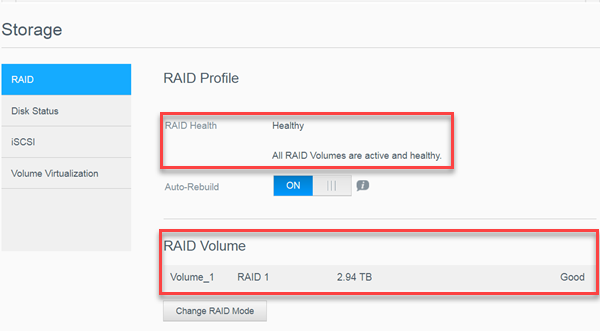
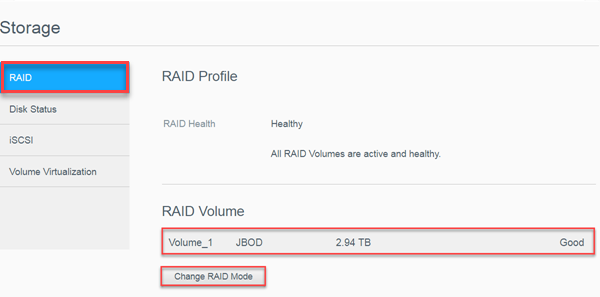
- Click RAID and note RAID Volume shows only Volume_1 for JBOD is Good. Click Change RAID Mode
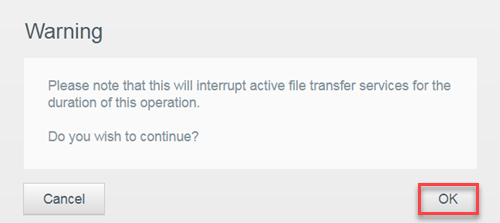
- Click OK to acknowledge the Warning and continue
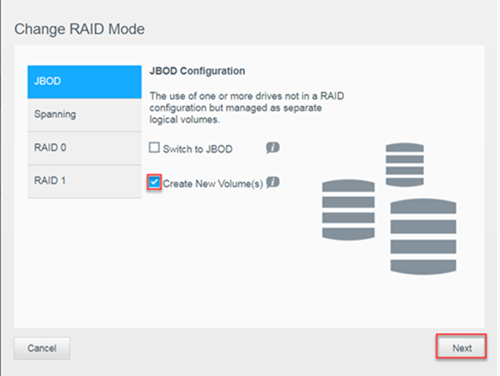
- Check the box next to Create New Volume(s). This option is to configure the newly inserted hard drive to join a RAID or create a new volume. Click Next
- The Change RAID Mode dialog will display the Drive Self Test
- Click Next as shown below
- Choose to encrypt the new volume or leave the default unencrypted as shown below
click Next
- Click Next to confirm the configuration of the new volume
- Click Finish to initiate the re-format and create the new volume
- A new dialog box will display the volume formatting progress as shown below
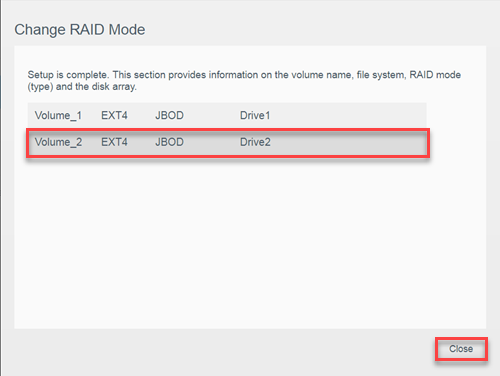
- The RAID Health will show Healthy as shown below. The new volume completed successfully.
Click Close
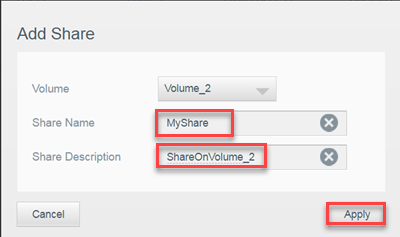
- Click the Shares Icon then click the New Share Icon to setup a new share on the new volume
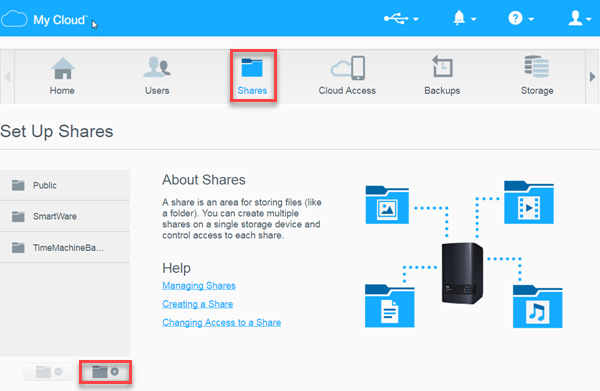
- Click the drop-down arrow as shown below
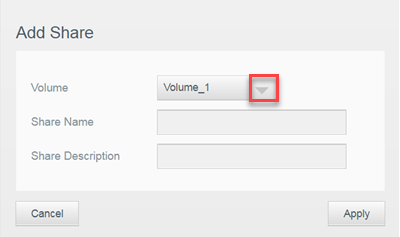
- Select Volume_2

- Type a Share Name and a recommended Share Description then click Apply
Four Bay Drive Replacement Instructions
| While handling an internal drive, ground yourself by touching metal before handling the device, to avoid electrostatic discharge (ESD) issues. Please see Answer ID: 1486 - How to properly handle Western Digital internal hard drives for more information. |
Removing a Drive:
Please follow the steps outlined below for removing the faulty drive from the enclosure:
- Shutdown the My Cloud and remove both the Ethernet and power cables. Please see Answer ID 23673: Instructions to Shutdown a My Cloud for more information
- Reveal the hard drives by lifting the lever which unlatches the drive bay door
- Slide the drive out of the bay
Inserting a New Drive:
Use the following steps to install the hard disk drive(s) in your My Cloud device
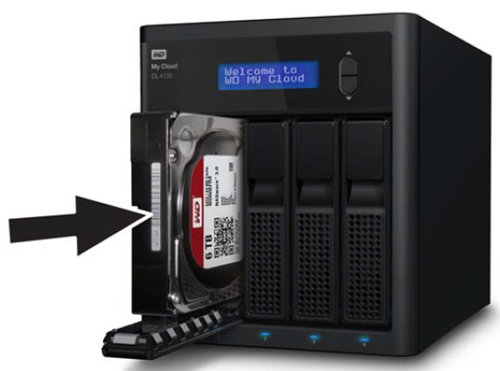
- Pull the handle on the front of the hard disk drive toward you
- Slide the approved hard disk drive into the drive bay, making sure that it is properly seated and is facing the correct direction
- Snap the drive handle shut
- Reconnect the Ethernet and power cables to the device
- Power-On the unit. Allow the unit to fully boot-up; this may take several minutes. It is normal to see a red LED because the replacement drive has not yet be prepared for use by either rebuilding the RAID array or formatting and creating a new volume. Proceed to the 'What to expect' section below related to the specific RAID configuration used prior to the drive failure for next steps
What to expect if a drive fails:
- What to expect if a drive fails on a RAID 0
- What to expect if a drive fails on a RAID 1
- What to expect if a drive fails on a Spanned volume
- What to expect if a drive fails on a JBOD setup
- What to expect if a drive fails on a RAID 5
- What to expect if a drive fails on a RAID 10
Replacing a drive on a RAID 0
RAID 0 stripes data across all drives involved in the RAID to provide improved performance, but does not provide any level of redundancy. It is normal to see a Red LED representing the existing and the replacement hard drive because the RAID is degraded.. Please see Answer ID: 13175 - The front LED on a My Cloud Mirror or My Cloud EX2 displays solid red for more information. Please follow the steps outlined below to prepare the replacement drive and create a new RAID0 array:
- Open the dashboard. Please see Answer ID 27432: How to Access the Dashboard on a My Cloud Device for help with this
- Click the Alert Icon to confirm the Volume Failure
- Additionally, Click the Storage Icon to view the RAID Health to confirm No Configured Volumes
- Click the Set up RAID Mode button to create a volume
- Select RAID 0, check the box next to Switch to RAID 0
click Next
- The system will run a Drive Self Test and prepare the new volume.
The user has the option to go back to create a different RAID Volume or cancel as shown below - Click Next to proceed
- By default the sliding size button is set to utilize the maximum capacity available. It is best to accept this setting
click Next
- Optional: It is possible to slide the capacity bar to configure space to be used as Spanning as shown below
- Choose to encrypt or leave the default unencrypted volume.
Please see Answer ID: 16538 - Encrypting a RAID volume on a My Cloud device for more information
- Click Next to accept the Change RAID Summary
- Click Finish to create the RAID
- Click Close to close the wizard. Please note, Drive1,2 used in RAID 0
Replacing a drive on a RAID 1
RAID 1 duplicates all data from one drive to another providing complete data redundancy. This allows for the data on the Cloud Storage device to still be accessible as normal after a experiencing a single drive failure. To replace the failed drive, follow the steps below:
- Open the dashboard. Please see Answer ID 27432: How to Access the Dashboard on a My Cloud Device for help with this
- Click the Alert Icon to confirm the Volume Failure
- Additionally, Click the Storage Icon to view the RAID Health to confirm Degraded
- Click the Auto-Rebuild button to enable the RAID to automatically rebuild. The My Cloud must be rebooted for changes to take effect
- Select Manual Rebuild, to initiate a RAID1 rebuild without a reboot
- The Manually Rebuild Now dialog will prompt the user to click Next. This dialog warns all data on the newly inserted drive will be erased.
- The RAID Health will show Healthy as shown below. The rebuild completed successfully.
Click Close
Replacing a drive on a Spanned Volume
When a My Cloud 4-Bay NAS has a volume set to Spanning, all drives in the array work together to create a single large volume. Data that is transferred to the device fills up one drive at a time, filling the next in line once the previous becomes full. When a drive fails, the volume is no longer accessible from the network drive. It is important to know Spanned Volumes do not have redundancy and therefore any attempt to recover the data must be accomplished before attempting to rebuild the array. To replace the failed drive, follow the steps below:
- It is recommended turning-Off the My Cloud as soon as the RAID is found to be degraded to avoid further loss of data. Leave the device off until a replacement drive is inserted into the failed drive's drive bay
- Replace the failed drive. For assistance replacing the failed drive, please see Answer ID 10336: Steps to Get a Warranty Replacement, Power Supply, or USB Cable
- Once a replacement drive has been obtained, insert it in the failed drive's drive bay
- Turn the My Cloud device on
- Open the dashboard. Please see Answer ID 27432: How to Access the Dashboard on a My Cloud Device for help with this
- Click the Alert Icon to confirm the Volume Failure
- Additionally, Click the Storage Icon to view the RAID Health to confirm No Configured Volumes
- Click the Set up RAID Mode button to create a new volume. Note: All data stored on the My Cloud will be erased
- Select Spanning, check the Switch to Spanning box to configure the storage mode
click Next
- The Change RAID Mode dialog will display the Drive Self Test
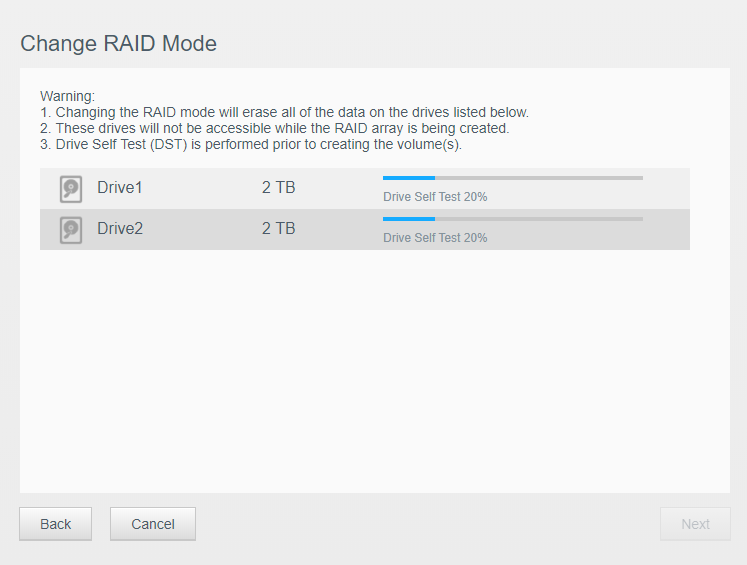
- Click Next to proceed
- Choose to encrypt the new volume or leave the default No encryption.
Click Next
- Click Next to confirm create a Spanned Volume as shown below
- Click Finish to initiate the partition and reformat the drives as shown below
- A new dialog box will display the volume formatting progress as shown below
- The RAID Health will show Healthy as shown below. The new volume completed successfully.
Click Close
Replacing a drive on a JBOD Setup
Just a Bunch of Drives, or JBOD, allows for every physical drive to have its own logical volume, enabling every drive to work independently from the rest. If one of these drives fails, the data stored on the rest is not only still intact, but also accessible as normal. To replace the failed drive, follow the steps below:
- If a drive set to JBOD fails, it will not affect the rest of the drives in the My Cloud device. The network storage can continue to be used as normal
- Replace the failed drive. For assistance replacing the failed drive, please see Answer ID 10336: Steps to Get a Warranty Replacement, Power Supply, or USB Cable
- Once a replacement drive has been obtained, insert it in the failed drive's drive bay
- Turn the My Cloud device on
- Open the dashboard. Please see Answer ID 27432: How to Access the Dashboard on a My Cloud Device for help with this
- Click the Alerts Icon to view messages related to the red LED on the front panel of the NAS. Click the expand dialog Icon as shown below
- A Notifications dialog will appear providing more information about this alert. The data volume 2 is not accessible, as shown below, indicates the array needs to be addressed to bring volume 2 online
- Click the Storage Icon and view Disk Status to verify the replacement hard drive is mounted
- Click RAID and note RAID Volume shows only Volume_1 for JBOD is Good.
Click Change RAID Mode
- Click OK to acknowledge the Warning and continue
- Check the box next to Create New Volume(s). This option is to configure the newly inserted hard drive to join a RAID or create a new volume.
Click Next
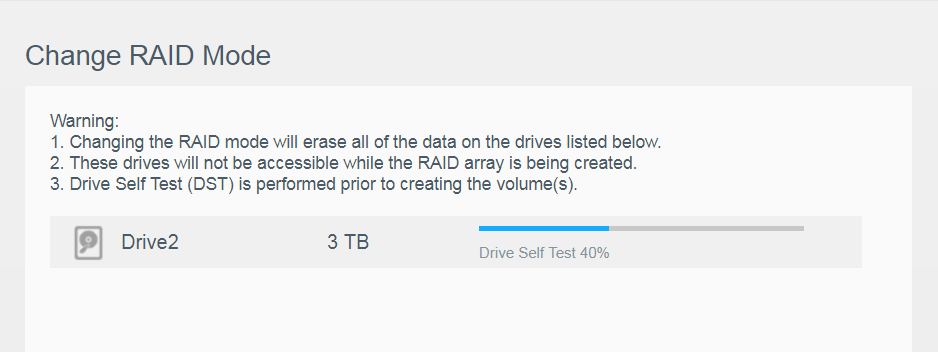
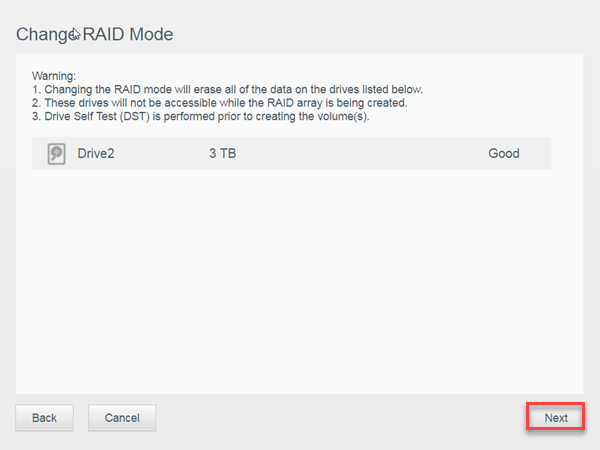
- The Change RAID Mode dialog will display the Drive Self Test
- Click Next as shown below
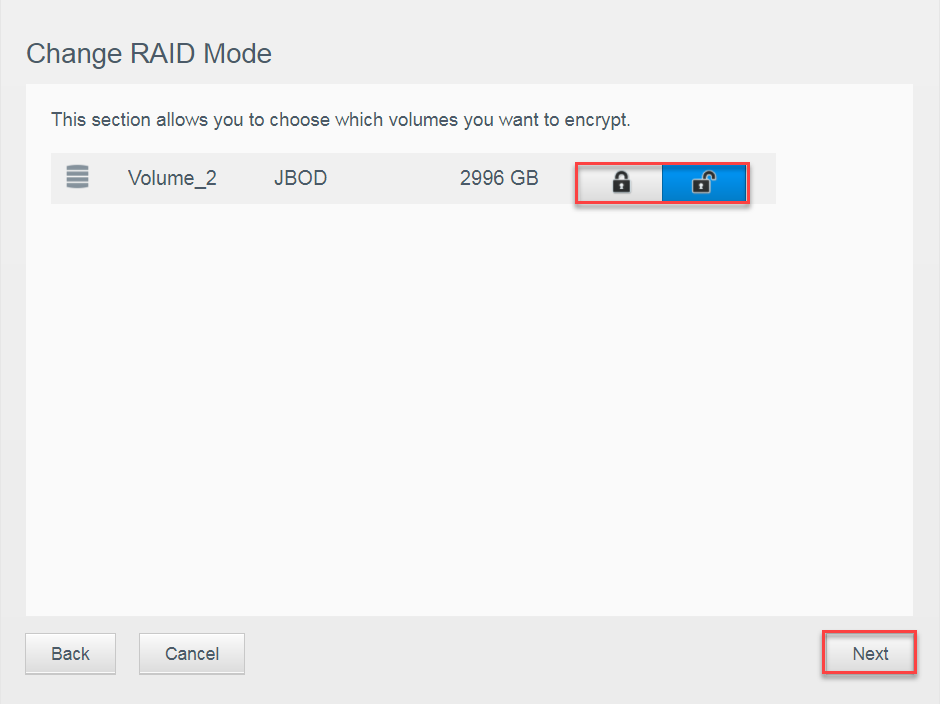
- Choose to encrypt the new volume or leave the default unencrypted as shown below
Click Next
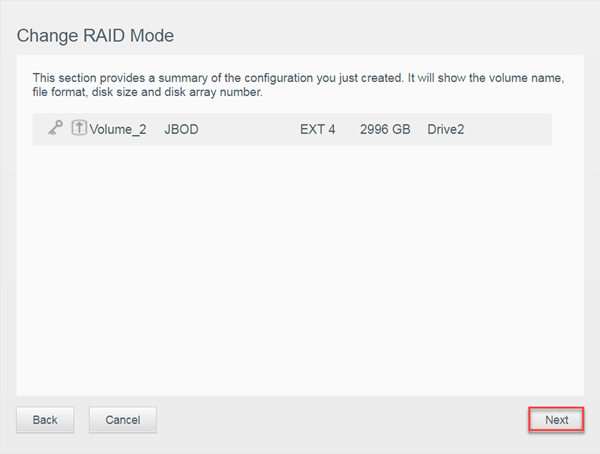
- Click Next to confirm the configuration of the new volume
- Click Finish to initiate the re-format and create the new volume
- A new dialog box will display the volume formatting progress as shown below
- The RAID Health will show Healthy as shown below. The new volume completed successfully.
Click Close
- Click the Shares Icon then click the New Share Icon to setup a new share on the new volume
- Click the drop-down arrow as shown below
- Select Volume_2
- Type a Share Name and a recommended Share Description then click Apply
Replacing a drive on a RAID 5
RAID 5 volumes have the information striped across all of the drives in the array, saving some space for parity blocks throughout all drives to help rebuild data that is lost from any single drive failure. Data stored on a RAID 5 is still accessible as normal. To replace the failed drive, follow the steps below:
- As soon as a failed drive is detected, it's recommended to turn the My Cloud device off. Leave the device off until a replacement drive is inserted into the failed drive's drive bay.
- Replace the failed drive. For assistance replacing the failed drive, please see Answer ID 10336: Steps to Get a Warranty Replacement, Power Supply, or USB Cable.
- Once a replacement drive has been obtained, insert it in the failed drive's drive bay.
- Turn the My Cloud device on.
- If the Auto-Rebuild option was set to On, the RAID will immediately start rebuilding itself.
- If the Auto-Rebuild option was set to Off, the RAID will need to be rebuilt manually through the Storage area in the Dashboard.
- Once the RAID rebuild process finishes, all data will be protected once again. This process may take several hours.
Replacing a drive on a RAID 10
RAID 10 volumes are a combination of RAIDs 1 and 0. Data stored on a RAID 10 is still accessible as normal when a single drive fails. To replace the failed drive, follow the steps below:
- As soon as a failed drive is detected, it's recommended to turn the My Cloud device off. Leave the device off until a replacement drive is inserted into the failed drive's drive bay
- Replace the failed drive. For assistance replacing the failed drive, please see Answer ID 10336: Steps to Get a Warranty Replacement, Power Supply, or USB Cable
- Once a replacement drive has been obtained, insert it in the failed drive's drive bay
- Turn the My Cloud device on.
- If the Auto-Rebuild option was set to On, the RAID will immediately start rebuilding itself.
- If the Auto-Rebuild option was set to Off, the RAID will need to be rebuilt manually through the Storage area in the Dashboard
- Once the RAID rebuild process finishes, all data will be protected once again. This process may take several hours depending on capacity