My Cloud OS 3 has reached its end of support life cycle.
Please update to My Cloud OS 5.
Need more help?
- My Cloud OS 3 End of Support
- WDC 21004 Recommend Upgrade to My Cloud OS 5
- Answer ID 32059 My Cloud OS 3: Cloud Access and Notification Email Support Removed
- Answer ID 29813: Steps to Manually Update My Cloud OS 3 to My Cloud OS 5
- Answer ID 28740: Western Digital Product Lifecycle Support Policy
IMPORTANT:
WD 3rd party app support
- Western Digital Technical Support does not provide setup, configuration or troubleshooting of 3rd party apps outside of the download, installation and successful launch of the app from the My Cloud dashboard.
- 3rd party apps are supported by the app vendor.
- The upgrade, modification or change to 3rd party apps outside of the version available from the WD App Store is not supported.
- View the WD Use of Third Party Software or Websites
Important
The user agrees that they will not use the WordPress client to infringe the copyrights or other intellectual property rights of others in any way, including but not limited to, copying or distributing copyrighted works. The user further agrees that they will not use the WD software or the WordPress client in an attempt to, or in conjunction with, any device, program or service designed to circumvent technological measures employed to control access to, or the rights in, a content file or other work protected by the copyright laws of any jurisdiction.
WordPress is a free and open source blogging tool and a content management system (CMS) based on PHP and MySQL. The user can create their own My Cloud storage device based customized Blog that can be accessed and commented on from any internet connection.
Installing the WordPress App
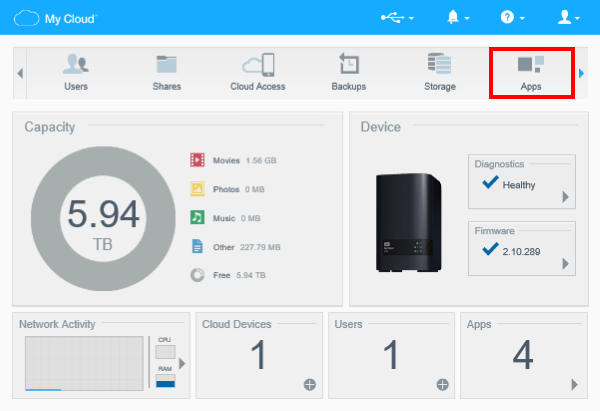
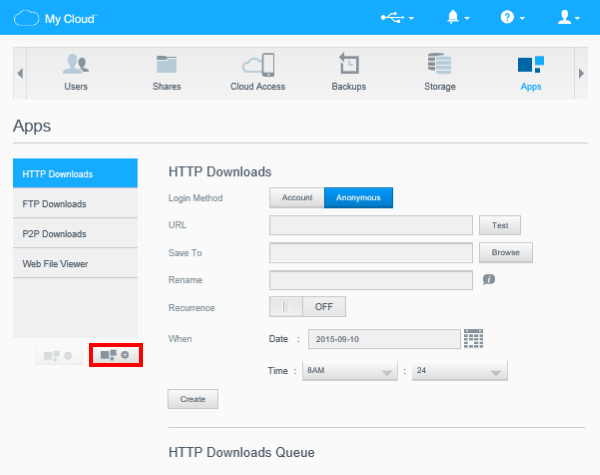
- From the Dashboard of a My Cloud storage device, click the Apps button of the Navigation bar. For assistance accessing the Dashboard, please see Answer ID 27432: How to Access the Dashboard on a My Cloud Device.
- Under the left-side panel, click the Add App icon.
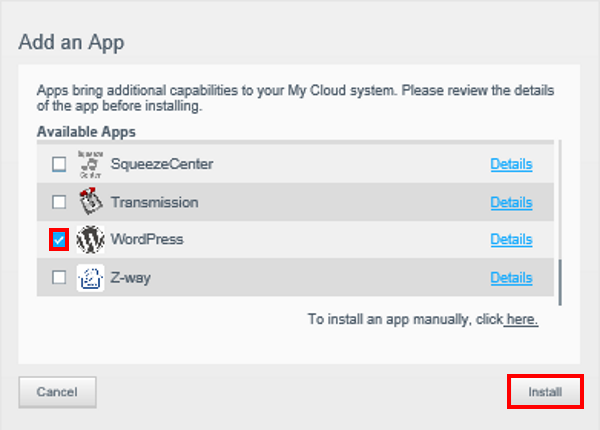
- From the list of available apps for the unit, scroll down and select WordPress by checking the check-box to the left of it, then click on Install.
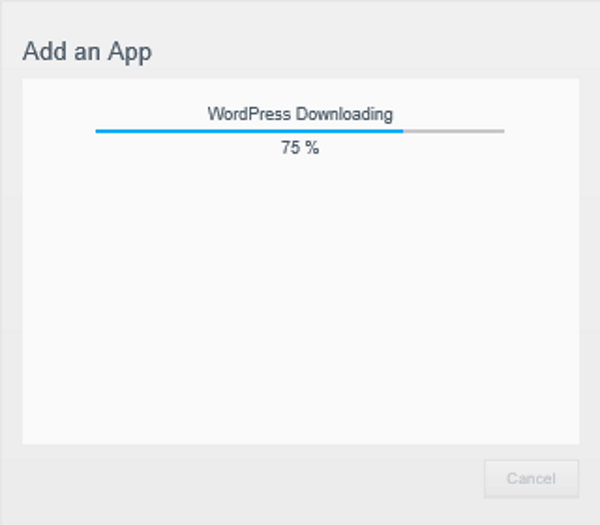
- WordPress will download and install. This process may take a few minutes.
- Once WordPress is installed on the My Cloud, click on OK.
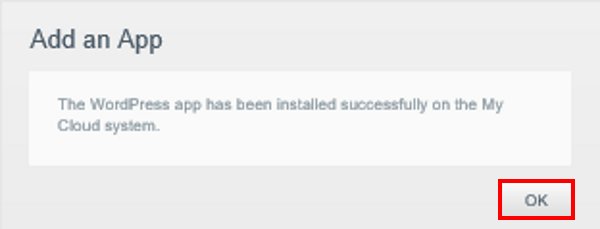
- By default, the application will be set to ON, meaning that the application is enabled.
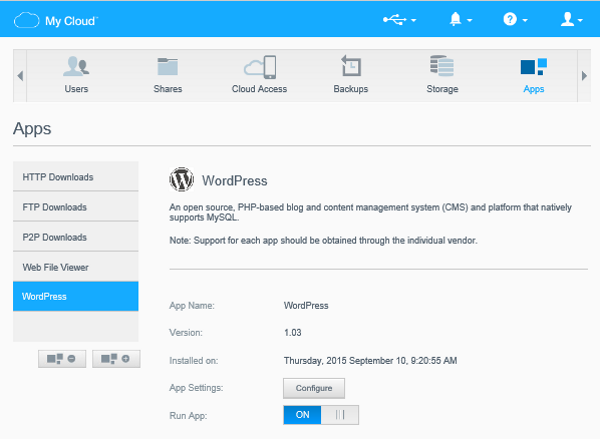
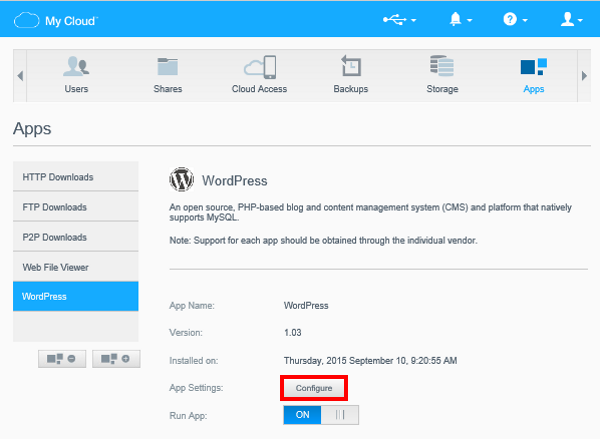
Configuring WordPress app
- Once WordPress is installed, the Configure button will be displayed. Click on it to access the application's web interface.
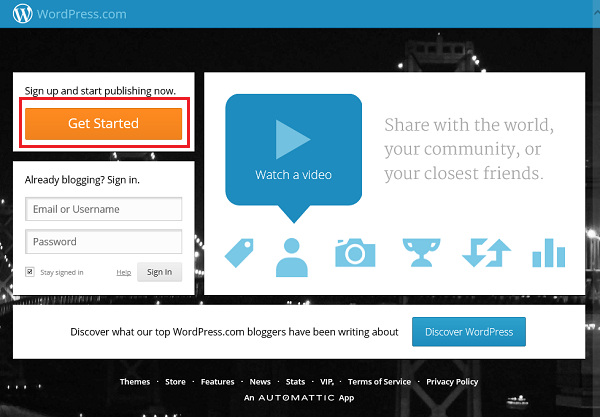
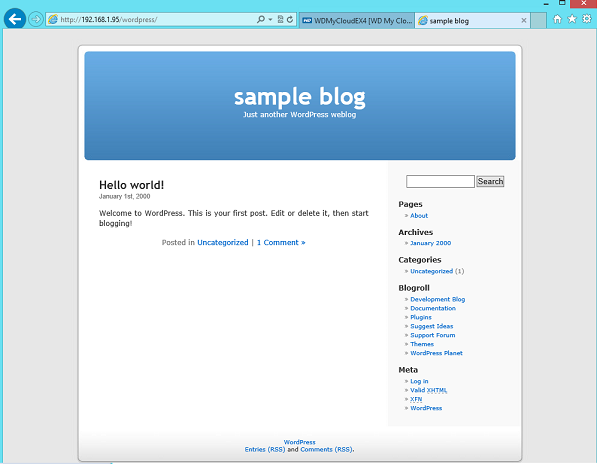
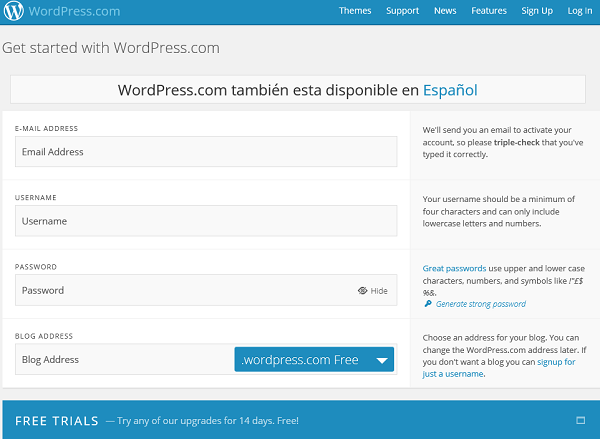
- The user will be brought to Sample Blog page of WordPress. The user should visit http://wordpress.com and sign up for a WordPress account, along with registering a blog.
- Enter the user's information, along with the name of their new page.
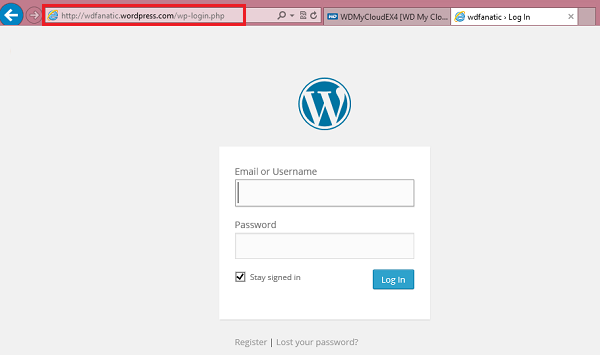
- Once the information has been entered, and the blog has been created, the user can go to use the web address given and use it to log on to the administrative dashboard for their site. In order to get the log in screen, please add wp-login.php after the url for the site. (For example: wdfanatic.wordpress.com/wp-login.php.)
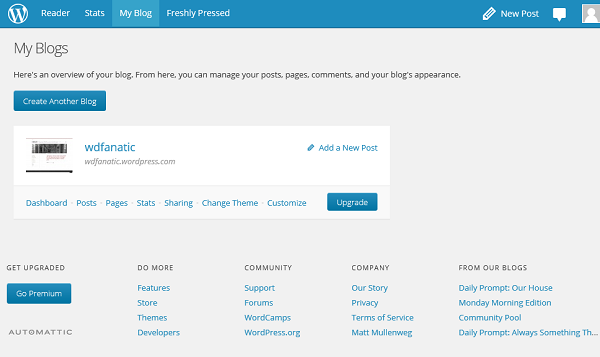
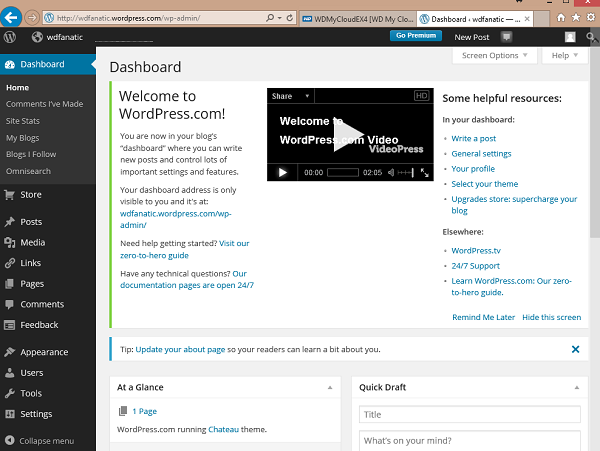
- After logging in, the next screen will show the the dashboard for their blog. Here the user can see all details for their site. See stats, add items to the blog, register new blogs.