Map a My Cloud network share on Windows and access the data.
IMPORTANT:
Connect and map a password protected share before a non-password protected Public share.
Instructions
- Steps for Windows 10 and 11
- Steps for Windows 8.x and 8.1
- Steps for Windows 7 and Vista
- Steps for macOS
Need more help?
- Answer ID 13943: Steps to Turn On Windows Network Discovery
- Answer ID 4155: Turn On SMB 1.0 CIFS File Sharing Support for My Cloud, My Cloud Home, My Passport Wireless and Legacy NAS Products
- Answer ID 3842: My Cloud, My Cloud Home and My Passport Wireless Not Detected in Windows Network
- Answer ID 13466: Resolve Share Access Failure Error Code 0x80070035 Network Path Not Found on Windows with a My Cloud
- Answer ID 12452: Steps to Check Drives for Errors or Failures on Windows and macOS
Windows 8.x and 8.1
IMPORTANT: Microsoft Windows 8: End Of SupportMicrosoft Windows 8 support has ended.
Need more help?
Answer ID 30413: Microsoft Windows 8 and 8.1 End of Support
Western Digital does not provide support for products used with vendor end of life operating systems. Upgrade Windows 8 to a Microsoft supported operating system.
View the Use of Third-Party Software or Websites disclaimer.Western Digital Support cannot help with third-party software or hardware.
Map Network Drive on Windows 8
- Map Drive with Name or IP Address (recommended)
- Map Drive from File Explorer Desktop Tab
- Map Drive from Start Menu
Map Drive with Name or IP Address
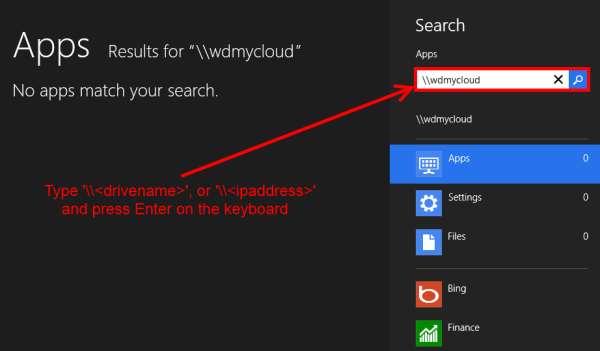
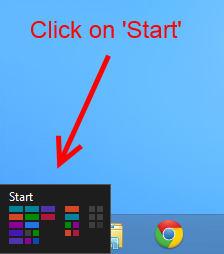
- Click the Start Screen.

- Type the name or the IP address of the network drive.
-
EXAMPLES
- \\drivename
- \\192.168.1.50
Press Enter on the keyboard.
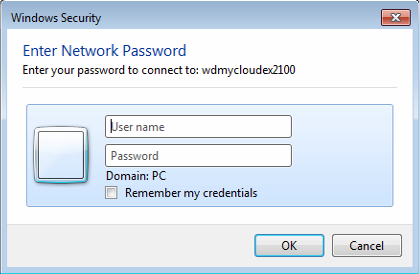
Enter the network share username and password if asked.
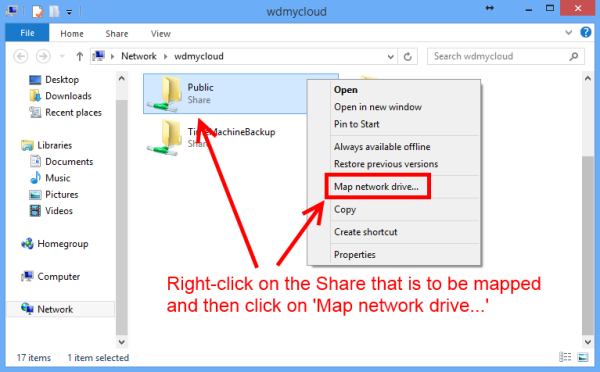
- Click Map network drive....
- Click Finish.

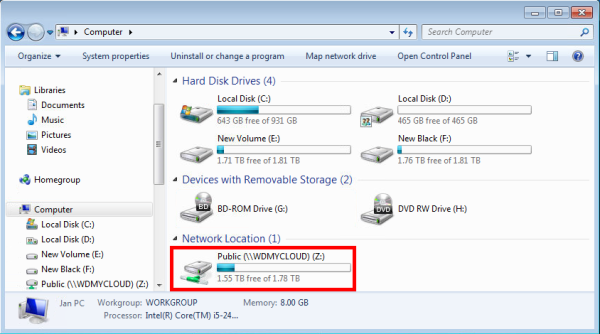
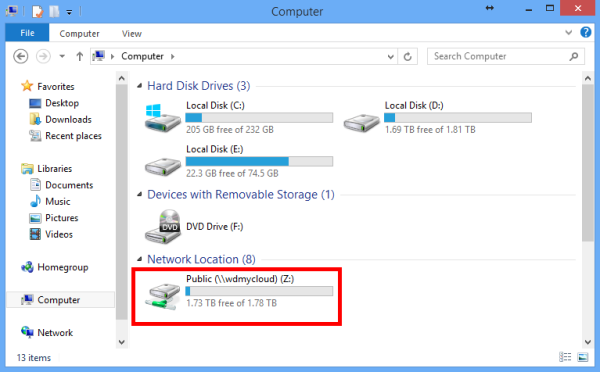
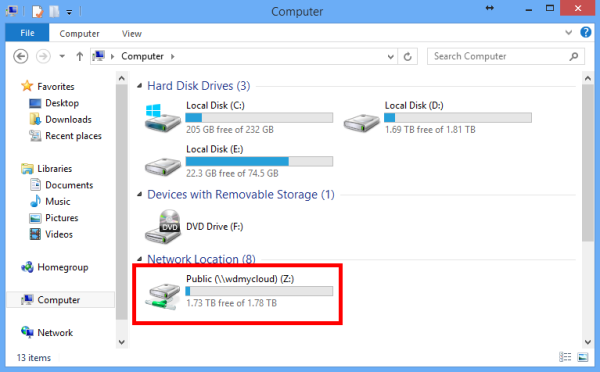
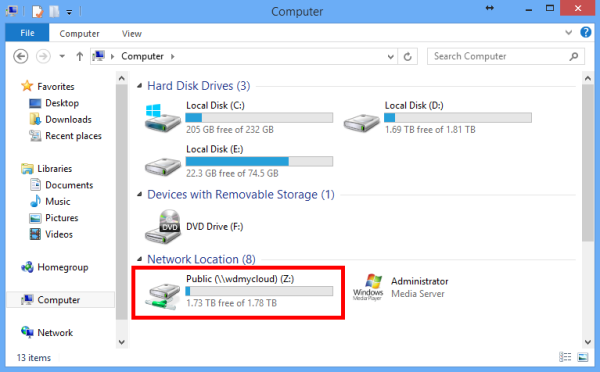
The Share will get a drive letter on Windows.
Map Drive from Start Menu
- Click the Start Screen.
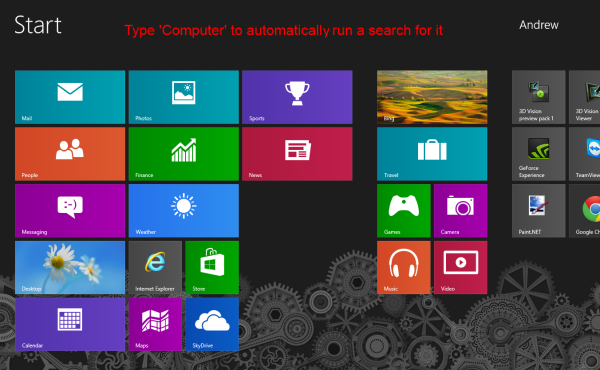
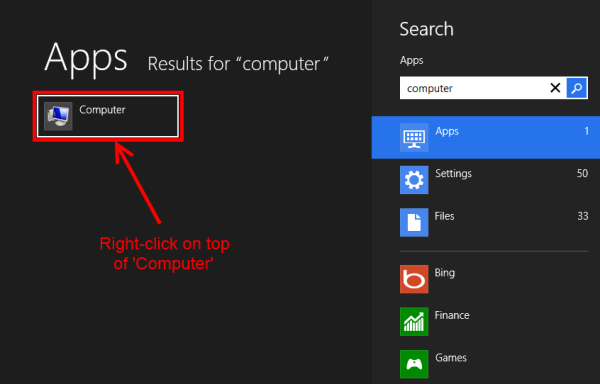
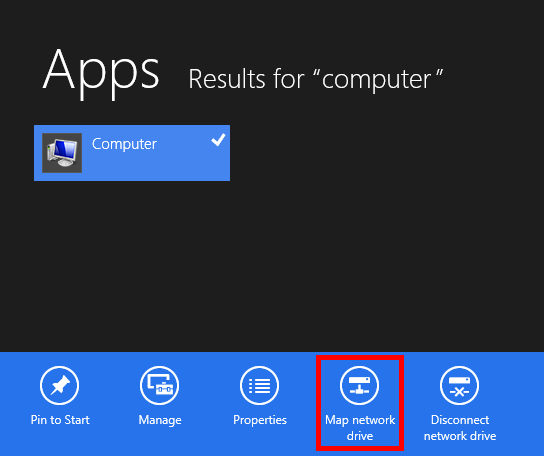
- Type Computer.
- Right-click on top of Computer.
- Click Map network drive.
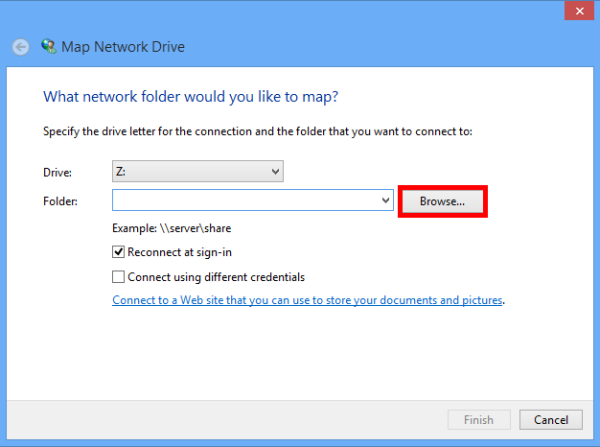
- Click Browse....
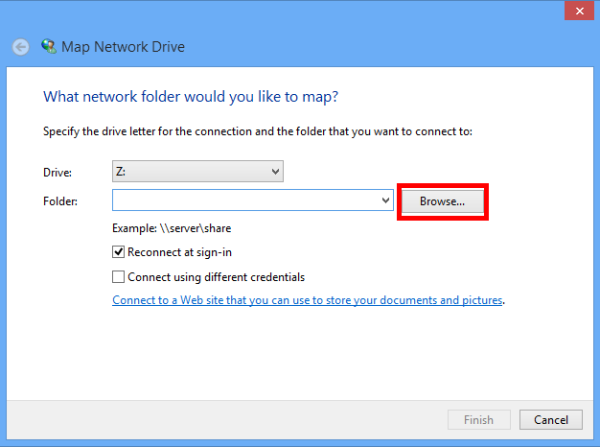
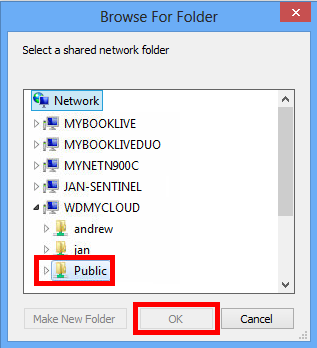
- Browse to a network share.
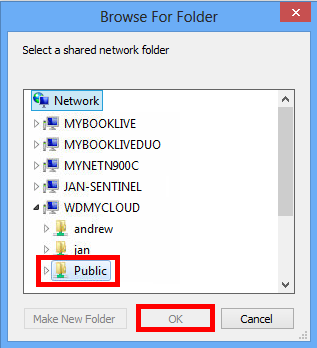
Select a network share.
Click OK.
Enter the network share username and password if asked.
- Click Finish.
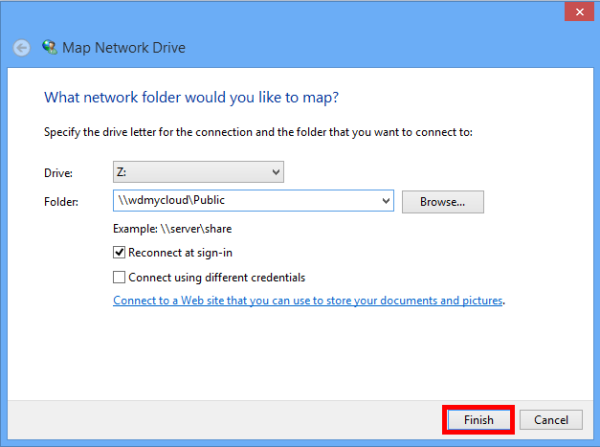
The Share will get a drive letter on Windows.
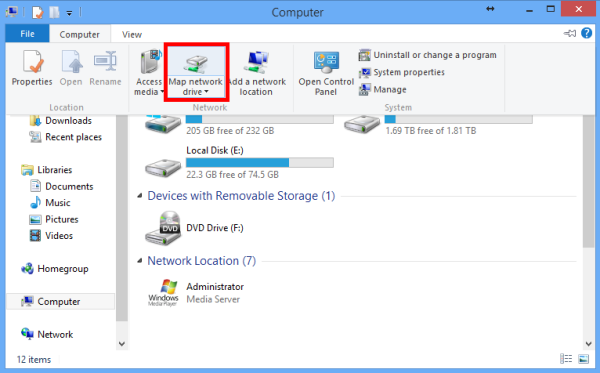
Map Drive From File Explorer Desktop Tab
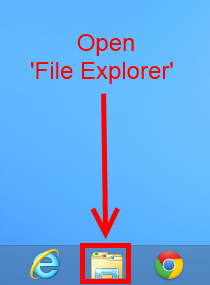
- Open File Explorer.
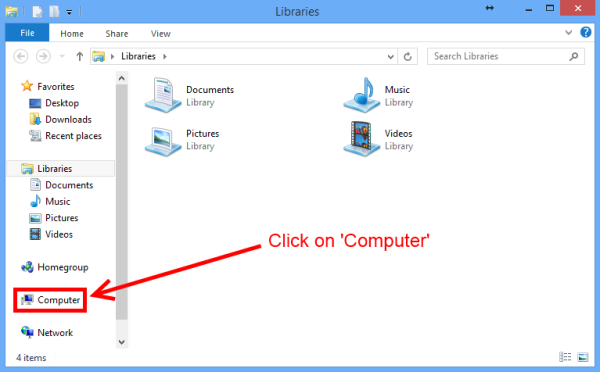
- Click Computer.
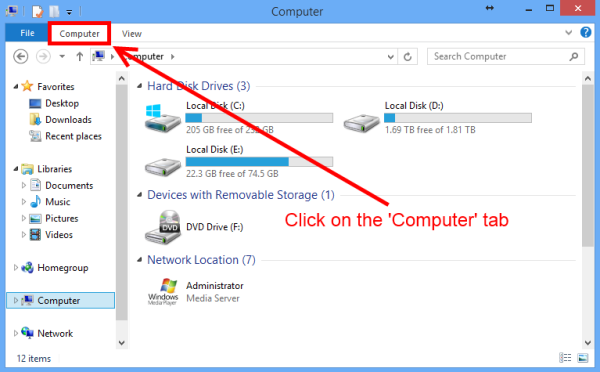
- Click the Computer tab.
- Click Map network drive.
- Click Browse... button.
- Browse to a network share.
Select a network share.
Click OK.
Enter the network share username and password if asked.
- Click Finish.
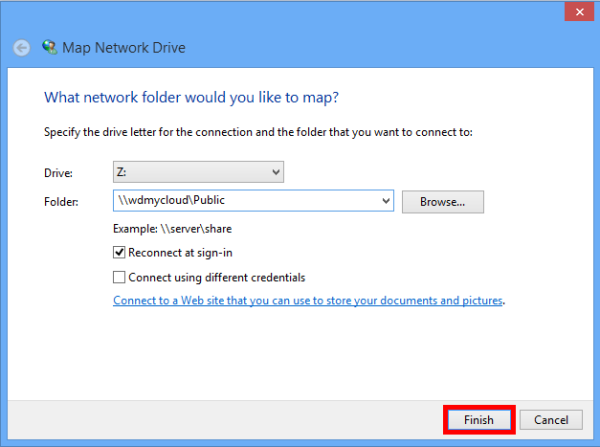
The Share will get a drive letter on Windows.
Windows 7 and Below
IMPORTANT: Microsoft Windows 7: End Of SupportMicrosoft Windows 7 support has ended.
Need more help?
Answer ID 29004: Microsoft Windows 7 End of Support
Western Digital does not provide support for products used with vendor end of life operating systems. Upgrade Windows to a Microsoft supported operating system.
View the Use of Third-Party Software or Websites disclaimer.Western Digital Support cannot help with third-party software or hardware.
Map a Network Drive on Windows 7 and Vista
Map Drive with Name or IP Address
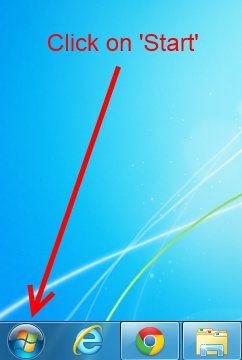
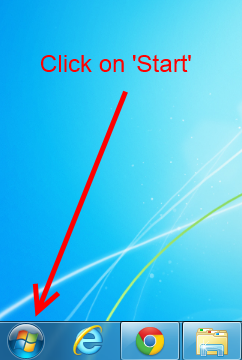
- Click Start.
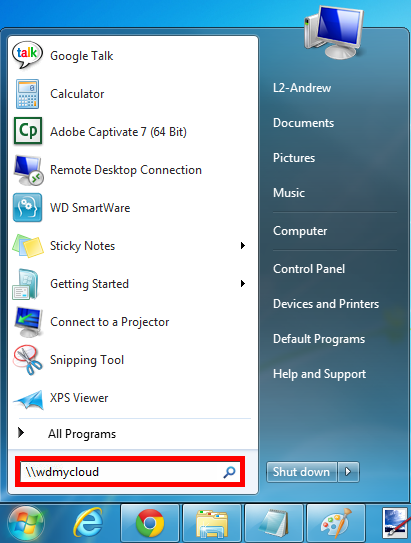
- Type the name or the IP address of the network drive.
-
EXAMPLES
- \\drivename
- \\192.168.1.50
Press Enter on the keyboard.
Enter the network share username and password if asked.
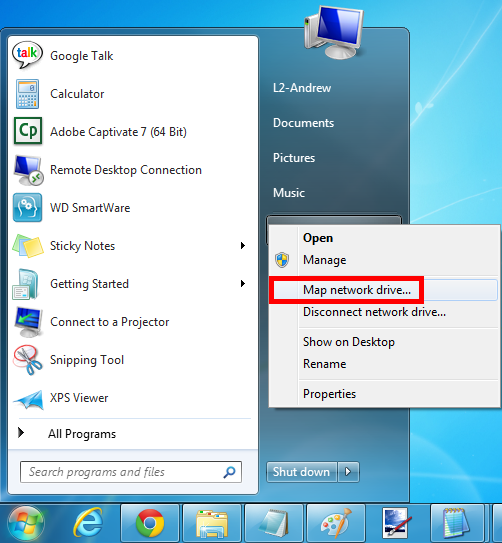
- Right-click Computer.
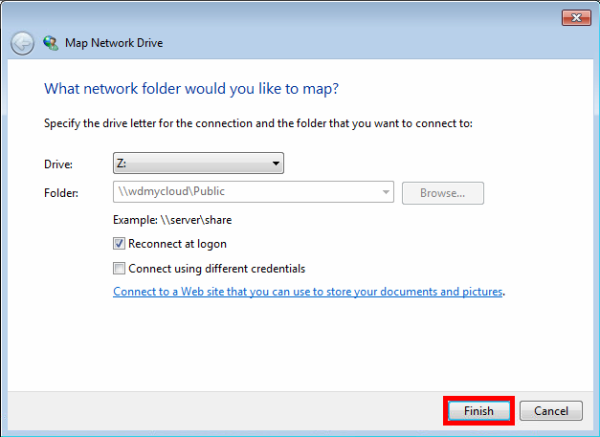
Click Map network drive....
- Click Finish.
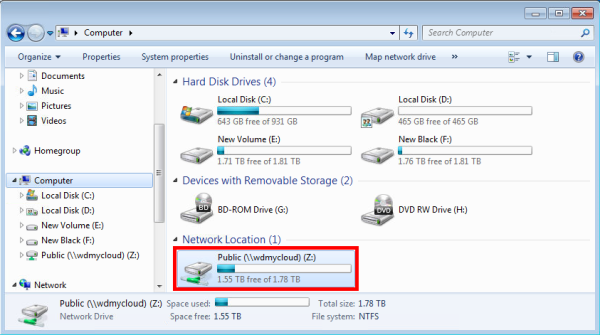
The Share will get a drive letter on Windows.
Map Drive From Start Menu
- ClickStart.
- Right-click Computer.
Click Map network drive....
- Click Browse....
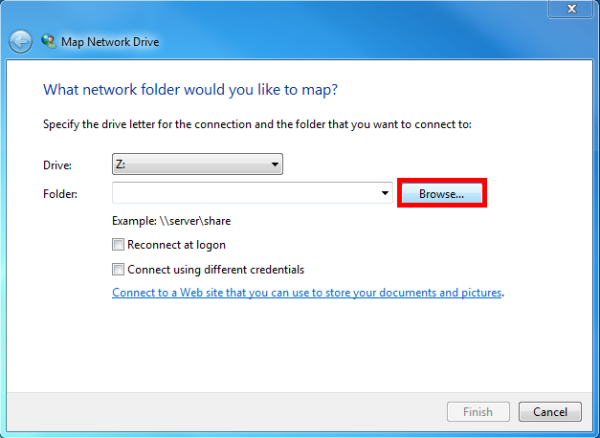
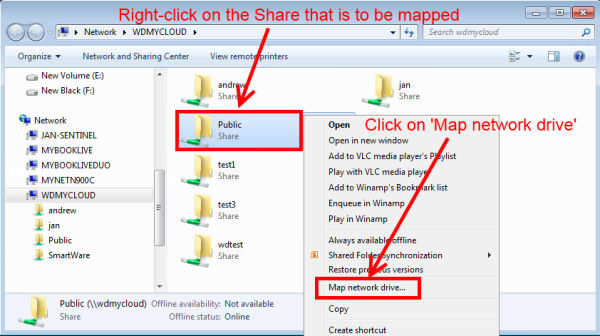
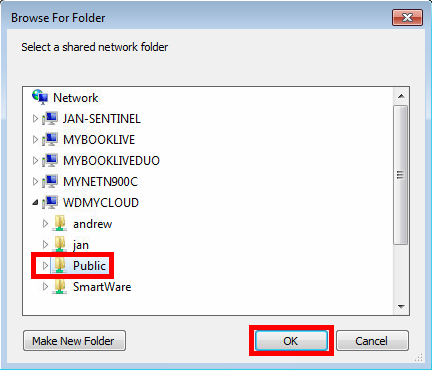
- Browse to a network share.
Select a network share.
Click OK.
Enter the network share username and password if asked.
- Click Finish.
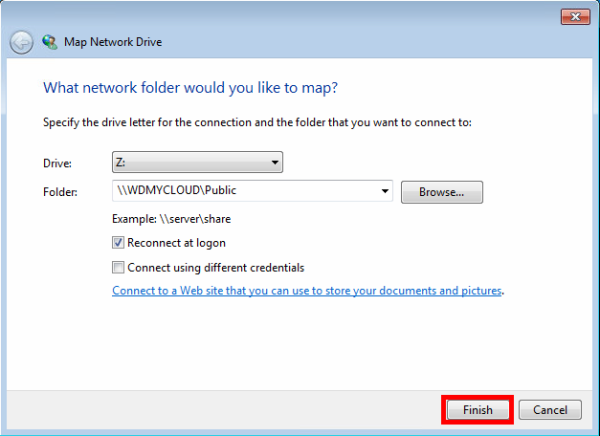
The Share will get a drive letter on Windows.