IMPORTANT:
My Passport Wireless, Wireless Pro and SSD save products images and files from computers, tablets and smartphones to this single portable drive using a wireless connection.
Need more help?
Answer ID 34297: WD My Passport Wireless End of Support
My Passport Wireless mobile app for iOS and Android is now in the Limited Updates phase. During this phase, bug fixes, updates for new features, and OS compatibility patches may stop, but Western Digital will continue to provide security updates for the app to address critical issues.
Need more help?
Western Digital Product Lifecycle Support Policy
As a secondary option to continue using your drive, connect it to the computer as outlined in the User Manual on page 19.
Need more help?
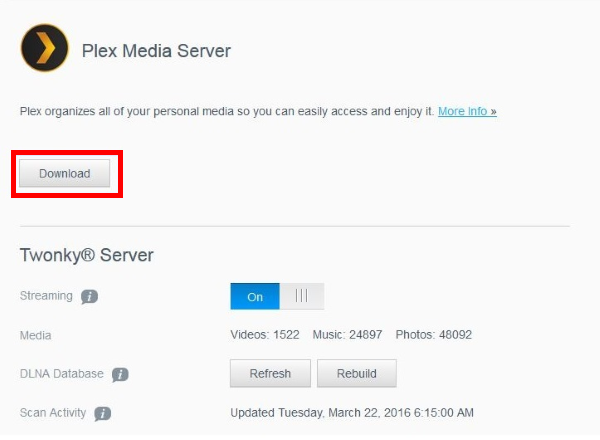
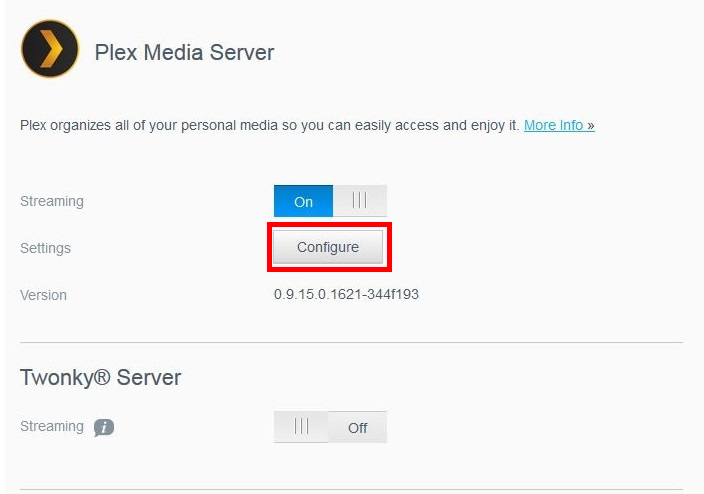
My Passport Wireless Pro supports both Twonky DLNA and DLNA Media Server. However, Twonky and Plex cannot be running at the same time. For information on how to install and configure Plex Media Server, please follow the instructions below:
Installing Plex Media Server
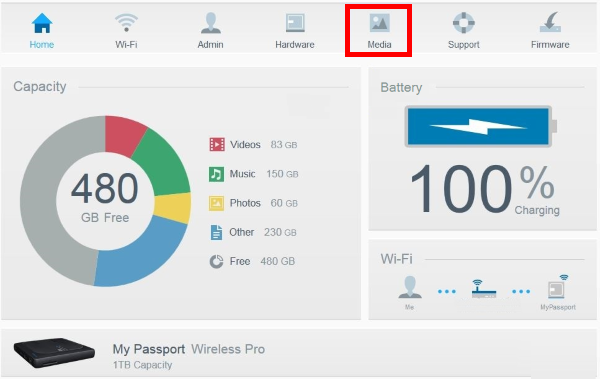
- Log into the Dashboard of the device. Once in the Dashboard, click the Media tab.
- Click Download to download and install Plex Media Server.
Important:
- The installation of Plex Media Server will automatically turn Twonky Media Server off.
- Plex Transcoding is not supported on this device.
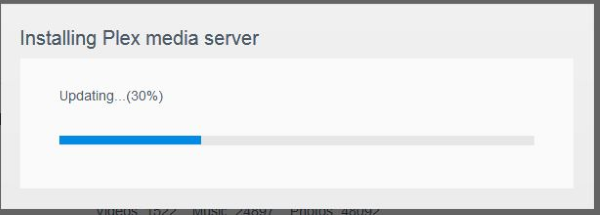
- After the installation has finished, click on Configure.
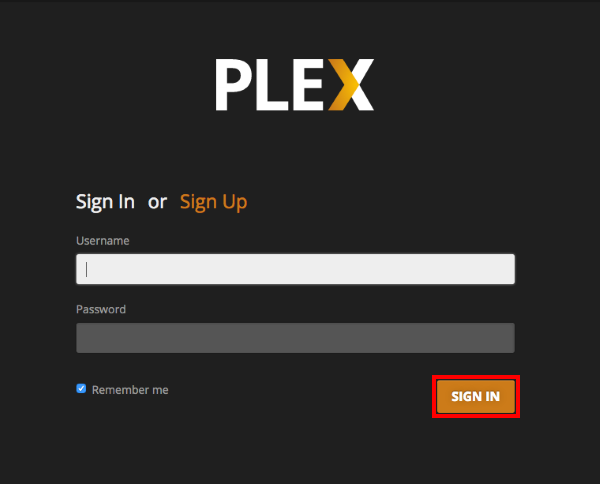
- Sign in or sign up to set up the Plex Media Server.
Configuring Plex Media Server
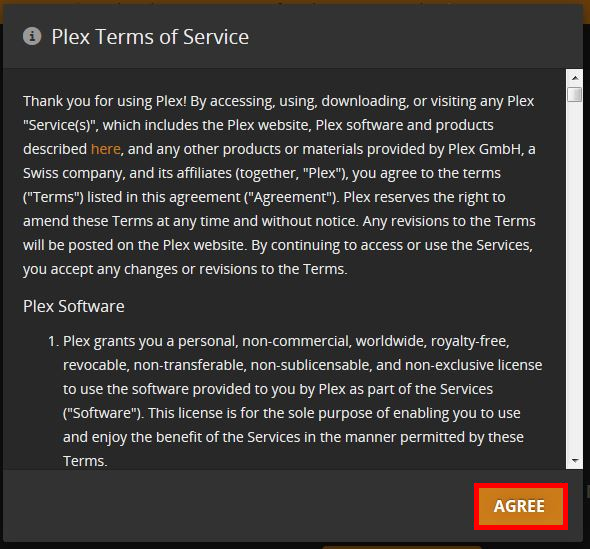
- Accept the Plex Terms of Service by clicking Agree.
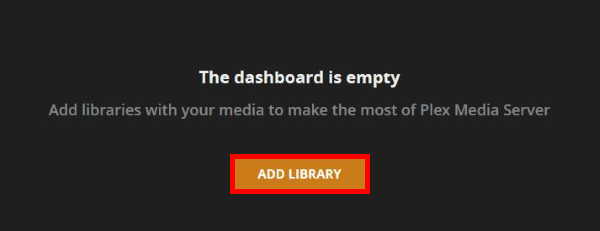
- Click Add Library to add a new library.
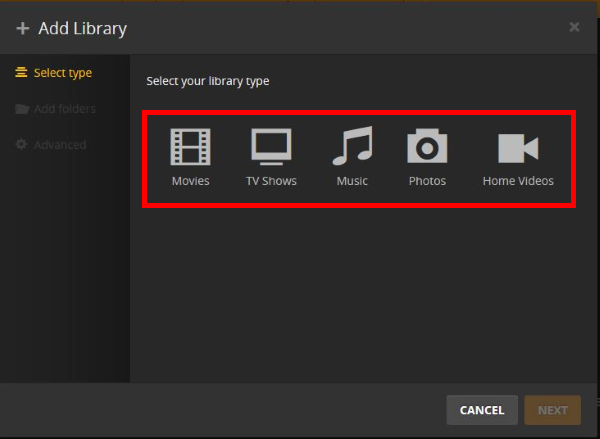
- Select the library type from the options provided.
- Provide a name and choose a language for this library. When done, click Next.

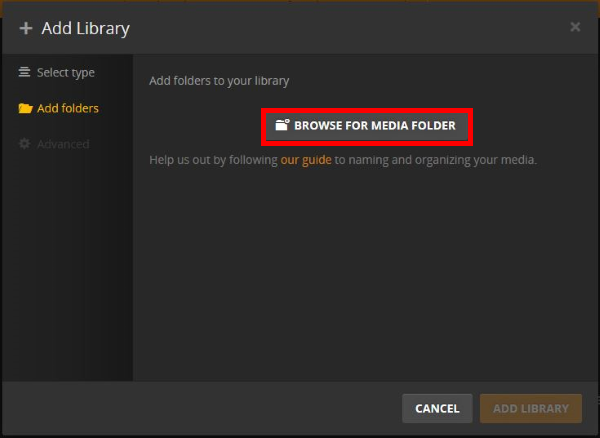
- Click Browse For Media Folder to select the folder in which the media content is located.
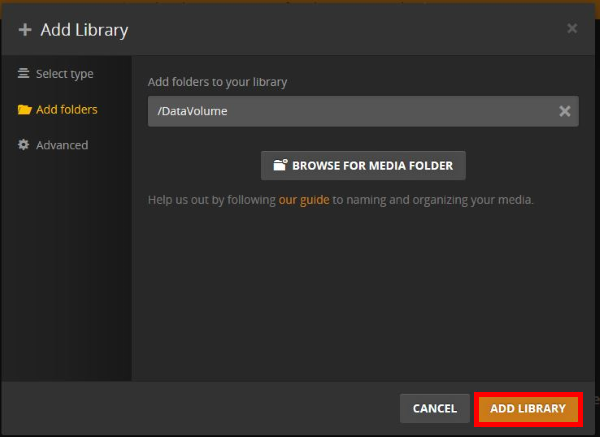
- Browse and select the folder where the media content is located. In this case, the DataVolume folder. When selected. Click Add.

- Now that the media folder is selected, click on Add Library to finish creating the library.
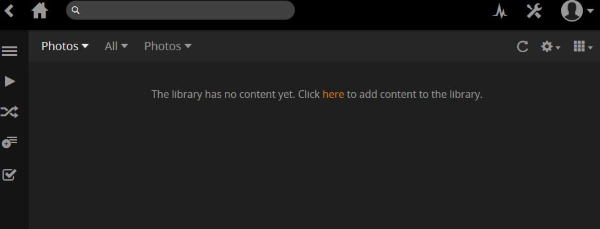
- Once the library is created, the contents in the media folder selected will be displayed under the new library.