IMPORTANT: WD My Book World End of Support Notice!
WD My Book World has reached it's end of support life cycle.
Need more help?
- Answer ID 28894: WD My Book World End of Support
- Answer ID 28740: Western Digital Product Lifecycle Support Policy
The My Book Premium Edition II, My Book Pro Edition II, and My Book World Edition II (Blue Rings) external units are a limited user-serviceable product which allow for servicing of one or both internal hard drives in the enclosure. In the event a fault occurs and you would like to service the device yourself, please follow these instructions below to disassemble the unit to remove the faulty hard drive. Please have the following items ready:
- My Book Premium Edition II, My Book Pro Edition II, or My Book World Edition II (Blue Rings) Serial number (located on the external case product label)
- Serial number of the defective internal hard drive (located on the internal hard drive - this will be different than the external case's serial number)
- Date of purchase
For directions on how to replace the hard drive through a Warranty Replacement, please see Answer ID 10336: Steps to Get a Warranty Replacement, Power Supply, or USB Cable.
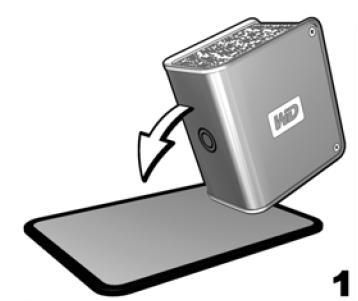
IMPORTANT: Before getting started, power off the unit and disconnect all cabled (power and data interface).- On a clean and stable surface, gently turn the unit over with the power button facing downward.
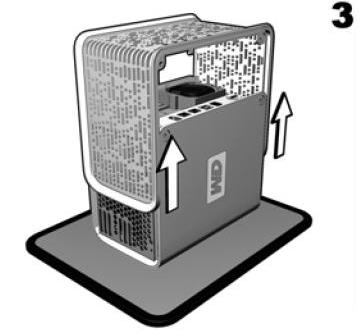
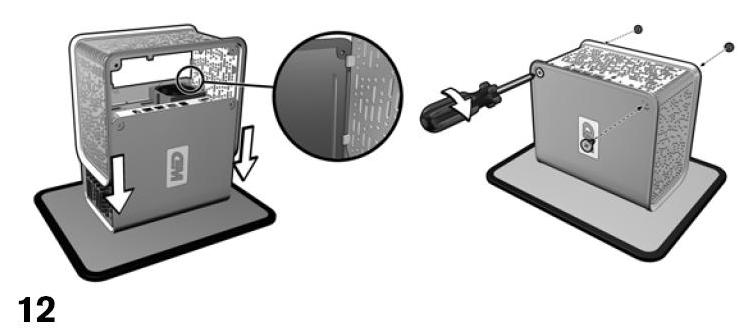
- Using a Philips-head screwdriver (cross-tip), remove all four screws from the unit and set aside in a safe place.

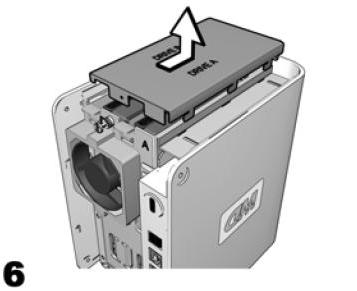
- Lift up the vent covering to remove it, then set it aside.
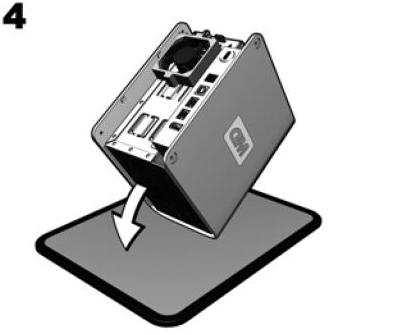
- Gently turn the device upside down (WD Logo should be upside down).
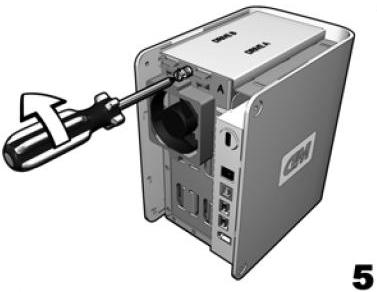
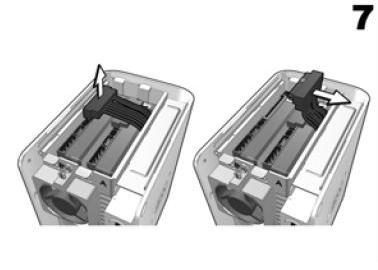
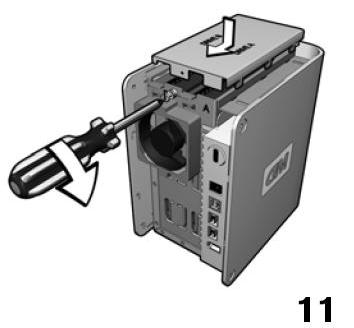
- Loosen the retainer screw that secures the drive cage cover.
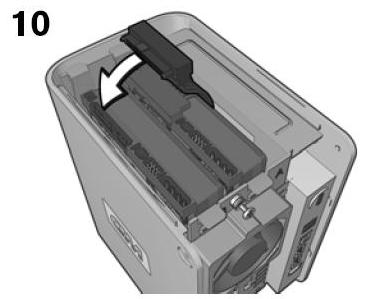
- Slide the drive cage cover away from the screw, lift up to remove, and then set it aside.
- Gently pull the connectors of the drive interface (SATA) and power cable until it is disconnected from the drive and gently push it out of the way.
- Pull the drive bracket tabs towards each other and gently slide the bracket and drive assembly up and out of the unit.

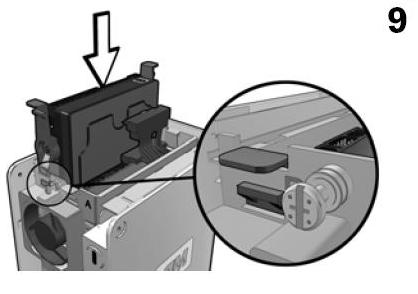
Each drive is designated A or B by a color coded decal on the drive and chassis. The components (bracket assembly, cables connectors) for each drive match the color of the decal. 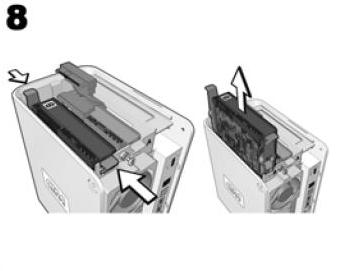
- Gently slide the Western Digital replacement drive assembly into the unit, decal side up, until the brackets on each side click into place.
- Reconnect the drive interface and power cables.
- Replace the drive cage cover and tighten the retainer screw.
- Replace the vent covering, carefully guiding each side down the chassis on the guide rails. Even pressure is needed on both sides of the covering to ensure proper fit. Secure the vent covering with the four screws.
IMPORTANT:
DO NOT over tighten the screws. The threaded inserts could be stripped if over tightened.
If the WD My Book Pro Edition II or WD My Book Premium Edition II Dual-drive System was using a RAID-1 array (Mirrored), please follow the directions in Answer ID 6280: My Book Pro and Premium II: How to Rebuild RAID 1(Mirror) to rebuild the RAID-1 array.
If the WD My Book World Edition II Dual-drive System was using a RAID-1 array (mirrored), please follow the directions in Answer ID 12893: WD My Book World (Blue Rings): RAID Rebuild to rebuild the RAID-1 array.