The My Book Mirror Edition external hard drive is pre-configured for RAID 1 (Mirrored) mode for maximum data protection. This drive also supports RAID 0 (Striped).
These products DO NOT support JBOD or any other RAID configurations. Please follow the directions below to change the RAID level of the My Book Premium II, Pro II, Studio II, or Mirror Edition external hard drive.
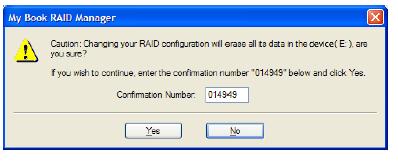
Important: Changing the RAID configuration on your My Book external hard drive will erase any existing data currently on the drive. Please ensure that any existing data on the drive is backed up.
Windows:
- Please ensure that the My Book hard drive is powered on and connected to the computer system. Launch the WD Drive Manager by double-clicking its icon on the desktop or system tray.
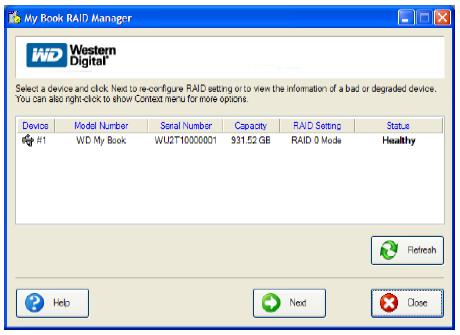
- The external hard drive will be shown in the following screen. Select the external hard drive in the menu and then click on Next.
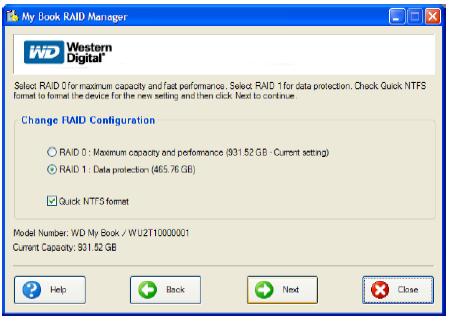
- Select the desired RAID configuration by clicking on RAID 0 or RAID 1 (the example shown has RAID 1 selected).
- Ensure that Quick NTFS Format is checked and then click on Next. You can also use Windows Disk Management to repartition and reformat the external hard drive.
- Enter the confirmation number provided on your screen, then click Yes. Click on Yes again to confirm the change.
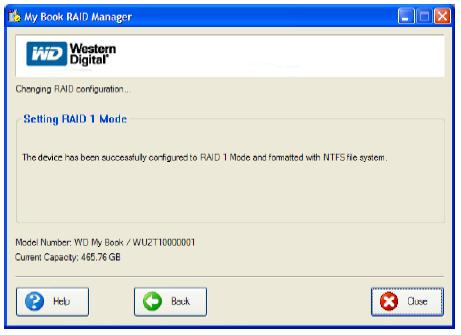
- Click Close when finished.
macOS:
- Please ensure that the My Book external hard drive is powered on and connected to the computer system. To install WD Drive Manager, insert the CD that came with the My Book external hard drive. Double-click the CD-ROM icon, the My Book external hard drive icon, then the Mac folder. Then double-click WD Drive Manager to install this program into the applications folder.
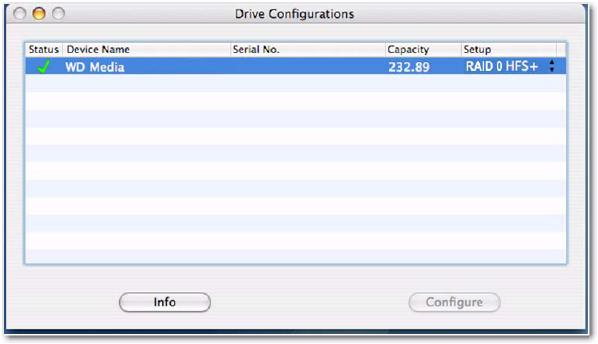
- The external hard drive will be shown in the following screen.
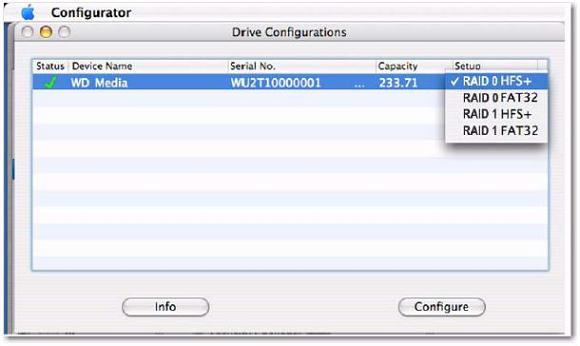
- Click on the arrows next to the Setup option to change the RAID level. The screen below shows RAID-0 with a format type of HFS+. Click on Configure and then when prompted to confirm, click on Configure again.
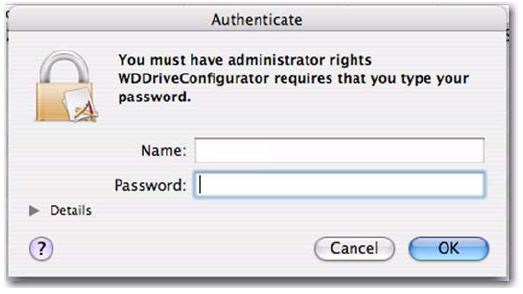
- As standard precaution, the system prompts you for an administrator’s name and password to authenticate your action. Enter this information and click OK.
- When configuring the device, My Book RAID Manager will create a a single volume to the format you specified. The new volume will automatically populate to the desktop.
 | Please refer to Answer ID 3526: How to install WD Drive Manager and set the RAID mode on a Mac |