This article explains how to change IPv4 DNS Server Address to Public DNS on Windows and macOS.*END
Using Google Public DNS server 8.8.8.8 can help resolve connection problems with network products.
Steps for Windows
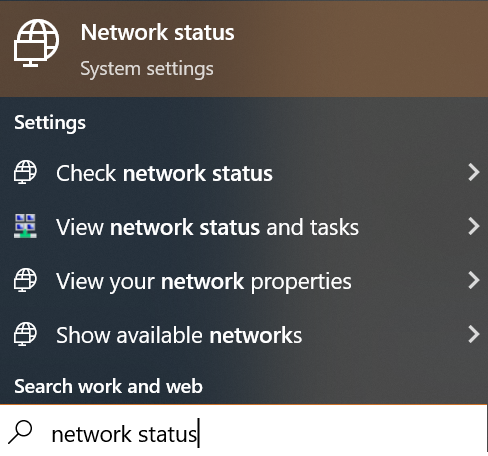
- Type network status in search bar.
Press the Enter key.
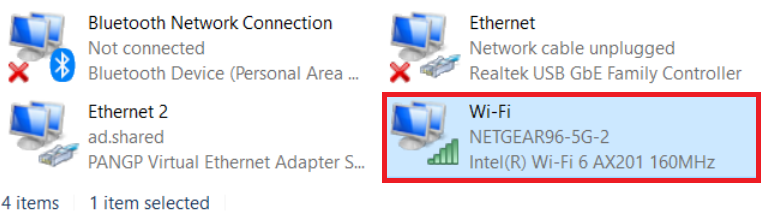
- Select an active internet connection.
Double click the connection.
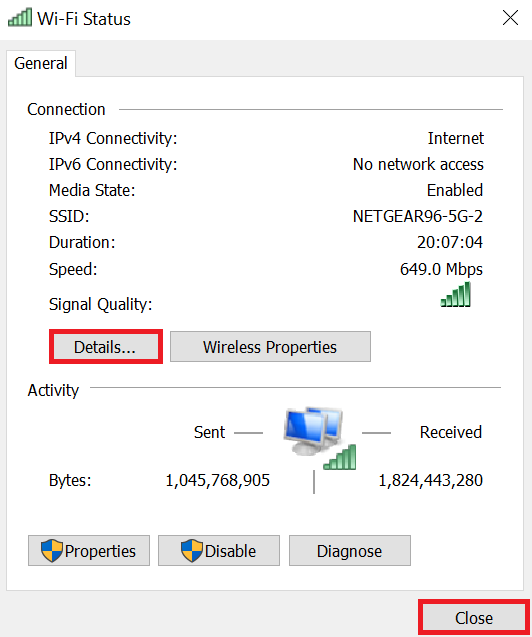
- Click Details.
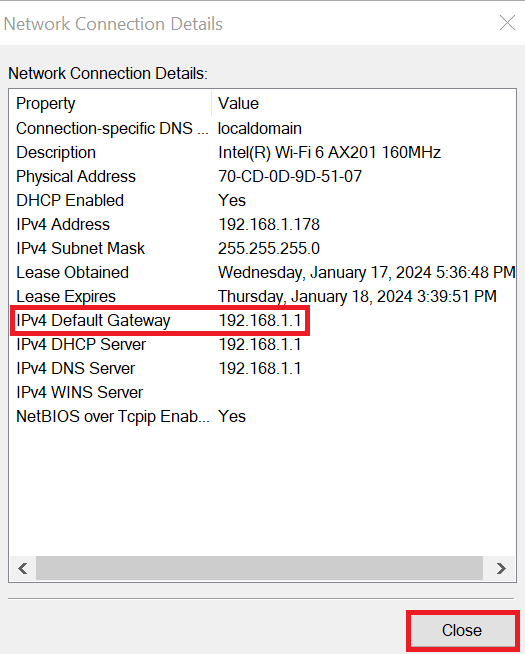
Write down the IPv4 Default Gateway IP address.
Click Close to exit the setting.

Use IPv4 Deafult Gateway IP address as the Preferred DNS server IP address in step 8
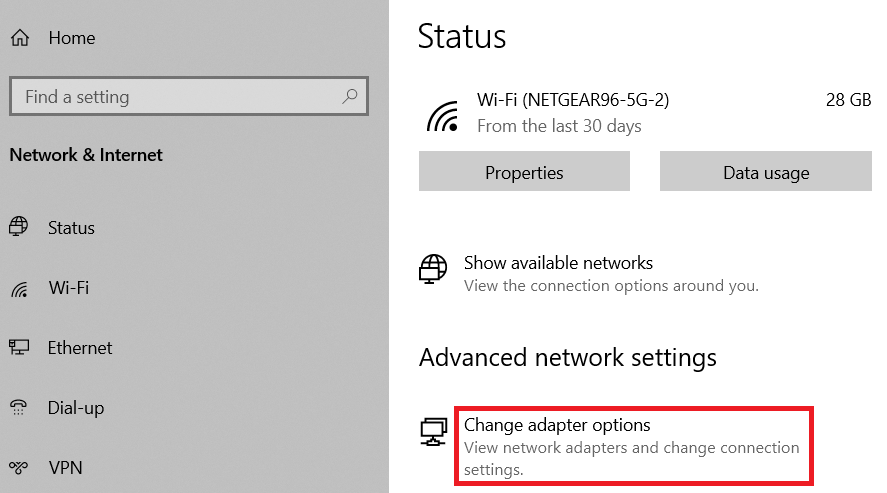
- Type network status in search bar.
Press the Enter key.
- Click Change adapter options.
Repeat the steps if both wired and wireless need to be changed.
- Select a connection.
Rick-click.
Click Properties.
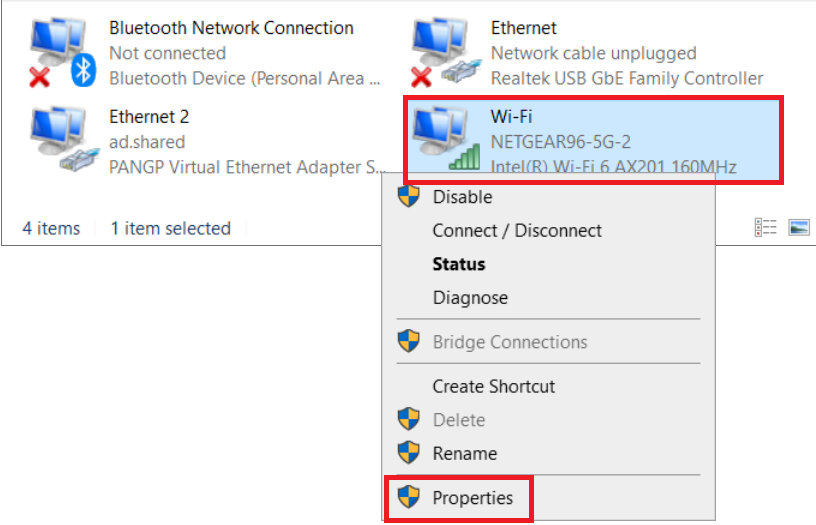
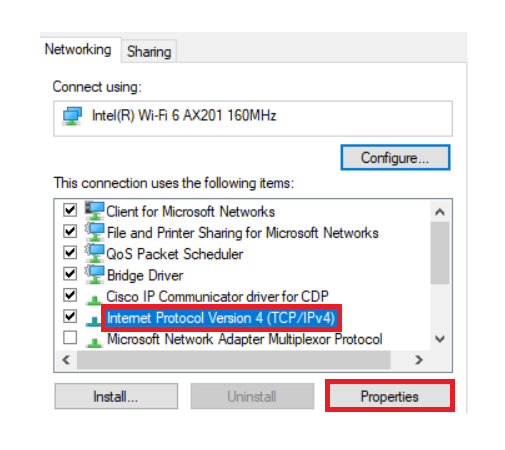
Click Internet Protocol Version 4 (TCP/IPv4).
Click Properties.
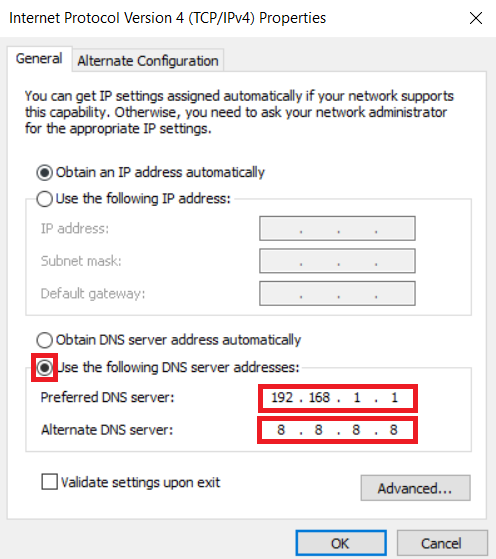
- Click the radio button for Use the following DNS server address:
Enter 192.168.1.1 for the Preferred DNS server. Check step 3.
Enter 8.8.8.8 for the Alternate DNS server.
Click OK.
Setup My Cloud using public DNS.
Need more help?
Answer ID 16487: Steps to Use Google Public DNS Servers for My Cloud
Steps for macOS
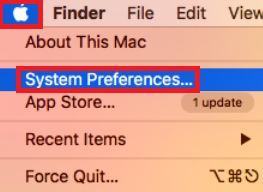
- Click Apple.
Click System Preferences.
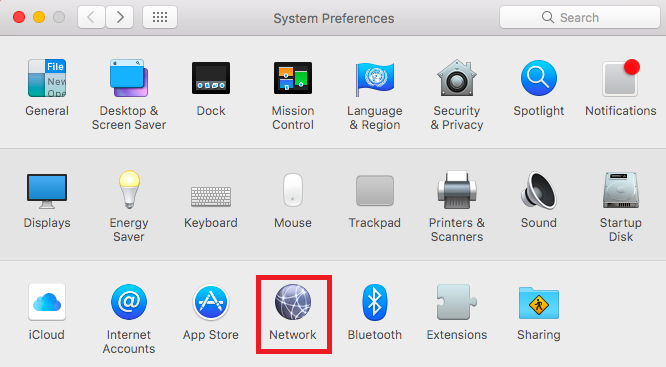
- Click Network.
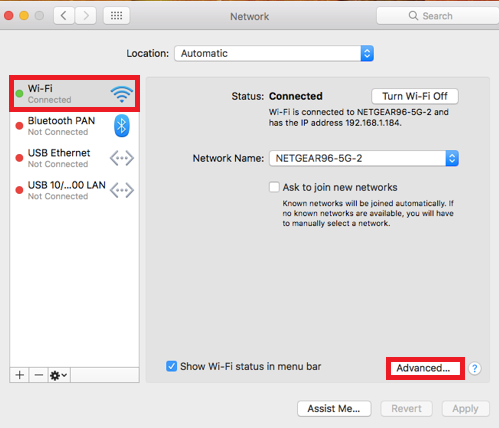
- Choose the network connection that needs to be modified.
Click Advanced.
Repeat the steps if both wired and wireless need to be changed.
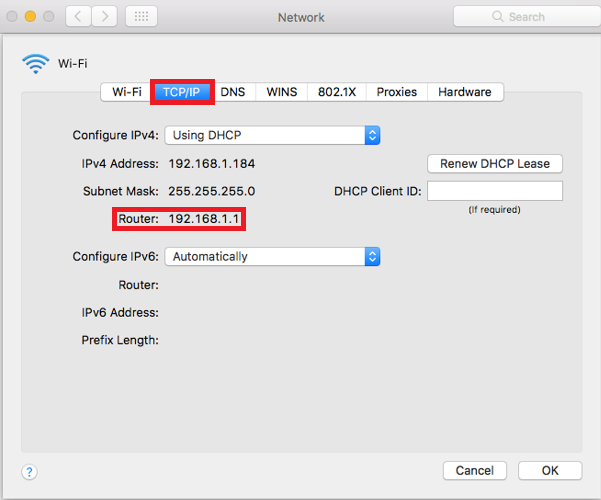
- Click TCP/IP.
Write down the Router IP address.
Use Router IP address as the DNS server IP address in step 5.
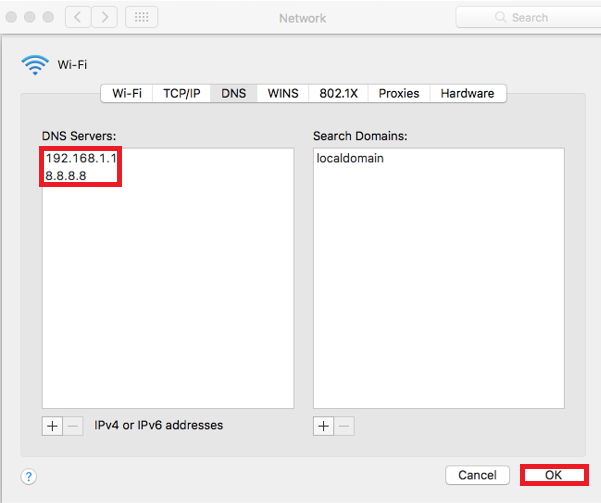
- Click DNS tab.
Click + sign below the DNS Servers list.
Enter 192.168.1.1 and then click the + sign again.
Enter 8.8.8.8 then press OK.
Setup My Cloud using public DNS.
Need more help?
Answer ID 16487: Steps to Use Google Public DNS Servers for My Cloud