 |
My Cloud Safepoint backups with 04.xx-xxx firmware. |
Backup files on a My Cloud to a USB Drive, or backup a USB drive to a My Cloud.
Configure Backups
About Backups
NAS to USB
- Incremental Backup is not supported.
- Scheduled USB Backup is not supported.
- External SSD drives are not supported.
- The drive should not have macOS Time Machine or Windows System backups.
- FAT32, NTFS, HSF+, and exFAT are supported.
Need more help?
Answer ID 19225: My Cloud External USB Drive Supported File Systems
USB to NAS
- Scheduled USB Backup is not supported.
- External SSD drives are not supported.
- TimeMachineBackup and Smartware are default backup shares.
They should be used to host the backups.
These shares are not indexed. - User Created Shares are index.
They should not be used as a backup target.
Need more help?
NAS to USB Backup Setup
- Connect a USB drive to the backup of the My Cloud.
- Access the dashboard.
Need more help?
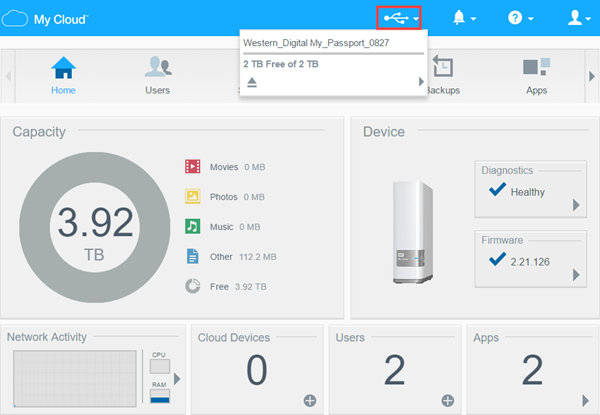
Answer ID 27432: How to Access the My Cloud OS 3 Dashboard - Click the USB icon.
Make sure the name and capacity shows.
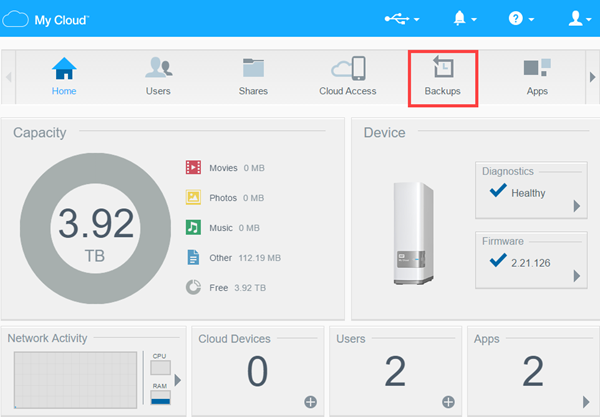
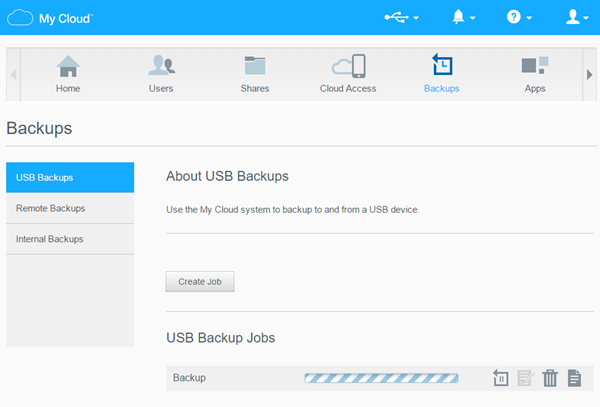
- Click Backups.
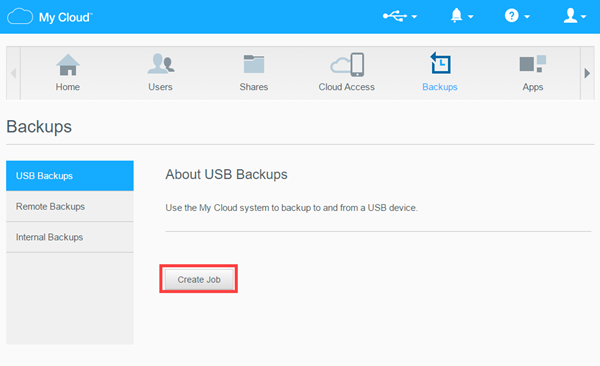
- Select USB Backups.
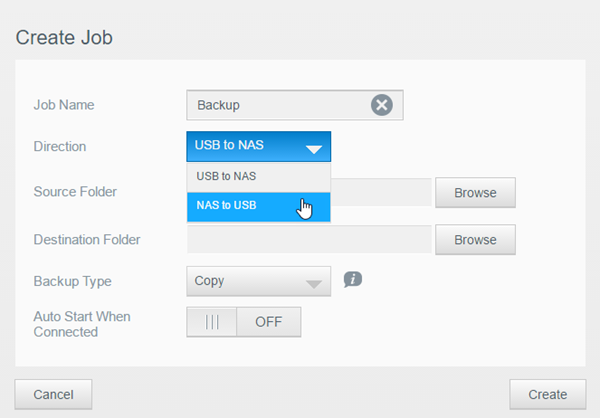
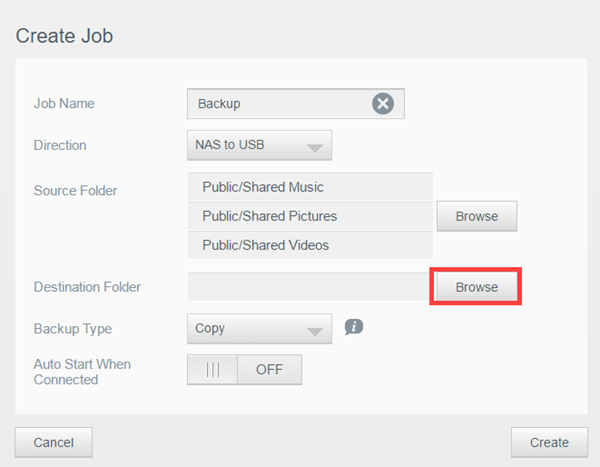
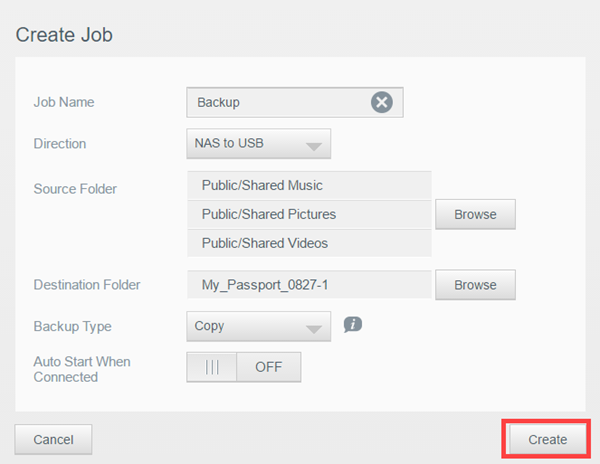
Click Create Job.
- Enter a name.
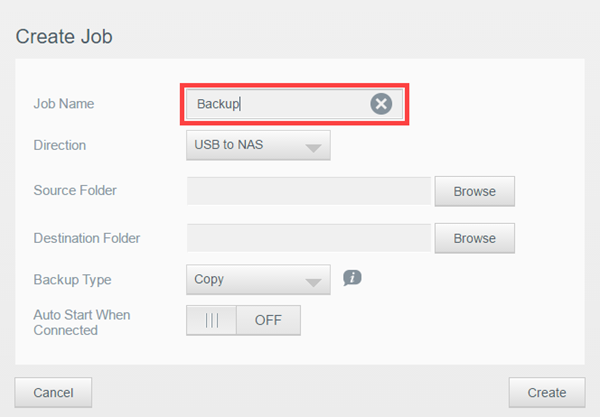
- Select NAS to USB
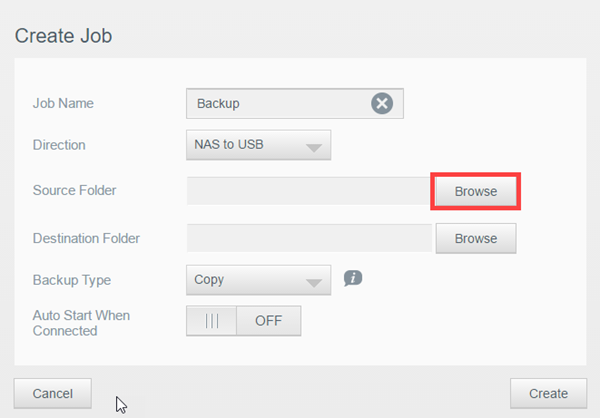
- Set the Source Folder.
Click Browse.
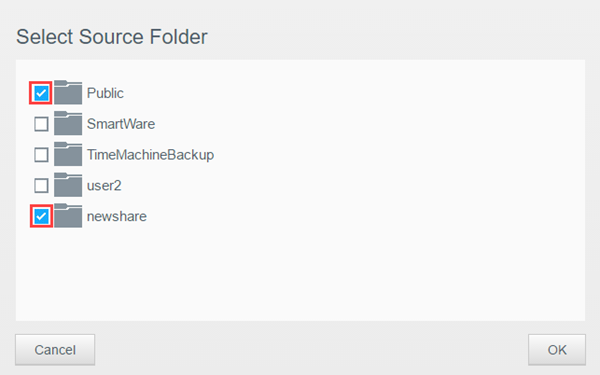
- Backup Whole Share
Select shares.
Click OK.
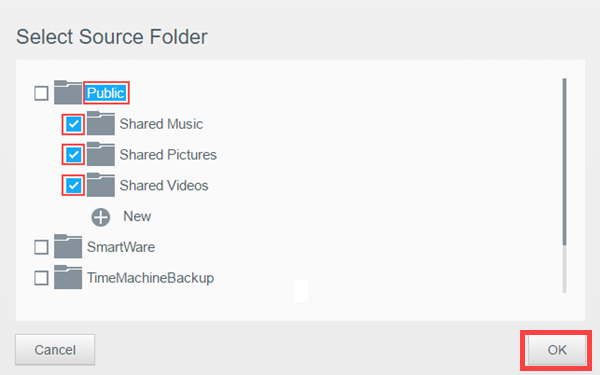
- Backup Sub-Directories
Click the share name.
Select folders.
Click OK.
- Backup Whole Share
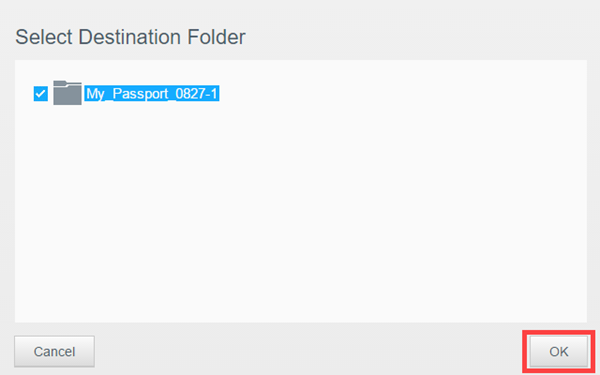
- Set the Destination.
Click Browse.
- Choose a USB drive.
Click OK.
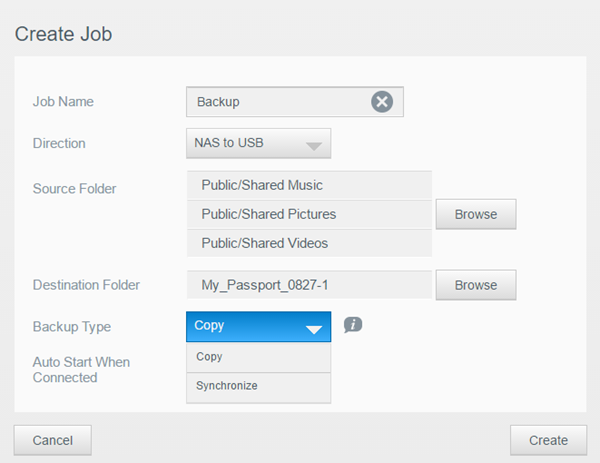
- Select the backup type.
- Copy: Copies files from source to destination. (Duplicate files are not overwritten)
- Synchronize: Copies files from source to destination. (Duplicate files WILL BE overwritten)
- Incremental: Not Supported for NAS to USB
Click Create.
This will create the job.
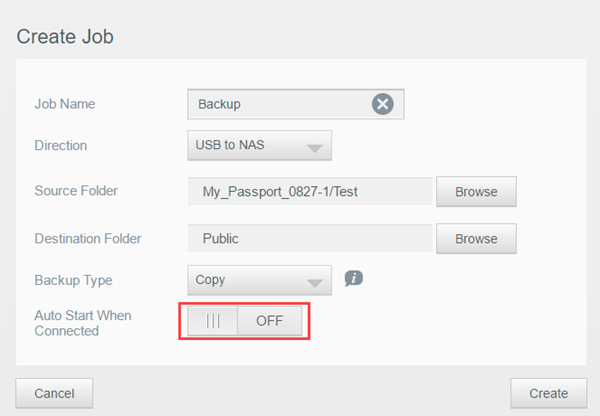
- Turn ON Auto Start When Connected.
This will start the job when it is connected to the My Cloud automatically.
It is OFF by default.
- Click Create
This will start the backup job.
The dashboard will show the progress.
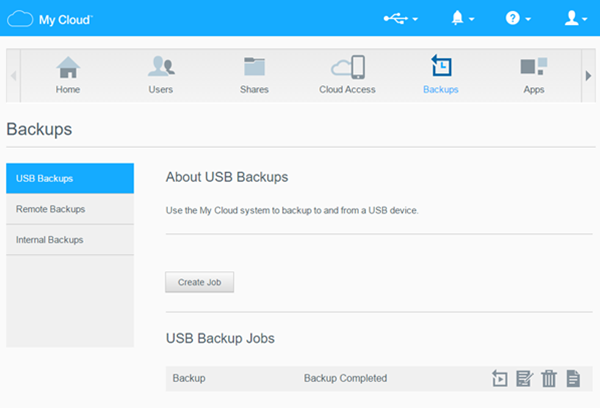
- Backup Completed will show when done.
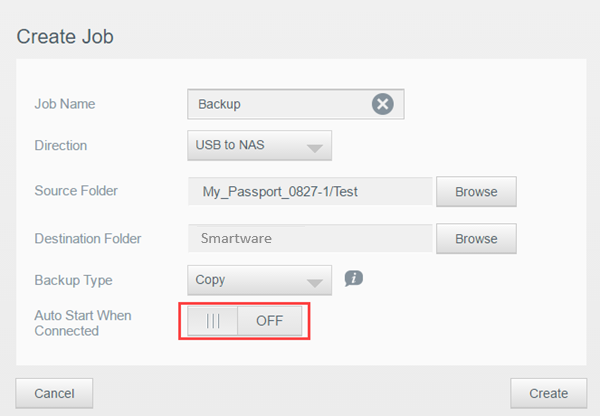
USB to NAS Backup Setup
- Connect a USB drive to the backup of the My Cloud.
- Access the dashboard.
Need more help?
Answer ID 27432: How to Access the My Cloud OS 3 Dashboard - Click the USB icon.
Make sure the name and capacity shows.
- Click Backups.
- Select USB Backups.
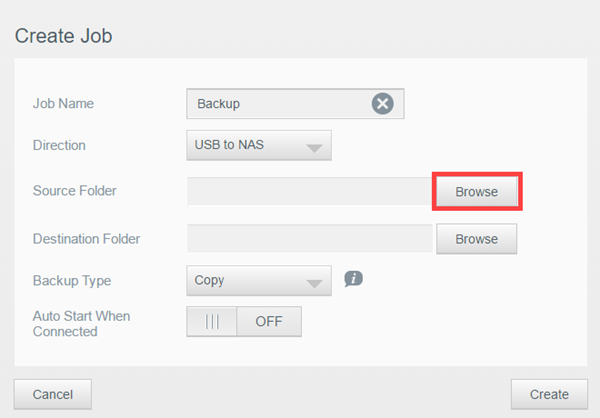
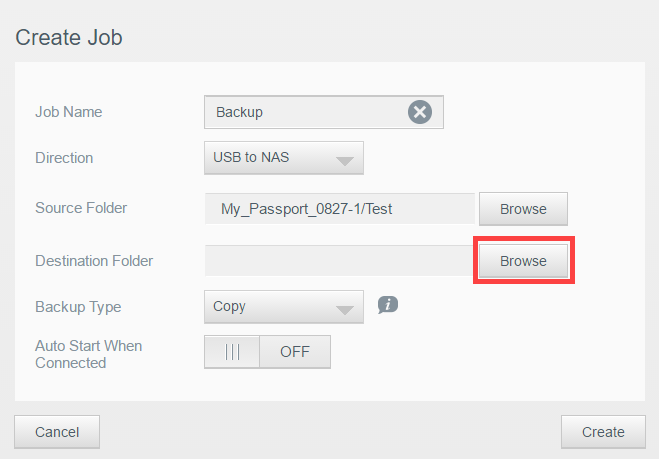
Click Create Job.
- Enter a name.
- Select USB to NAS.

- Set the Source Folder.
Click Browse.
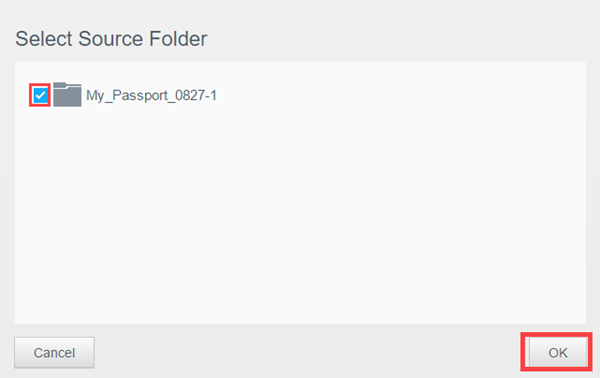
- Backup Whole Drive
Select shares.
Click OK.
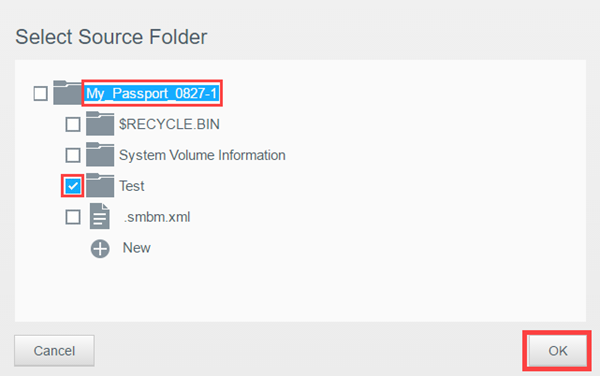
- Backup Sub-Directories
Click the drive name.
Select folders.
Click OK.
- Backup Whole Drive
- Set the Destination.
Click Browse.
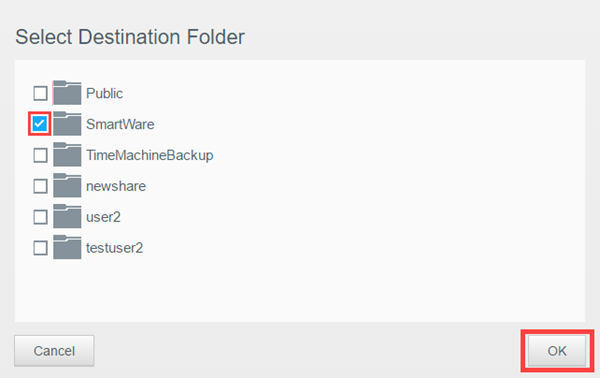
TimeMachineBackup or Smartware should be used.
They are not indexed.
User created shares are indexed.
- Choose a USB drive.
Click OK.
- Select the backup type.
- Copy: Copies files from source to destination. (Duplicate files are not overwritten)
- Synchronize: Copies files from source to destination. (Duplicate files WILL BE overwritten)
- Incremental: Copies incremental changes of files.
Saves up to 25 copies.
Click Create.
This will create the job.

- Turn ON Auto Start When Connected.
This will start the job when it is connected to the My Cloud automatically.
It is OFF by default.
- Click Create
This will start the backup job.
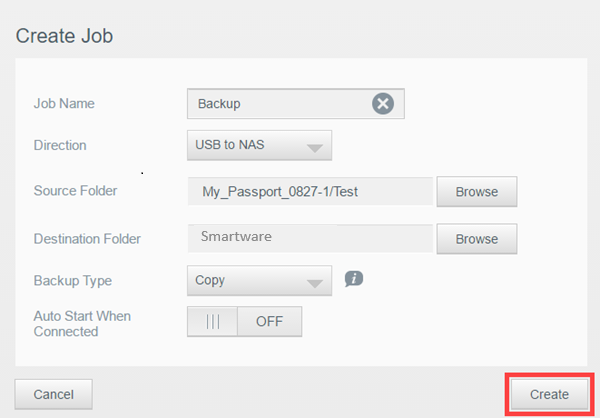
The dashboard will show the progress.
- Backup Completed will show when done.
