This article explains how to recover a Sentinel DX4000 or RX4100.*END
IMPORTANT: WD Sentinel End of Support Notice!
WD Sentinel has reached its end of support life cycle.
Need more help?
- Answer ID 29076: WD Sentinel End of Support
- Answer ID 28740: Western Digital Product Lifecycle Support Policy
To perform a server recovery, please read through the instructions found in the user manual for your model Sentinel to become familiar with the steps involved in the recovery process.
DX4000 - User Manual, instructions start on page 50.RX4100 - User Manual, instructions start on page 66.
 |
Critical: A minimum of two hard drives in the Sentinel are required to install the Operating System from the recovery. The hard drives must be on the supported drive list. To see a list of support drives, please see Answer ID 21170: WD Sentinel: Hard Drive Compatibility |
 | If you are running Windows 10, you do not need the 3rd party virtual DVD program. |
To download the .ISO file, click on the link below. There are three versions of the .ISO depending on your location. The same .ISO will work on either the DX4000 or RX4100
PAN/AM_SvrRecovery
APAC_SvrRecovery
EMEA_SvrRecovery
Performing a Recovery
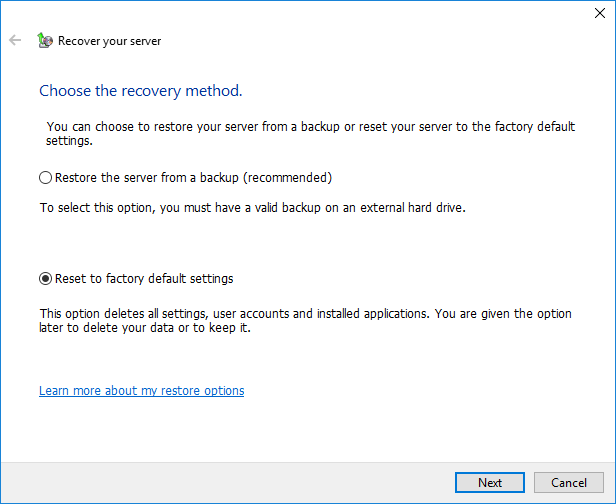
This option enables the Administrator to restore the server to factory defaults with or without deleting all contents stored on the WD Sentinel server.
- Mount or extract the ISO file, then run the setup.exe
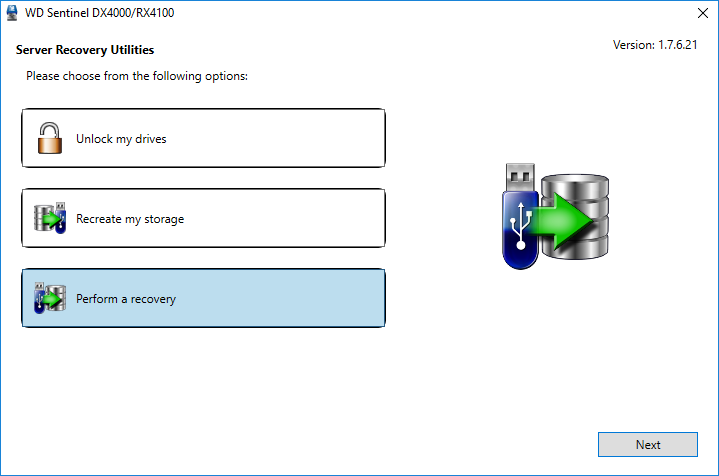
- On the Server Recovery Utilities window, click Perform a recovery.
- Click Next. The Getting Started page displays:
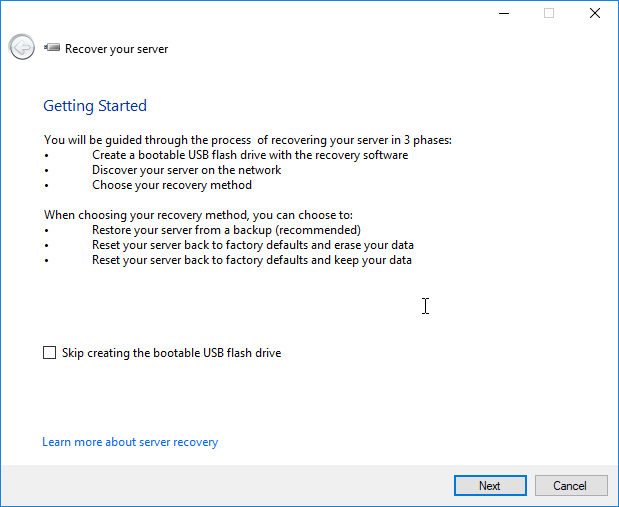
- If you have previously created a bootable recovery USB flash drive, check the Skip creating the bootable USB flash drive box and continue to Step 9.
- Click Next. The Create a bootable USB flash drive for server recovery screen displays:

- Insert the USB flash drive into the USB port of the Windows PC, and click Next. The Prepare the USB flash drive for server recovery screen displays.
The USB flash drive should appear in the Select USB flash drive drop-down list. If it is not on the list, click Refresh and search for it.
If the USB drive is not detected, please refer to Answer ID 9889 'Create a bootable USB flash drive for server recovery' appears during Server Recovery on a WD Sentinel RX4100 or DX4000
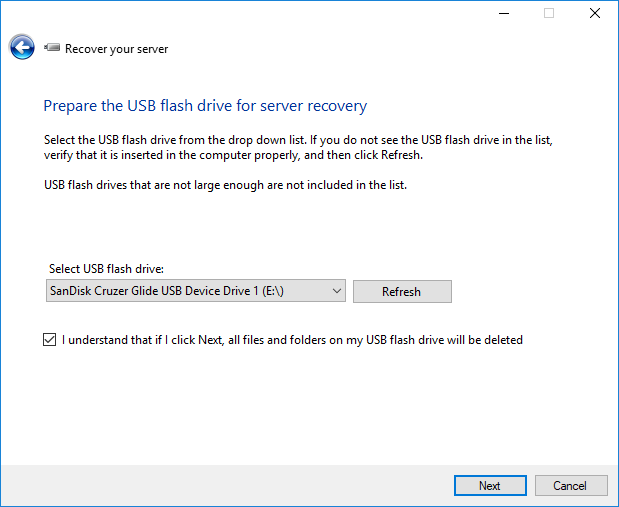
- After locating the USB drive, click the check box to acknowledge that you know clicking Next will delete all files and folders on the USB flash drive.
- Click Next. The Preparing the USB flash drive for server recovery screen displays.
- The recovery application on the DVD prepares the USB drive. This process can take up to 15 minutes to complete. After the USB drive preparation is done, the Start your server in recovery mode screen displays.
- Follow the additional instructions that appear on the screen to guide you through the recovery process:
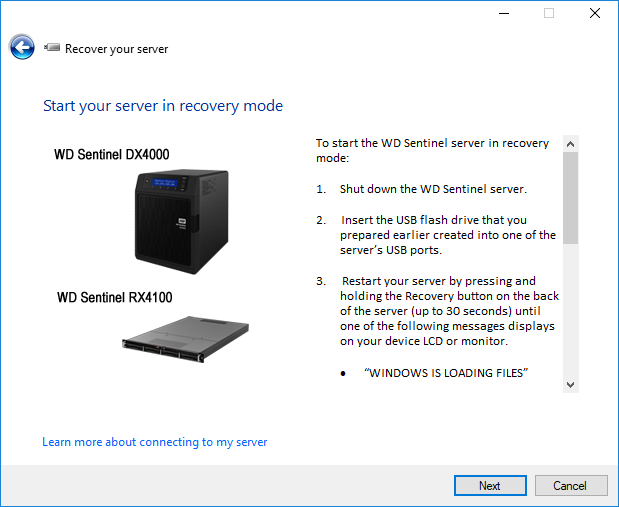
- Shut down the WD Sentinel server.
- Insert the USB flash drive that you prepared earlier into one of the server’s USB ports.
- Restart your server by pressing and holding the Recovery button on the back of the server, while holding the reset button, press the power button and continue to hold the reset button (for up to 30 seconds) until one of the following messages displays on your device LCD or monitor(RX4100).
- WINDOWS IS LOADING FILES
- INITIALIZING OK LOADING RECOVERY.
- Then release the Recovery button. Leave the USB flash drive connected to the WD Sentinel server.
- The monitor or LCD displays RECOVERY INITIALIZING.
- When the monitor or LCD displays RECOVERY STARTED, return to the computer.
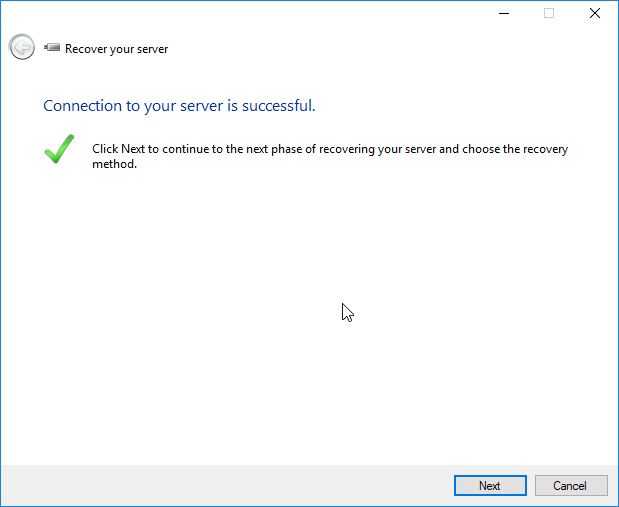
- Return to the PC and follow the instructions by clicking Next. Make sure the PC is on the same network as the WD Sentinel server. The application searches for the WD Sentinel server and performs the final recovery.
- When the server is detected, the following screen displays, click next.
- Select the recovery method and click next.
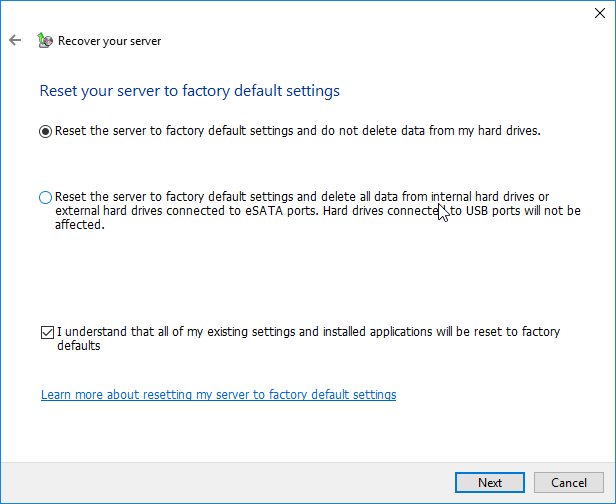
- Select whether to retain the data on RAID volume, check the box click next.
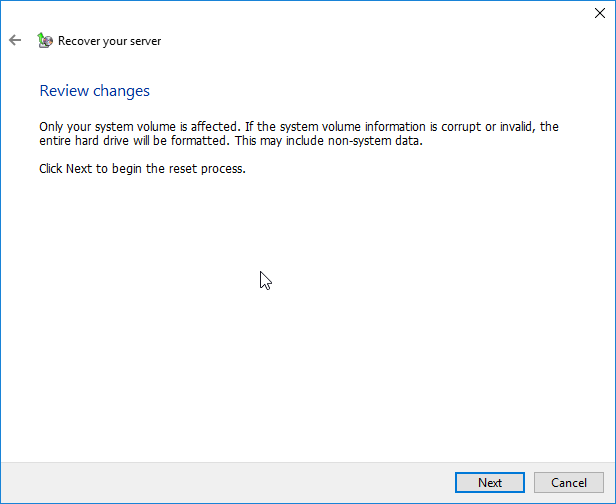
- Review changes and click Next.
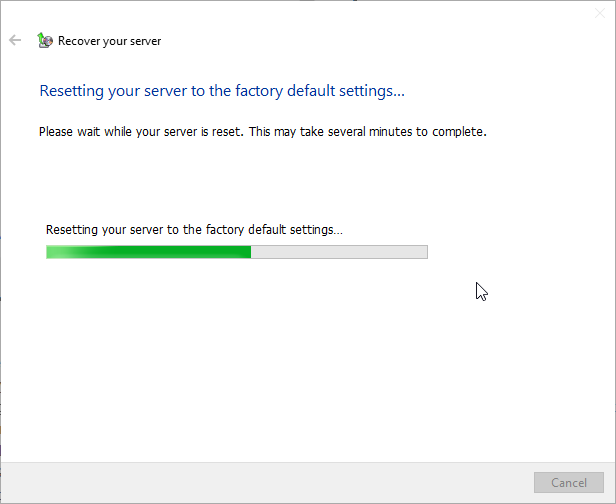
- When the reset starts, the following screen dispalys.
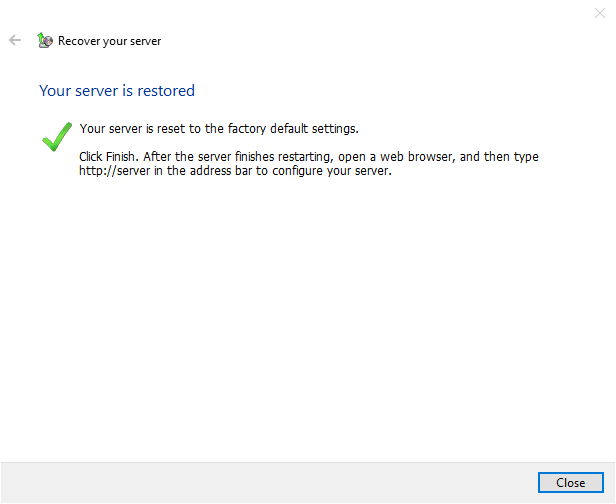
- When the reset is done, the following screen displays, click Close.
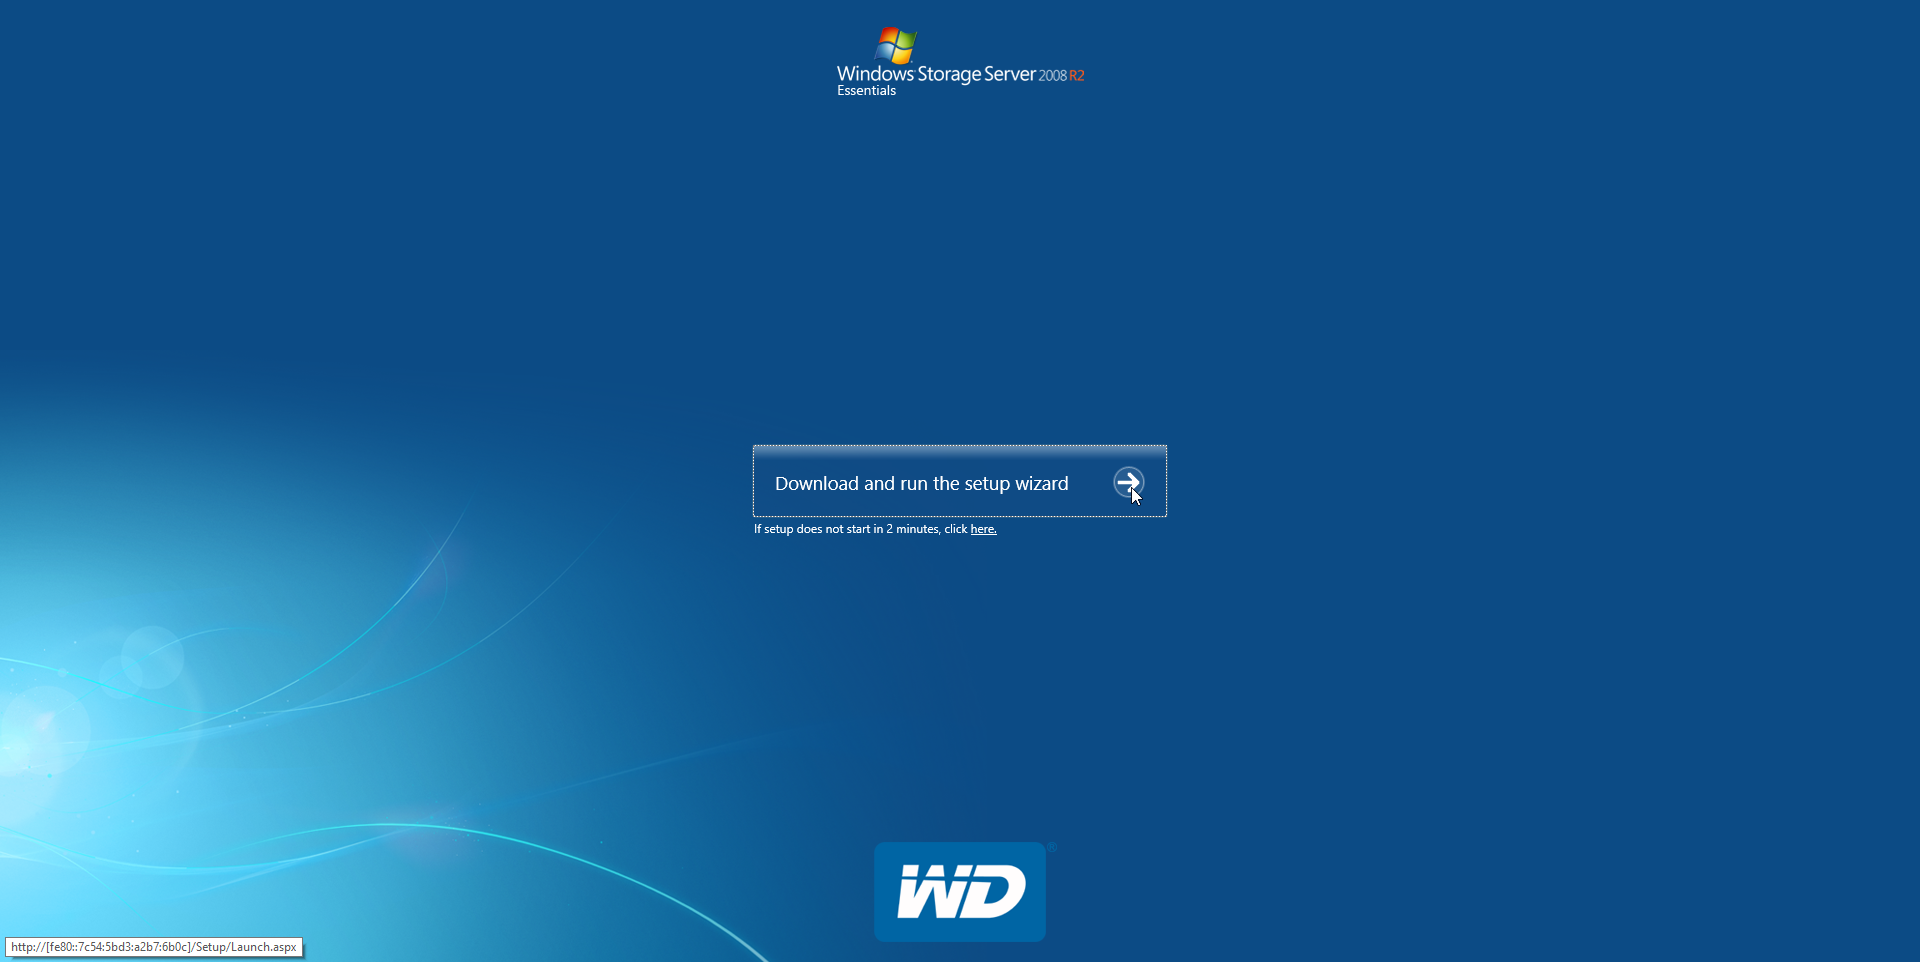
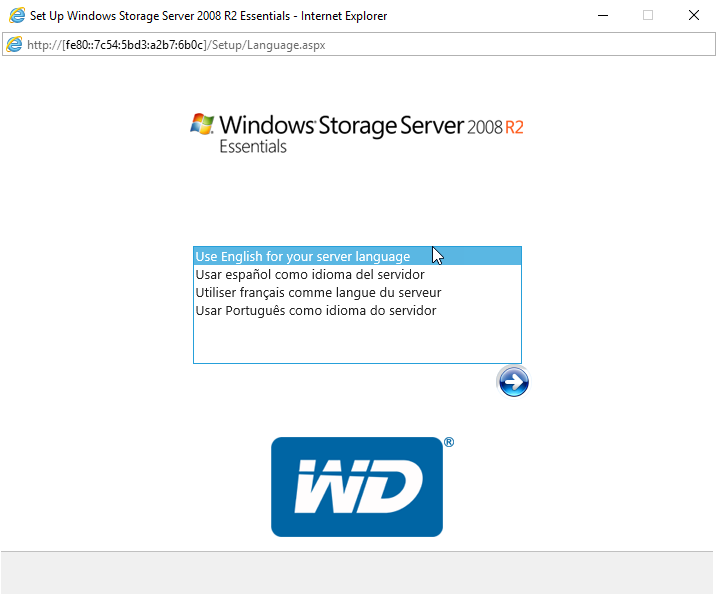
- After the reset is complete, from your computer, go to http://{servername}/connect (e.g. http://wdsentinel/connect).
- Select your language and click the arrow icon.
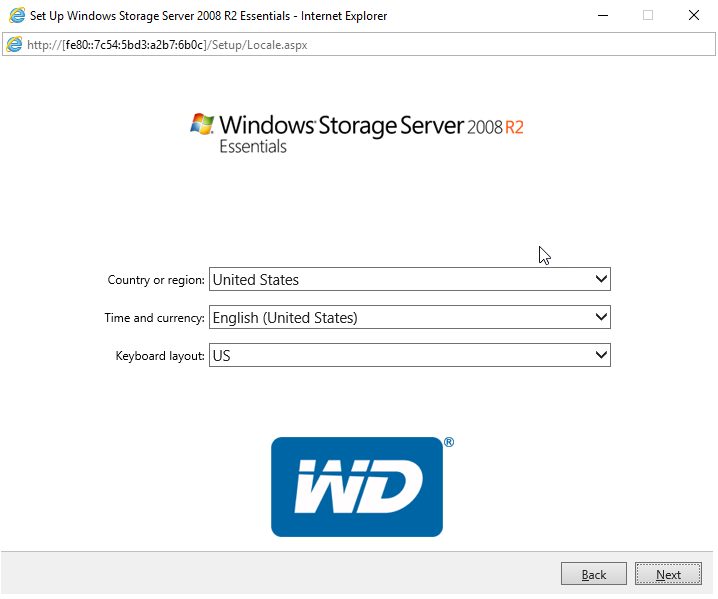
- Complete the Country, Time, and Keyboard Layout fields and click next.
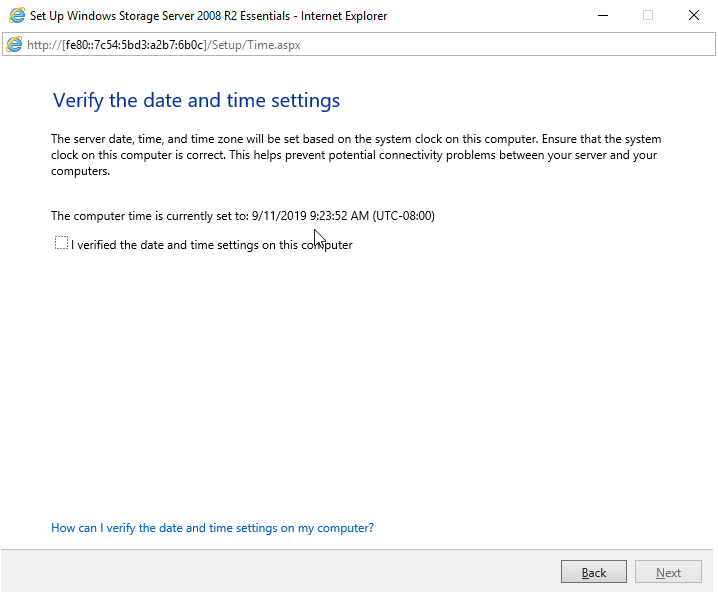
- Verify the date and time settings, check the box, and click next.
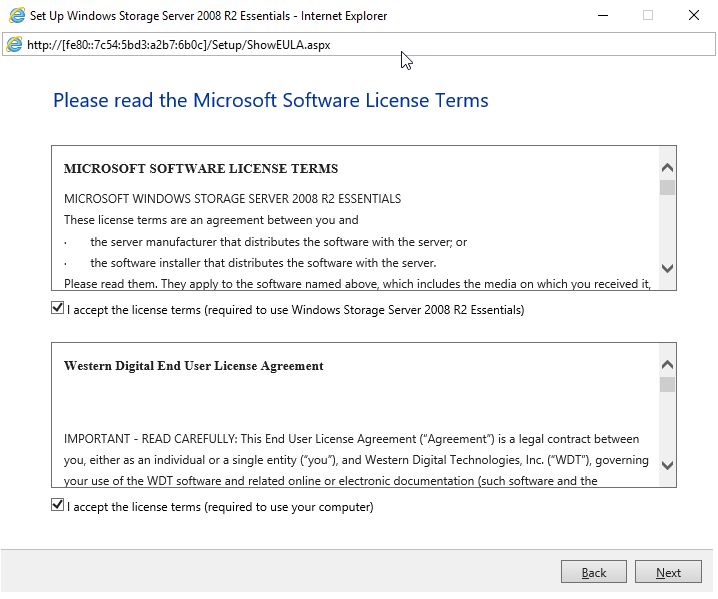
- Check the boxes and click next.
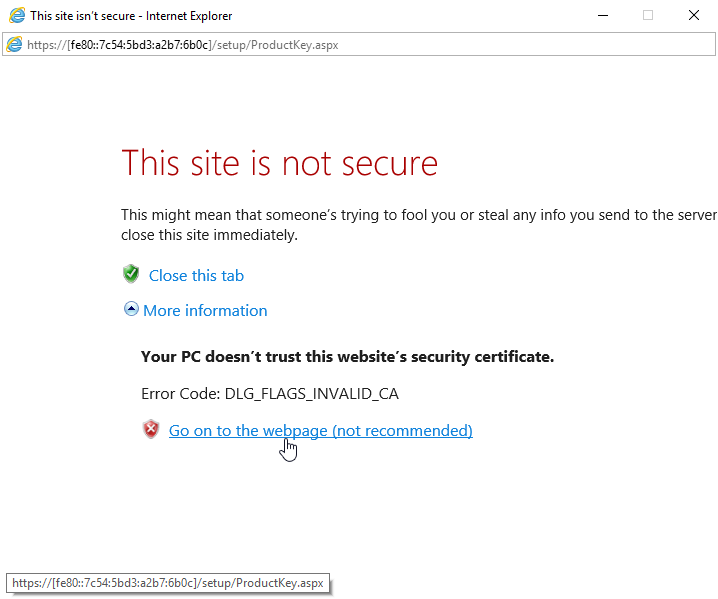
- If a not secure screen displays, please select the appropriate options to allow the process to continue.
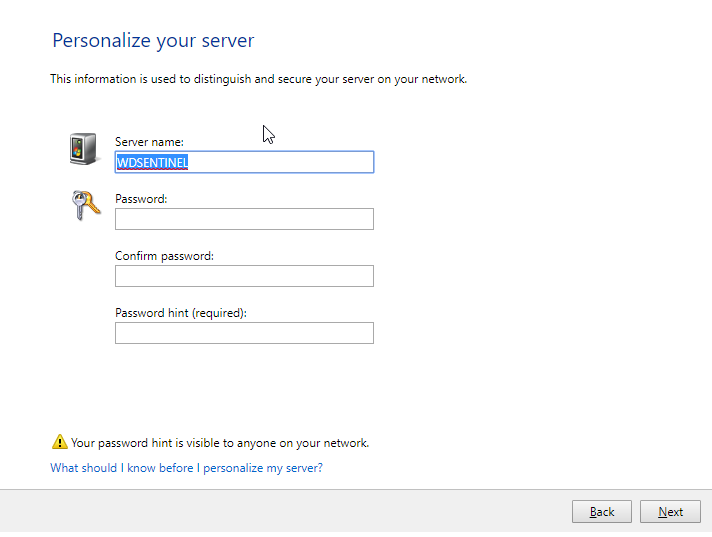
- Complete the Server name, Password, Confirm password, and Password hint fields and click next.
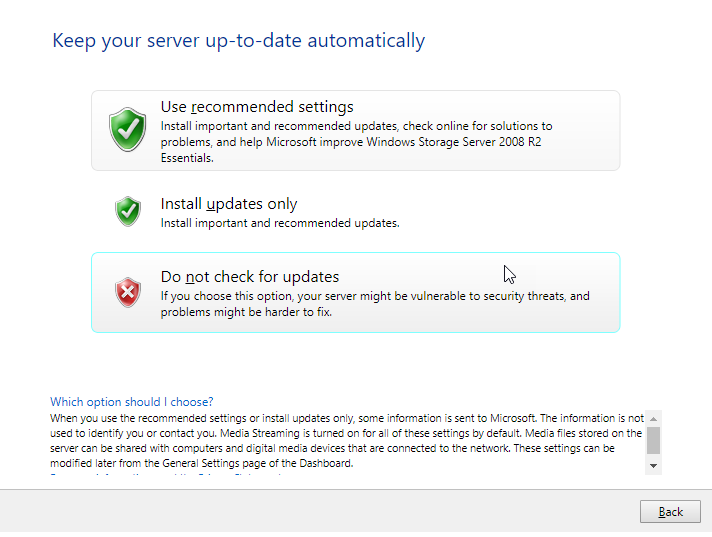
- Select one of the following options.
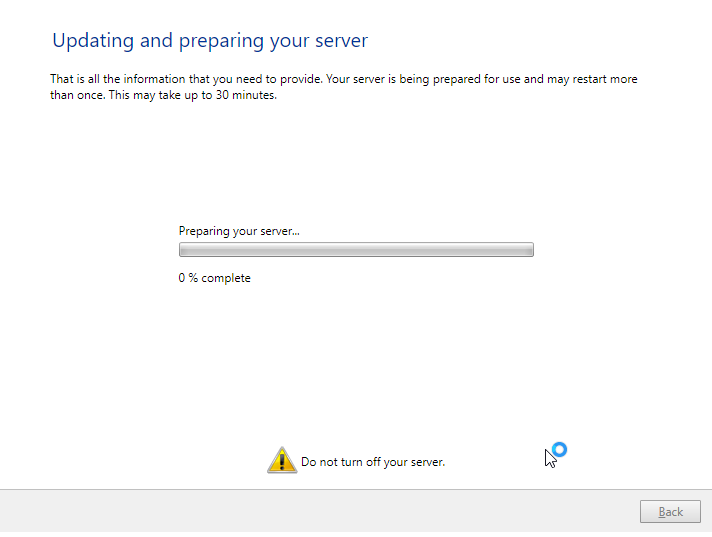
- The following screen displays the status of the update process (this may take 2 - 3 hours).