 | This article applies to all My Cloud devices with firmware 2.xx.xx. |
My Cloud Firmware Updates
Please ensure that your My Cloud product firmware is up to date.
For assistance with updating My Cloud firmware, please refer to Answer ID 6546: Steps to Auto and Manually Download Update WD My Cloud OS 3 Firmware
NAS to USB Backup
External USB drives file system format must be FAT32, NTFS or HSF+ and in some cases exFAT.
USB drives used for My Cloud backups should not contain macOS Time Machine or Windows System backups.
For more details regarding file system support, please refer to Answer ID 19225: My Cloud External USB Drive Supported File Systems
NAS to USB Incremental Backup is not supported
Scheduled USB Backup is not supported
USB to NAS Backup
TimeMachineBackup and Smartware are default shares on all My Cloud products. The "backup shares" are not indexed by the My Cloud or the Twonky DLNA Server. Using the "backup shares" can increase My Cloud performance since the data is not indexed. User created Shares are indexed and thumbnailed when My Cloud and DLNA Service is enabled resulting in slow backup speeds and My Cloud performance.
Scheduled USB Backup is not supported
Configuring USB backups on a My Cloud device
The My Cloud device features an ability to back up the data that is stored on it onto a USB attached device. This feature can also backup the data currently stored on an attached USB drive to a share on the My Cloud device. Instructions on how to configure the USB backups feature can be found on the table below.
| NAS to USB backup | Click here for Instructions |
| USB to NAS backup | Click here for Instructions |
| Incremental Backup Information | Click here for Instructions |
Please select the backup direction from the table above.
NAS to USB Backup
- Insert a USB storage device into a USB port on the back of the My Cloud device
- Access the dashboard of the My Cloud device.
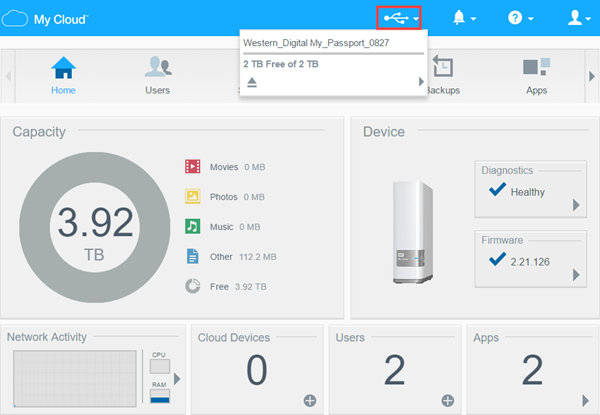
For assistance accessing the Dashboard, please see Answer ID 27432: How to Access the My Cloud OS 3 Dashboard - From the top of the dashboard, click on the USB icon and verify that the name and capacity of the attached drive shows properly
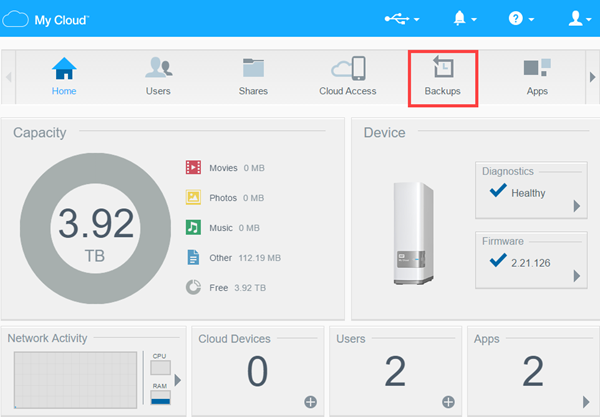
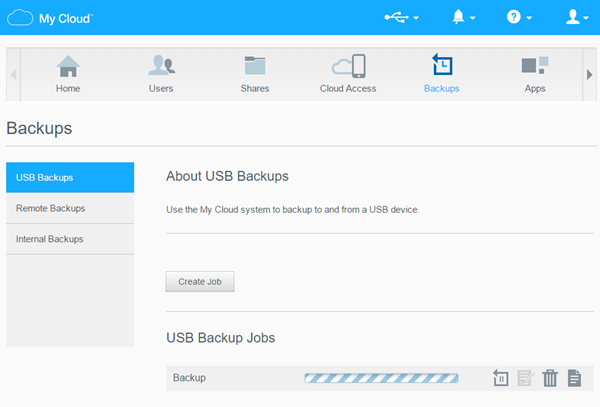
- Click on the Backups tab
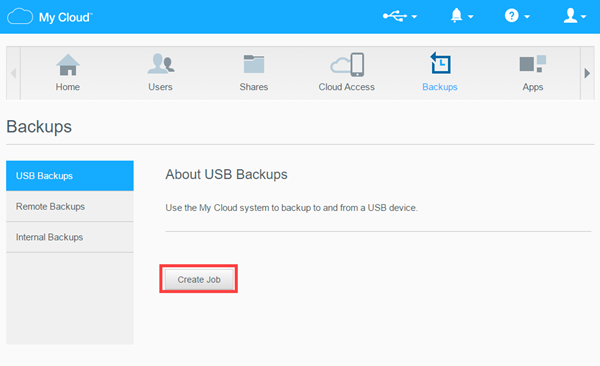
- Highlight the USB Backups to the left and click on Create Job button
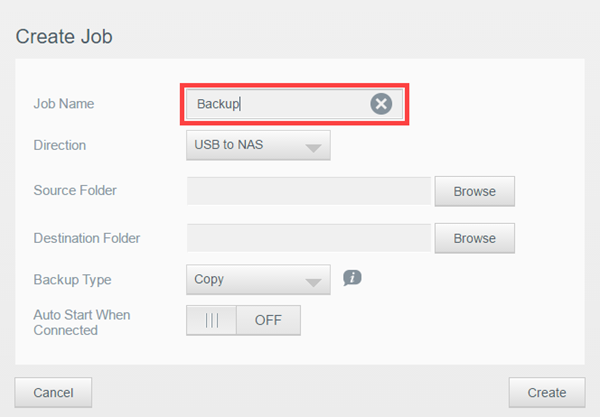
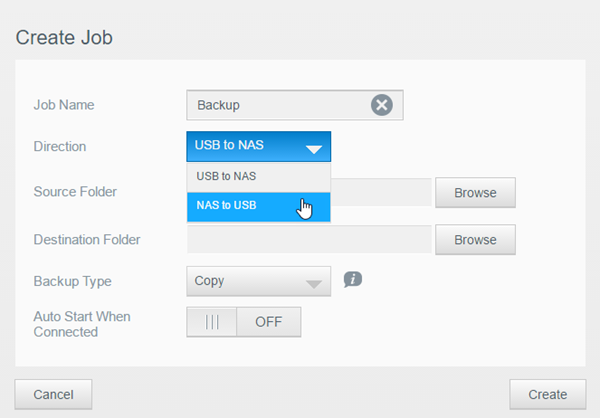
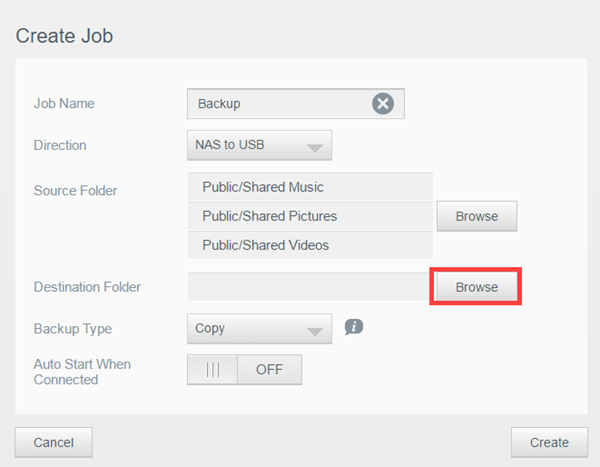
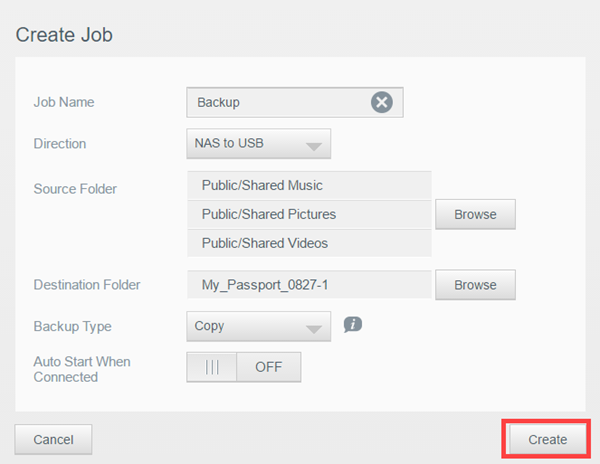
- Enter a name for the Backup Job
- From the dropdown menu under direction, click NAS to USB
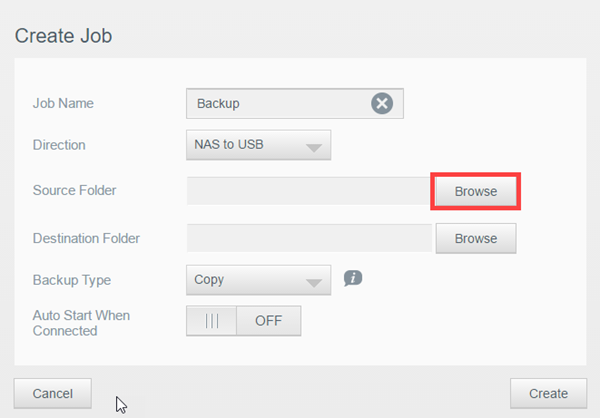
- Choose the source location by clicking on the Browse button
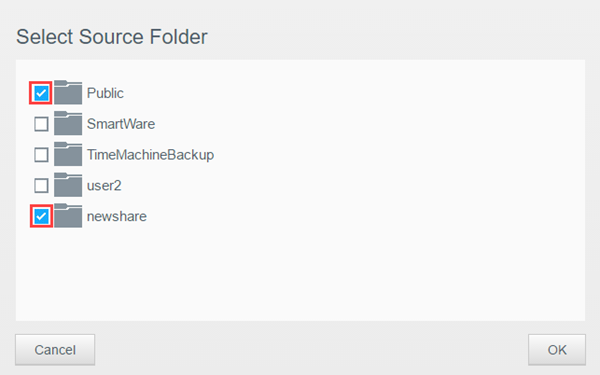
- To backup the entire share, put a check-mark next to the name of the share(s) that need to be backed up
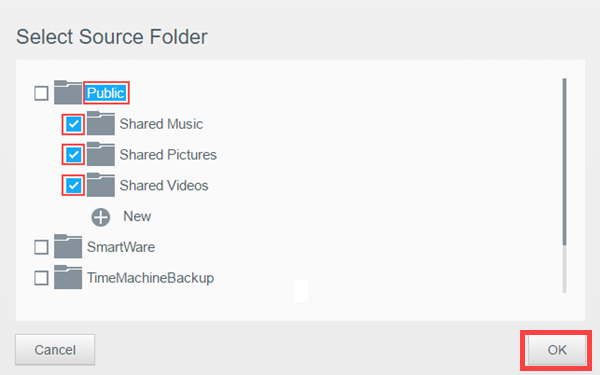
- To backup specific sub-directories located within a share, click on the share's name. This will expand it and list all directories located within. Place a check next to each directory that needs to be backed up and click OK
- Choose the backup destination by clicking on the Browse button
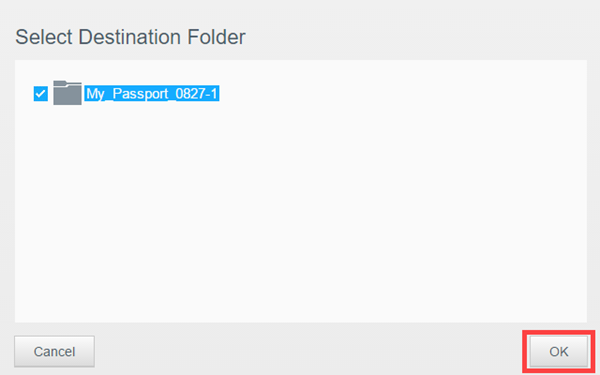
- Choose the USB destination by putting a check-mark next to it and click OK
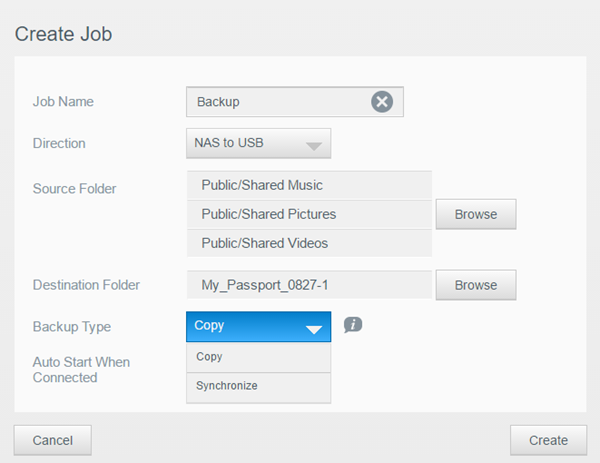
- Choose the type of backup to be performed
- To start the backup job automatically every time the USB drive is connected to the My Cloud device, toggle the Auto Start When Connected switch to ON
- Click on the Create button
- The dashboard will show the progress of the back up
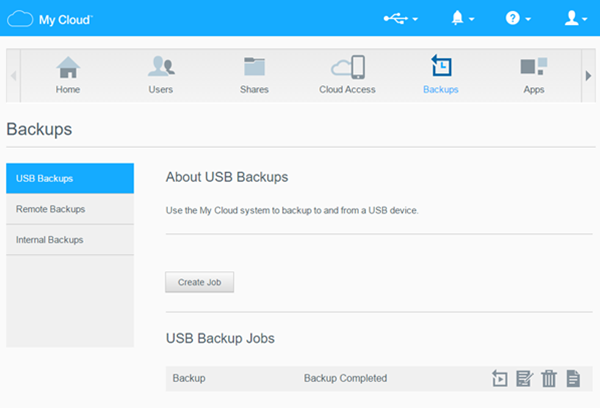
- Backup Completed will show up when the backup is done
| Copy: Copies files from source to destination. (Duplicate files will not be overwritten). Synchronize: Copies files from source to destination. (Duplicate files WILL BE overwritten). Incremental (Not Supported for NAS to USB Backups): Copies incremental change of files up to 25 copies to the destination. |
USB to NAS Backup
- Insert a USB storage device into a USB port on the back of the My Cloud device
- Access the dashboard of the My Cloud device.
For assistance accessing the Dashboard, please see Answer ID 27432: How to Access the My Cloud OS 3 Dashboard - From the top of the dashboard, click on the USB icon and verify that the name and capacity of the attached drive shows properly
- Click on the Backups tab
- Highlight the USB Backups to the left and click on Create Job button
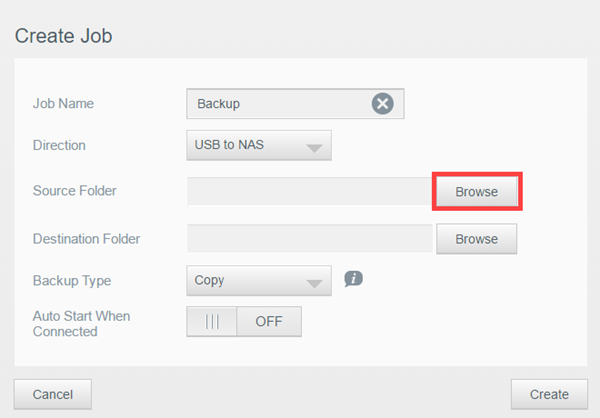
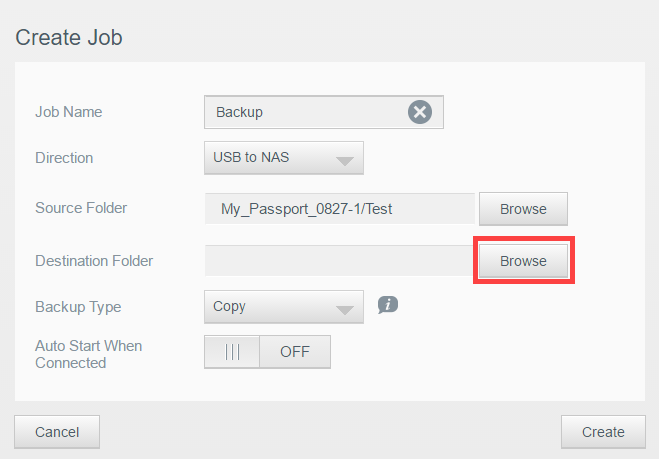
- Enter a name for the Backup Job
- From the drop down menu under direction, click USB to NAS
- Choose the source location by clicking on the Browse button
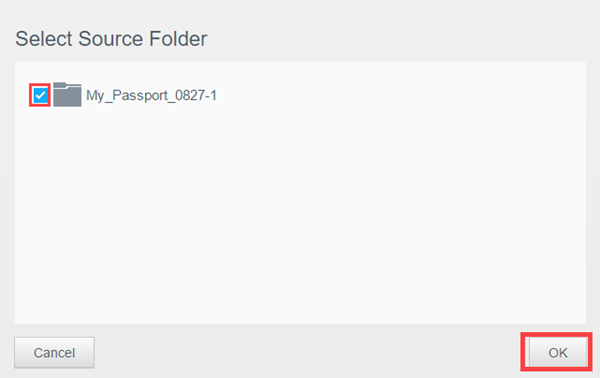
- To back up the entire drive, put a check-mark next to the name of the drive that needs to be backed up
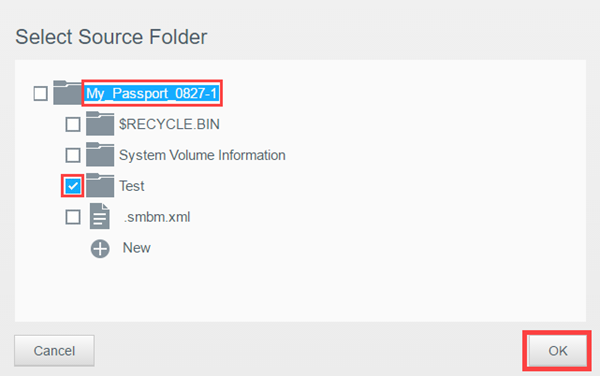
- To back up specific sub-directories located within a drive, click on the drive's name. This will expand it and list all directories located within. Place a check next to each directory that needs to be backed up and click OK
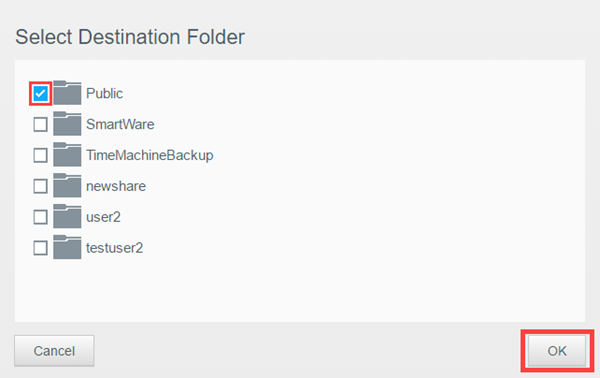
- Choose the backup destination by clicking on the Browse button
- Choose the destination share by putting a check-mark next to it and click OK
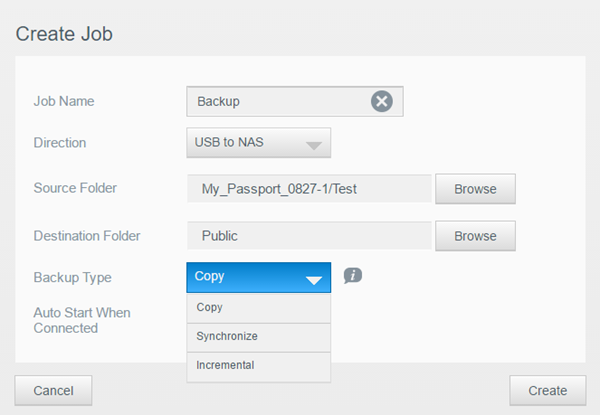
- Choose the type of backup to be performed
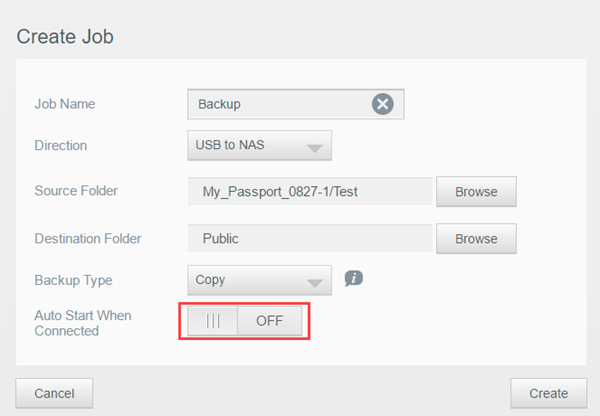
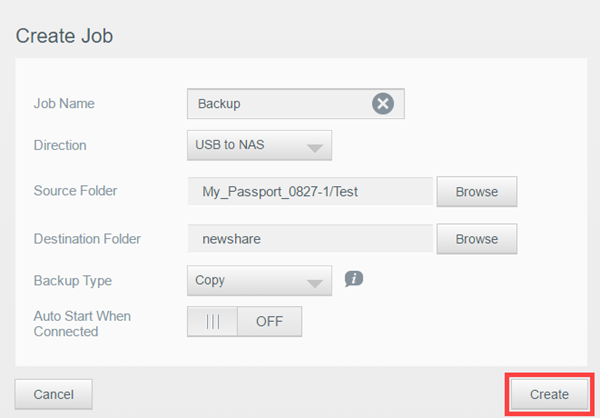
- To start the backup job automatically every time the USB drive is connected to the My Cloud device, toggle the Auto Start When Connected switch to ON
- Click on the Create button
- The dashboard will show the progress of the back up
- Backup Completed will show up when the backup is done

| Copy: Copies files from source to destination. (Duplicate files will not be overwritten). Synchronize: Copies files from source to destination. (Duplicate files WILL BE overwritten). Incremental: Copies incremental changes of files up to 25 copies to the destination. |
Incremental Backup Information
The Incremental Backup job on a My Cloud has the following features:
- Creates up to 25 copies of the content
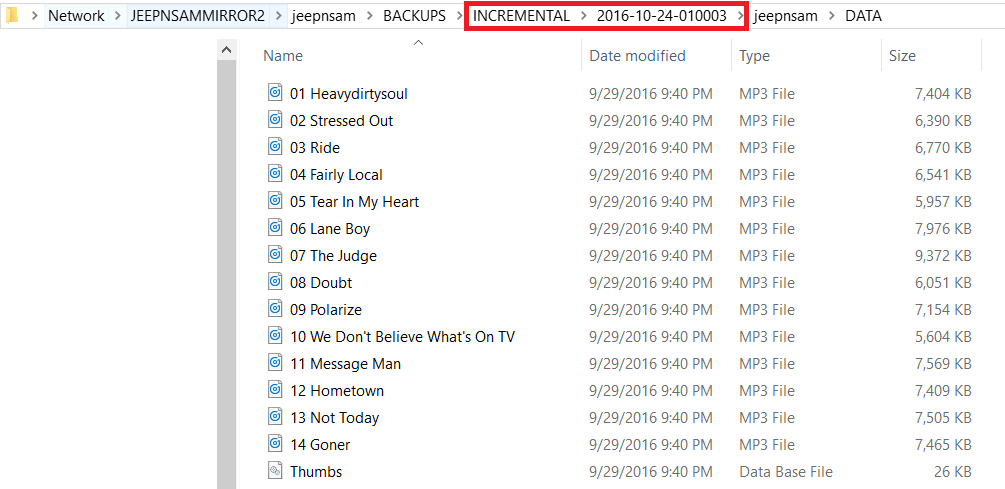
- Each incremental backup copy and it's contents will reside in a time stamped directory structure
- Uses hardlinks
"hard link is" the file system representation of a file by which more than one path references a single file in the same volume.
IMPORTANT:
Windows Explorer does not support and cannot view hardlinks and should not be used to check incremental backup status, file count or space used. It will appear that every incremental backup job is performing as a full backup job and saving the files in their entirety again inside of a newly created time stamped directory.
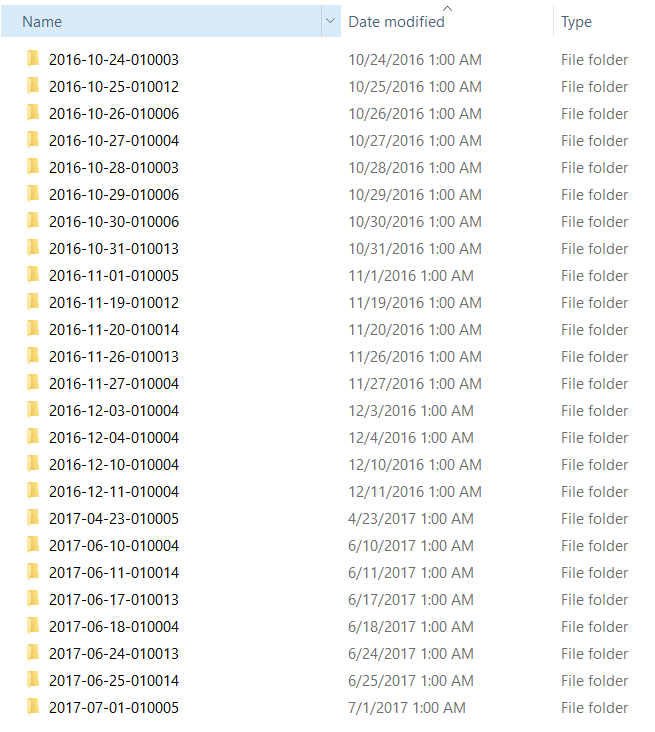
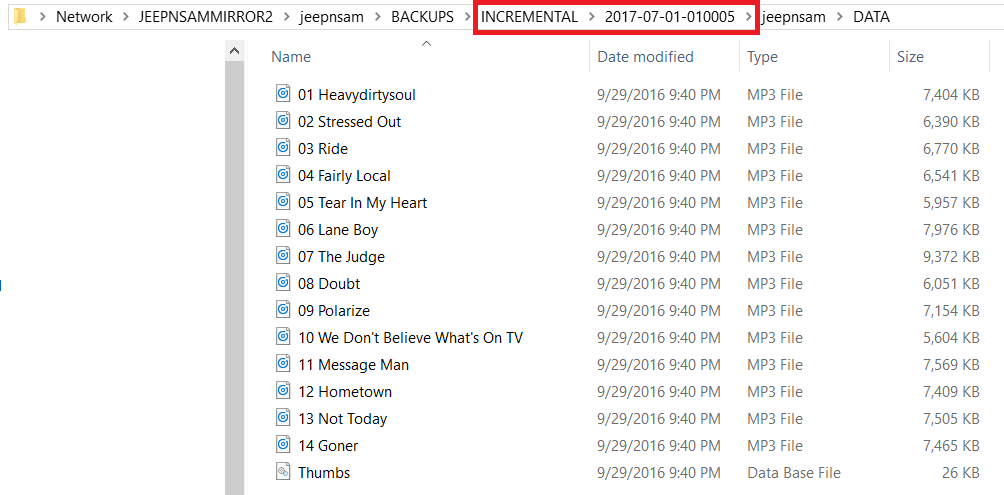
Incremental Backup Structure
Directory Structure of Incremenal Backups
Eample of incremental backup data structure as seen in Windows Explorer.
First Incremental Backup Content
Example of the 1st copy of the incremental backup job.
Most Recent Incremental Backup Content
Example of the most recent copy of the incremental backup job.
| Answer ID | 20227 |
| Published | 08/20/2018 02:51 AM |
| Updated | 04/16/2024 12:58 PM |