IMPORTANT: This is an NTFS file permissions issue. This should not be confused by password protection enabled with hardware encryption. The WD Security software uses the set password to electronically lock and unlock the drive. The drive’s volume will not mount without being unlocked.
Description
All or most of the files stored on an external hard drive either have Read-Only access, or produces an access denied error when attempting to access that data on another PC. The user may be the sole owner/administrator of either or both computers and still have this access issue.
By default, when a file or folder is created, Windows assigns default permissions to that entity or object.
Windows / NTFS File Permission for files and folders can be set to Owner, Shared, Read, Modify, or No access. This can be most prevalent for users attempting to access data on a Windows 10 machine, after adding data from a Windows 8 or older machine.
IMPORTANT: Moving a file using Cut and Paste will inherit the permissions set within parent folder and Carry over to the destination folder. Using Copy and Paste will not inherit the permissions of the destination folder, and may cause access issues; such as Access Denied, Administrator Permission Required, or Folder is emptyResolution
Managing File or Folder Ownership
All files and folders are considered objects and every object has an owner on an NTFS file system. The owner controls how permissions are set on the object and to who has a level of access.
IMPORTANT:File and folder permissions apply only on drives formatted to use NTFS. The user must have administrator rights on the computer in question to repair or change permissions on a file, and must begin by taking ownership of the file.
- Users whom are granted Full Control permission for a folder can delete files and subfolders within that folder. Full Control permission overrides other permissions that protect the files and subfolders
- If the check boxes under Permissions for
are shaded or if the Remove button is unavailable, the file or folder has inherited permissions from the parent folder - By default adding a new user will have Read & Execute, List Folder Contents, and Read permissions
Take Ownership of a File or Folder
Ownership can be taken by an Administrator, or a user in the Administrators group is given the Take ownership of files or folders right by default. To take ownership of a file or folder follow the steps outlined below:
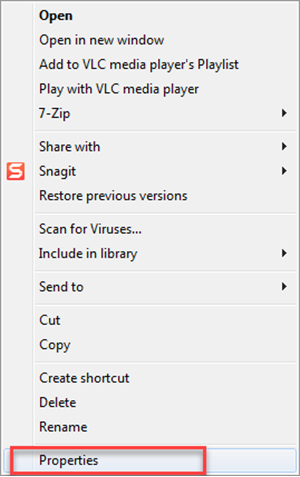
- Open File Explorer, and then locate the root or containing folder to take ownership.
To open File Explorer, right-click Start, and select File Explorer - Right-click the file or folder, click Properties
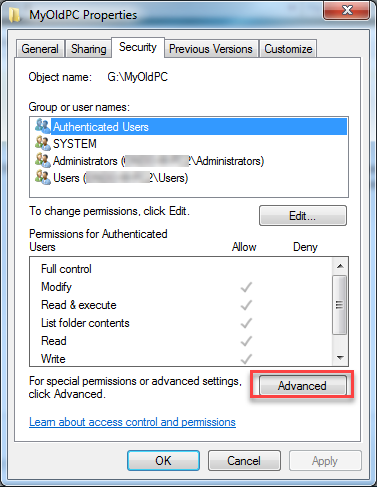
- Click the Security tab.
- Click the Advanced button
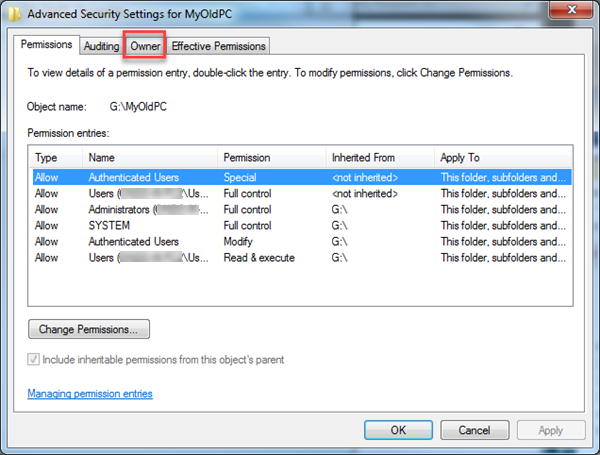
- Click the Owner tab
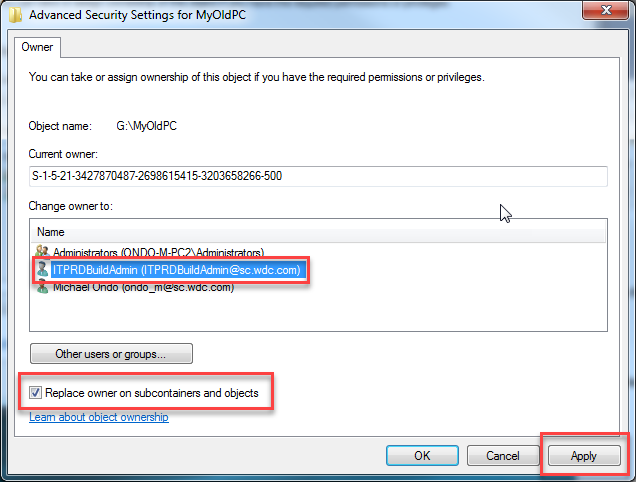
- Select a user listed in the Change owner to:.
Select the user, check the box next to: Replace owner on subcontainers and objects.
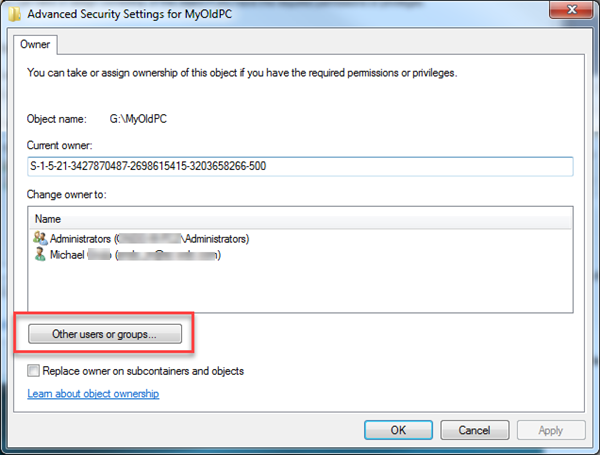
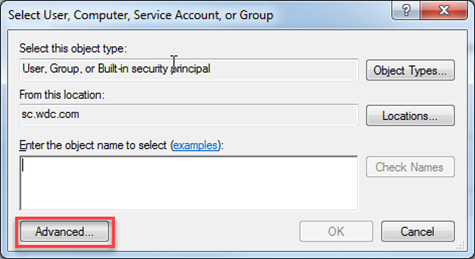
Click Apply - If a user is not listed, click Other users and groups... to select a local or network user
- Click Advanced... to populate the Enter the object name to select (examples):field
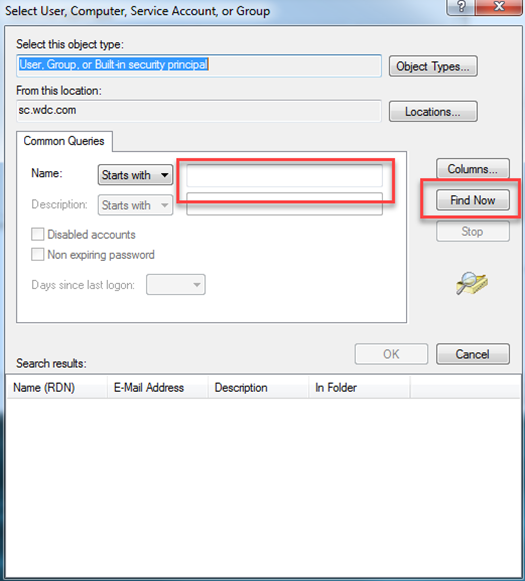
- Click the Find Now button to select a user or group name from the list or enter the full name in the Starts with field
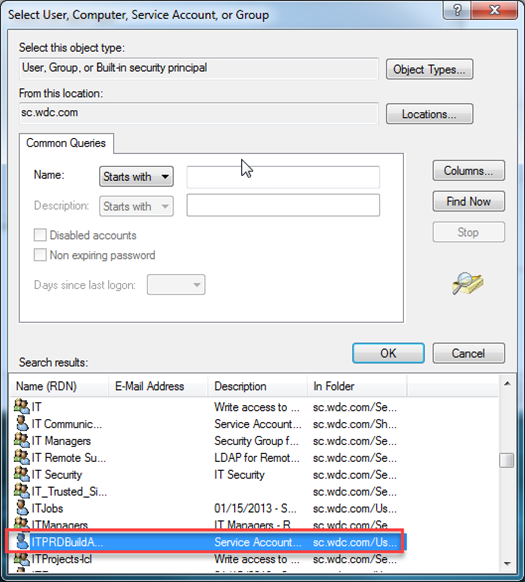
- Locate and click to highlight the user name and then click OK
- Change the owner to a user listed, in the Change owner to box, click the new owner
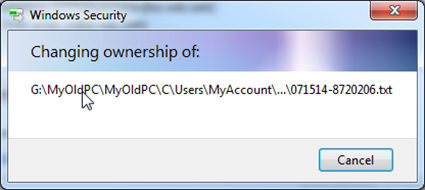
- A new Windows Security pop-up window will display the files ownership changing

Change, or Remove Permissions on Files and Folders
Follow the steps below to view, change, or remove permissions on files and folders
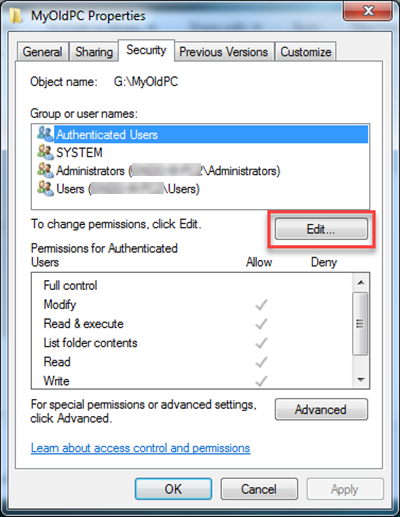
- Right-click the file or folder for which you want to set permissions, click Properties, and then click the Security tab.
- Click Edit to open the Permissions for dialog box.
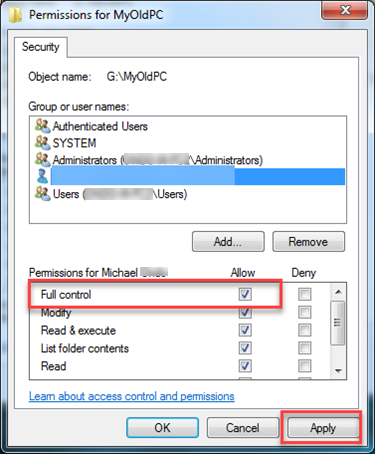
- Select a user from the Group or user names: Field.
Select Full Control from the Permissions for (User name): field below. - Click Apply. A new Windows Security pop-up window will display the files ownership changing
- The Windows Security window will close when complete.
Close all open windows - Open File Explorer, and then locate the root or containing folder to take ownership.
To open File Explorer, right-click Start, and select File Explorer

 | Adjusting Windows folder permissions is an advanced Operating System feature. If the outlined steps above to not help resolve the issue please contact Microsoft support. Please see the link for more information about the different methods to contact Microsoft support: Microsoft Support Contact US. |
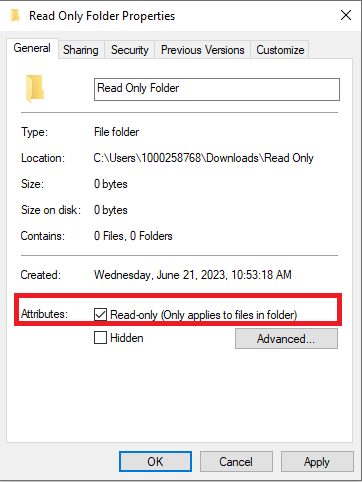
Turn off Read-only Mode on a Folder
Follow the steps below to turn off read-only mode on folders and files in Windows 10 and 11.
- Right-click the file or folder that needs to set the attribute.
Click Properties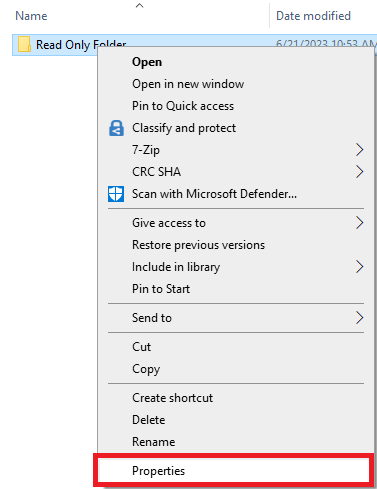
- From the General tab, find the Attributes
- Remove the check mark from Read-only
Click OK