IMPORTANT: My Cloud OS 3 End of Support Notice!
My Cloud OS 3 has reached its end of support life cycle.
Please update to My Cloud OS 5.
Need more help?
- My Cloud OS 3 End of Support
- WDC 21004 Recommend Upgrade to My Cloud OS 5
- Answer ID 32059 My Cloud OS 3: Cloud Access and Notification Email Support Removed
- Answer ID 29813: Steps to Manually Update My Cloud OS 3 to My Cloud OS 5
- Answer ID 28740: Western Digital Product Lifecycle Support Policy
When initially loading media on a My Cloud drive, it is best to temporarily disable Cloud Access and Media Serving from the drive’s Dashboard. See Answer ID 27432: How to Access the Dashboard on a My Cloud Device for help accessing the Dashboard on a My Cloud and see Answer ID 19276: My Book Live & My Book Live Duo: Update Firmware for useful tips and suggestions for uploading files to a My Cloud.
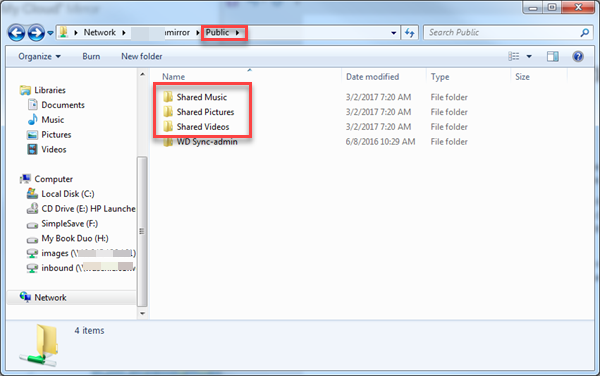
This article is based on using the most current version of iTunes for Windows. By default, the Media Server and iTunes server will search for new media from the Public share and serve that media from the appropriate shared sub-folders.
Please see Moving an iTunes music folder to an external hard drive for help moving an iTunes folder to a My Cloud drive.
Enabling Media Serving and iTunes Server on My Cloud
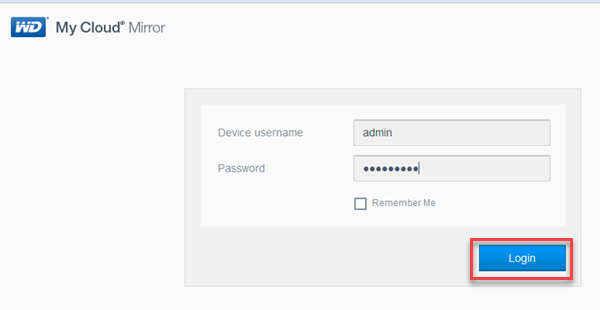
The following steps assume the media has been uploaded to the My Cloud device, the most current version of iTunes for Windows is already installed on the computer, and the My Cloud and computer are connected on the same network.- Open the My Cloud Dashboard. It may be necessary to login if a password was set
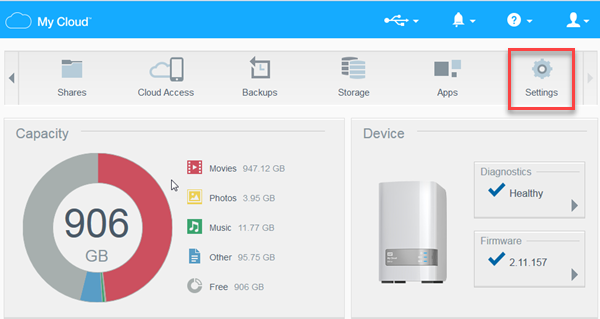
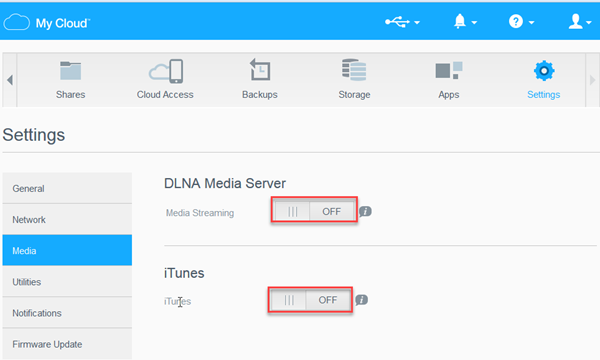
- Scroll through the Icon ribbon and click Settings
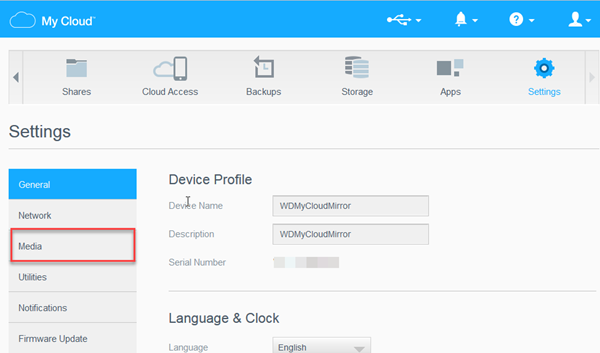
- Click Media to open the media settings page
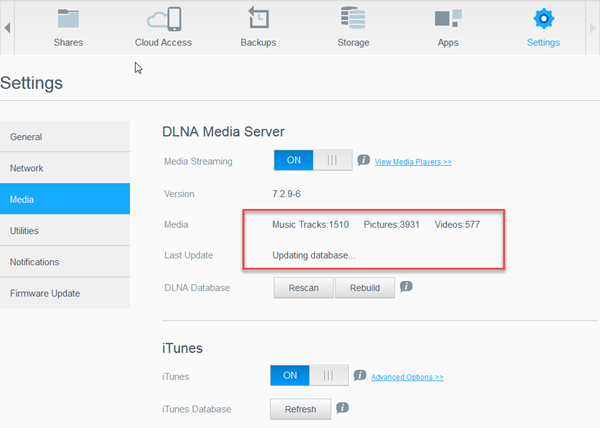
- Enable the DLNA Media Server and iTunes server by clicking on buttons indicated below
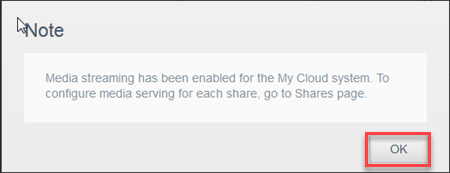
- A popup note advising the Media streaming has been enabled for the My Cloud system and direct the user to enable for each share media will be served from (iTunes server uses the Public share by default). Click OK
- The media crawler will run. This discovers all media from the selected media serving shares and compiles a database by Music Tracks, Pictures, and Videos. Please allow this process to complete before proceding
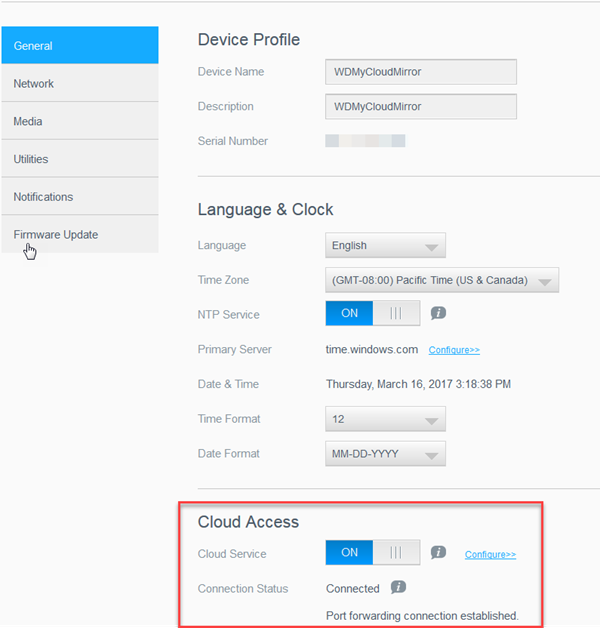
- Be sure to re-enable Cloud Access from the General page, if it was previously disabled for uploading media
Enabling Home Sharing on iTunes
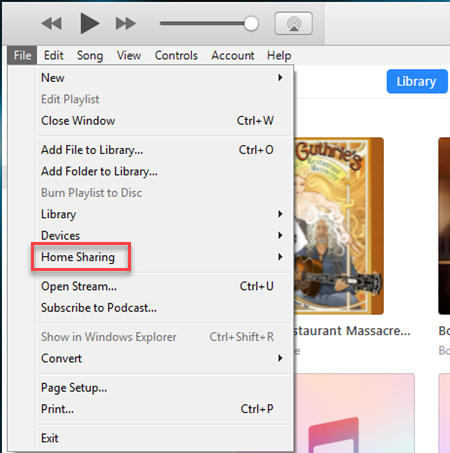
DRM protected iTunes music can be streamed to any network connected player by enabling Home Sharing.- Open iTunes by the list of Programs or short cut
- Click File in the menu bar and select Home Sharing
- Click Turn On Home Sharing
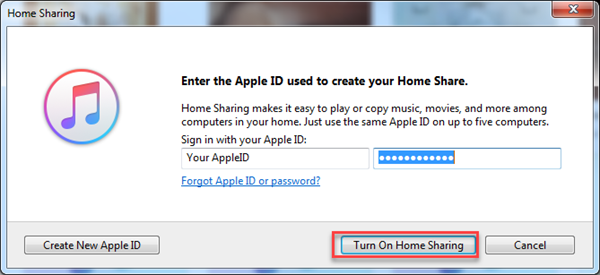
- Enter the Apple ID used to create the Home Share and click the Turn On Home Sharing button
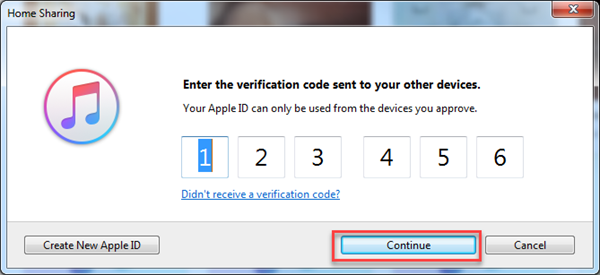
- Enter the verification code sent to a selected device and click the Continue button. It may be necessary to click the Didn't receive a verification code link to have a new code sent via Email or SMS to a mobile device

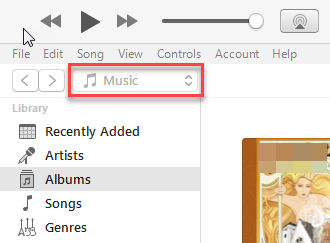
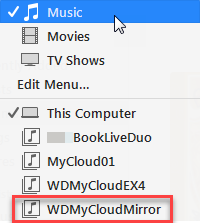
Select the My Cloud Library
- Click the Music button drop-down to select where the iTunes Library will be played from
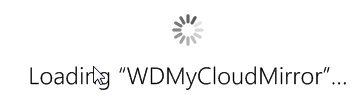
- iTunes will load the music library from the selected location
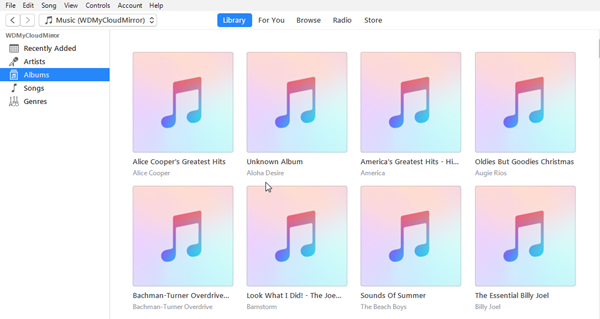
- The current Library will be shown. Album artwork may take time to transcode. If there is a problem loading the album art, it may be necessary to manually add an image by the album name
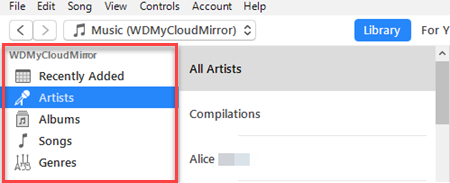
- The Library can be sorted or viewed by Artists, Albums, Songs, and Genres
IMPORTANT: The iTunes server licensed to the My Cloud can only stream music to authorized iTunes account devices or Home Shared players. This release of iTunes server cannot stream iTunes video. Please use the DLNA Media Server Twonky to stream video and picture content to DLNA players on the local network or using the My Cloud App. Please see Answer ID 13992: How to access files on a My Cloud using the My Cloud Mobile App for help installing and using the My Cloud App
If album artwork is not being displayed it may because the media files are not available in the Apple iTunes system.
ITunes may not display album artwork from converted CD’s or download from the Internet.
Please see the link below from Apple iTunes Support for more information about how to manually add artwork.
iTunes for Mac: Add artwork to songs and other items
iTunes for Windows: Add artwork to songs and other items
View the Use of Third-Party Software or Websites disclaimer.
Western Digital Support cannot help with third-party software or hardware.