IMPORTANT: My Cloud OS 3 End of Support Notice!
The My Cloud cannot be updated to OS 5.
My Cloud OS 3 has reached its end of support life cycle on April 15, 2022.
Need more help?
- My Cloud OS 3 End of Support
- WDC 21004 Bulletin: Recommend Upgrade to My Cloud OS 5
- Answer ID 32059 My Cloud OS 3: Cloud Access and Notification Email Support Removed
- Answer ID 28740: Western Digital Product Lifecycle Support Policy
The My Cloud (firmware 4.xx.xx-xxx) comes with a built-in utility to safely backup all information, shares, users and configurations to an attached USB drive or network storage.
My Cloud Safepoint Backups
My Cloud Firmware Updates
Please ensure that your My Cloud product firmware is up to date.
For assistance with updating My Cloud firmware, please refer to Answer ID 10440 How to update the firmware on a My Cloud device
USB Backup
External USB drives file system format must be FAT32, NTFS or HSF+.
Drives used for My Cloud backups should not contain macOS Time Machine or Windows System backups to obtain the best backup results.
For more details regarding file system support, please refer to Answer ID 15124 External USB drive file systems supported on My Cloud products
Network Backup to My Cloud
Safepoints can be written to another My Cloud on the same network.
TimeMachineBackup and Smartware are default shares on all My Cloud products. The "backup shares" are not indexed by the My Cloud or the Twonky DLNA Server. Using the "backup shares" can increase My Cloud performance since the data is not indexed. User created Shares are indexed and thumbnailed when My Cloud and DLNA Service is enabled resulting in slow backup speeds and My Cloud performance.
Create a Safepoint Backup
To create a Safepoint, please follow the instructions below:
- From the main page of a My Cloud Dashboard, click the Safepoints button of the Navigation bar.
For assistance accessing the Dashboard, please see Answer ID 27432: How to Access the Dashboard on a My Cloud Device.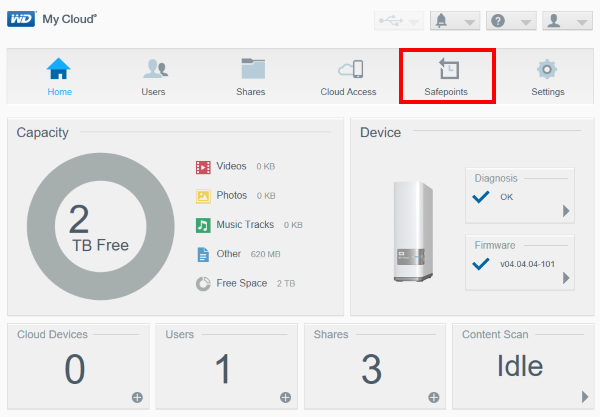
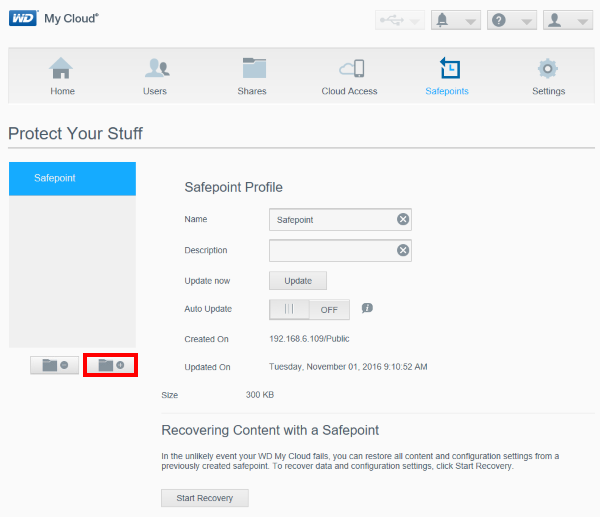
- Safepoints will be listed on the left-side panel. To create a new one, click on the Add a Safepoint icon.
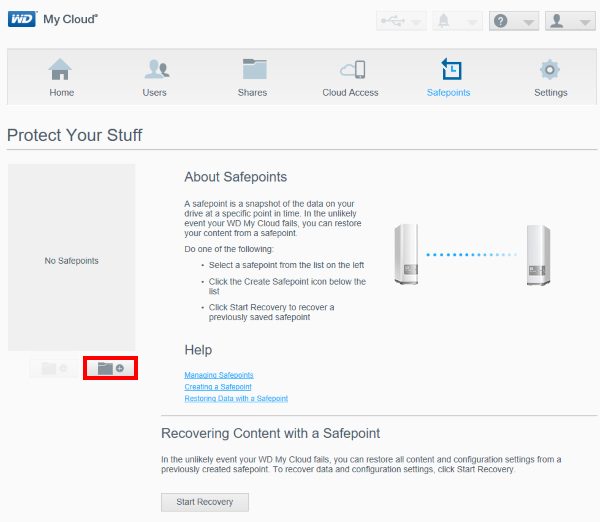
- The "Create a Safepoint" screen will appear.
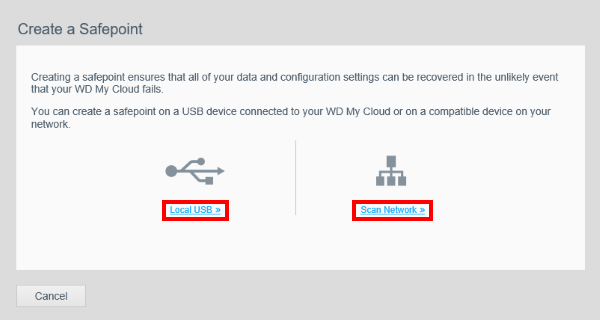
Select the desired destination for the Safepoint.
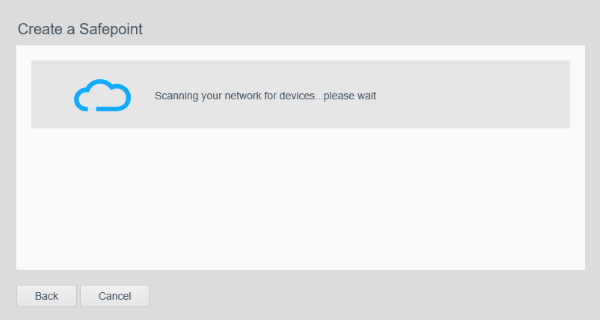
The options are Local USB, which is any external USB drive that may be connected to the USB port on the back of the My Cloud, or to Scan Network in order to search for other network resources, such as another My Cloud. For this example, we will be using the Scan Network option.
- My Cloud will scan the local network in search for network locations where the Safepoint can be saved.
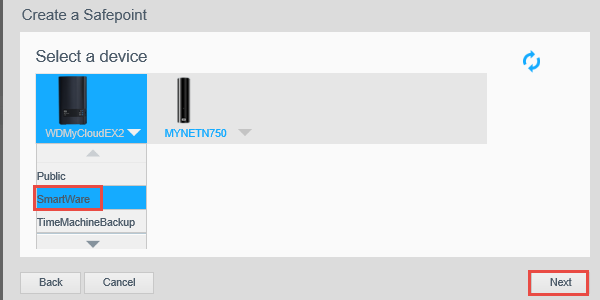
- The available devices will be displayed.
When this happens, select the desired device where the Safepoint is to be saved.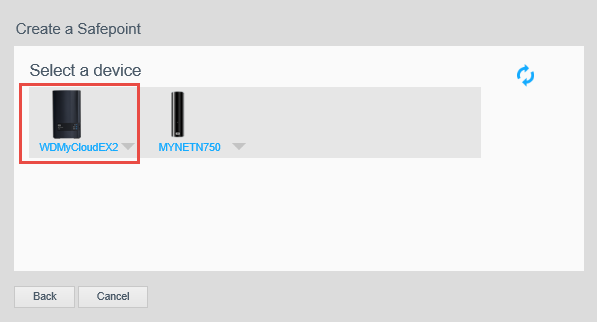
- Selecting the network resource will allow for the display of that device's network shares.
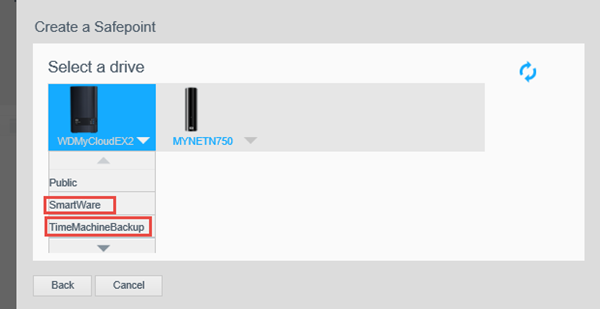
Scroll up and down to view the different shares for that device.
For best backup results to another My Cloud, please select the "Smartware" or "TimeMachineBackup" share.
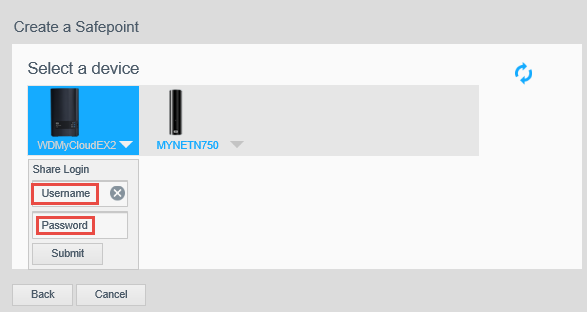
- If the selected network share is a private share, a username and password will need to be inserted to provide access to it.
For best backup results to another My Cloud, please select the "Smartware" or "TimeMachineBackup" share.
- Once the desired Share is selected, click Next.
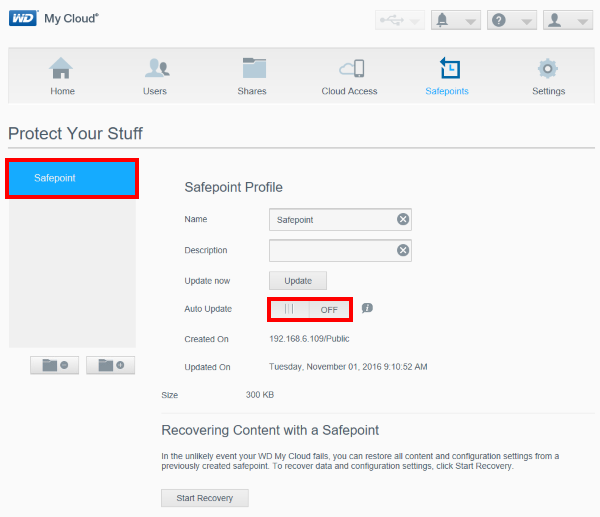
- Type in a name for the Safepoint, as well as a brief description.
On this window, the Auto Update will be available. When Off, the Safepoint will be a one-time backup only.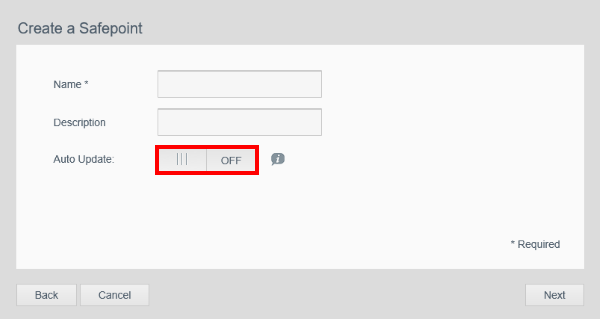
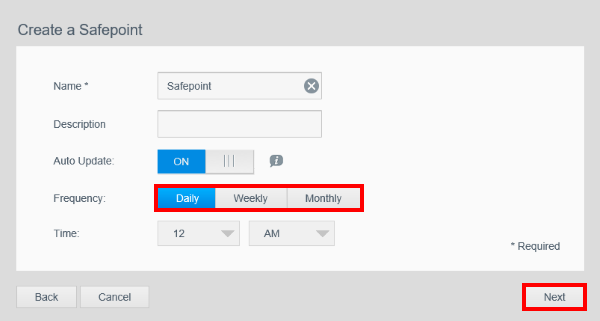
- Turning the Auto Update On will provide a user with the option to decide how often to update the device's backup.
It can be done Daily, Weekly and Monthly. When ready to proceed, click on Next.
- Select whether to create the Safepoint right away, or at a later time.
Now will have the Safepoint be created right away.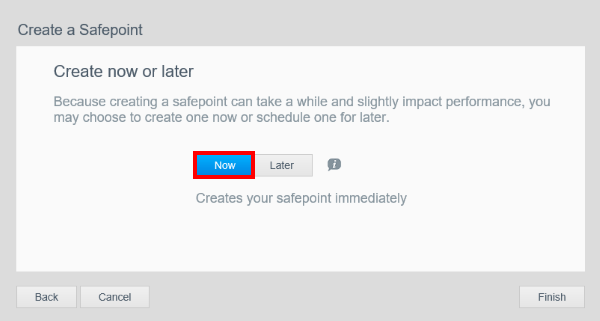
- If Later is selected, there will be an option to select between creating it Today or Tomorrow, and will allow the selection of the time when the Safepoint is to start.
When ready, click on Finish.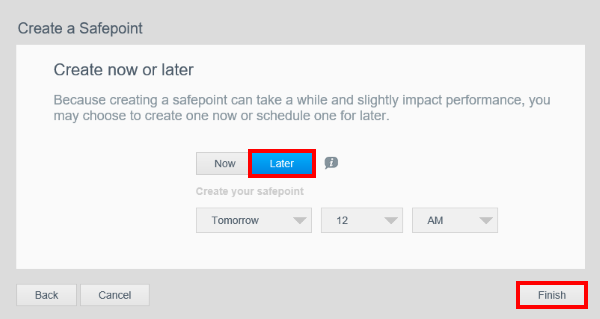
- As the Safepoint creation is active, the progress will be displayed on the Dashboard.
This process may take up to several hours depending on how much information is in the drive.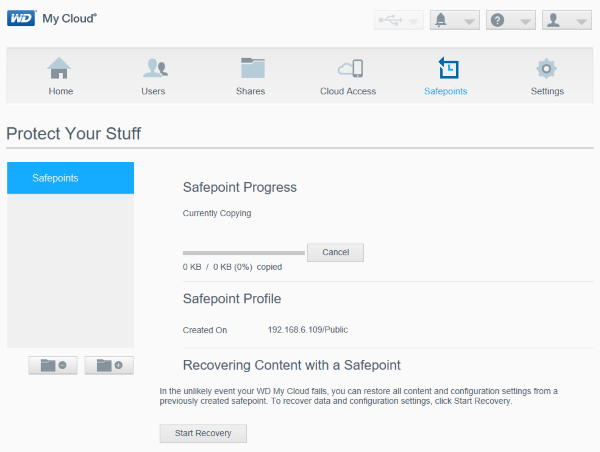
- Once the process finishes, it will display the Safepoint on the left-side panel, and its information is displayed to the side, including the network resource and share where it was created, as well as its size. The Auto Update function can be turned On or Off at any time, and an manual Update can be requested in case the need arises.
Delete a Safepoint Backup
The Safepoint backup will only appear in the dashboard if:
- external USB drive is attached to the My Cloud
- network storage is online and it's IP address and hostname has not changed
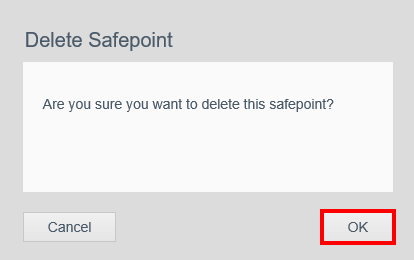
- Select the correct Safepoint from the left-side panel and click on the Delete Safepoint icon at the bottom of the Safepoint panel.
IMPORTANT:
When a Safepoint is deleted, the backup that was created on the external resource or USB storage on the back of the My Cloud will be deleted.
- When ready, click on Ok and it will be removed from the left-side panel.