Description
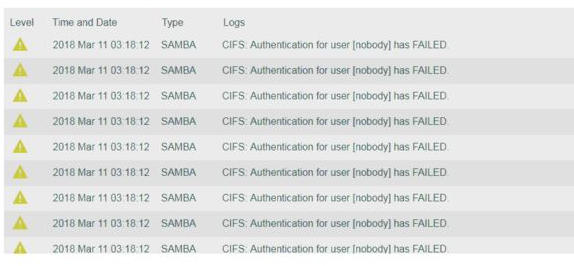
Access to a My Cloud share fails with the following error message on a Windows PC.
CIFS Authentication for the user [nobody] had FAILED
The user nobody is a pseudo user on the Linux operating sysem similar to the Windows Guest Account and allows access to non-password protected network shares on a My Cloud.
Windows does not support multiple connections to network shares under the following conditions :
- Accessing a My Cloud Private Share with one My Cloud user name, and attempting to access another share using a different My Cloud user name on the same Windows PC.
- Accessing a My Cloud Public Share and then attempting to access a Private Share on the same Windows PC
Resolution
Auto Map Shares
Disconnect and remove all mapped networked drives that are configured to connect after loign. Reboot the computer and aconnect to the a Private Share before connecting to the Public Share.
Private to Private Share
If you have accessed a My Cloud Private network share using Windows Explorer with one My Cloud user name, Log Off the Windows PC and Log On again to access a different share using a different My Cloud user name.
- Log off the Windows PC
- Log on the Windows PC
- Access the Private Share using the different My Cloud user name
Public to Private Share
If you have accessed a My Cloud Public network share using Windows Explorer and attempt to access a My Cloud Private network share, Log Off the Windows PC and Log On again, access the Private Share before the Public Share. This process ensures that Windows Explorer will always use the Private Share credentials when accessing the Public Share in the same Windows session.
- Log off the Windows PC
- Log on the Windows PC
- Access the Private Share before accessing the Public Share
Windows 10 Log In / Sign In Option
Log In Option - Local Account
Windows 10 includes the traditional Login In option using a Windows computer Local User Name and password.
The Login In option is considered a Local Account which does not utilize Active Directory or any online sign in associated methods.
Local Account Login in does not access the windows Samba (SMB) network layer.
Solution
When using Local Account, access the My Cloud Private Share before accessing the Public Share.
Sign In Option - Online Account
Windows 10 introduces a new Sign In option using the Windows Online Account email address as the username to access the computer.
The Sign In option is considered a Online Account utilizing Active Directory via Windows Online.
Due to the Active Directory nature of the Windows Online Account, the Windows Samba (SMB) network environment uses the Windows Online Account email address
to access available network shares.
Solution
When using the Online Account, accessing the My Cloud Private and Public share will fail. Microsoft Windows does not allow
more than one user to access a network share in the same active session. Using an alternate Local Log In Account or changing the computer access method from "Sign In - Online Account"
to "Log In - Local Account" will allow access to network shares without permission errors.
My Cloud Admin
Access any share on the My Cloud as the "admin" user which Read/Write access to all shares created by default.
If the "admin" user cannot access the share, please check the share permissions on the My Cloud dashboard.
Windows 10 Solutions
Perform a system only restore on the My Cloud. Please see Answer ID 14275: How to Restore a My Cloud Device
Use WD Access to map the My Cloud shares. Please see Answer ID 9323: How to Map a My Cloud Network Drive on Windows
Windows Networking Services
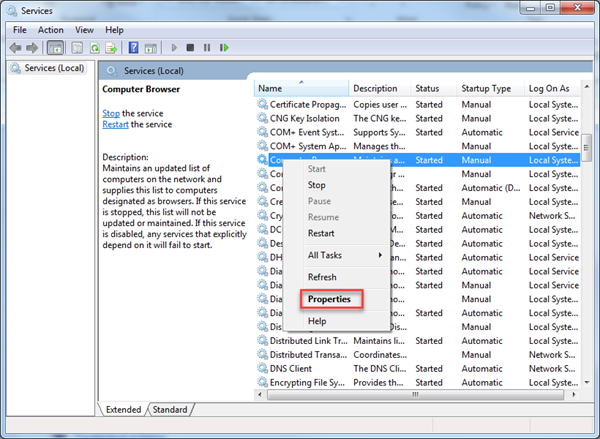
Open the Services panel.
- Click on Start (Windows logo) at the bottom-left of the screen
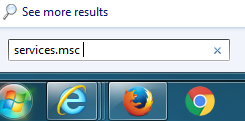
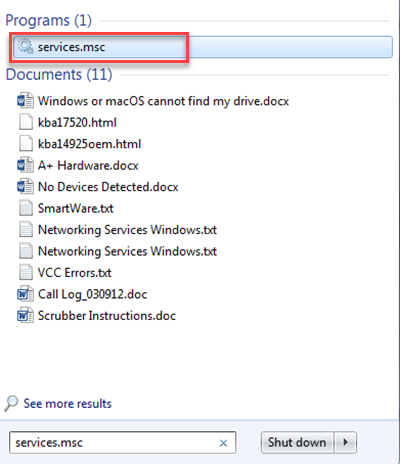
- Type services.msc from the search bar as shown below
- Click services.msc application as shown below
- Computer Browser
- DHCP Client
- DNS Client
- Function Discovery Resource Publication
- Network Location Awareness
- Plug and Play
- SSDP Discovery
- Storage Server
- Server
- TCP/IP NetBIOS Helper
- UPnP Device Host
- Workstation
- Right-click the service to be edited and select Properties
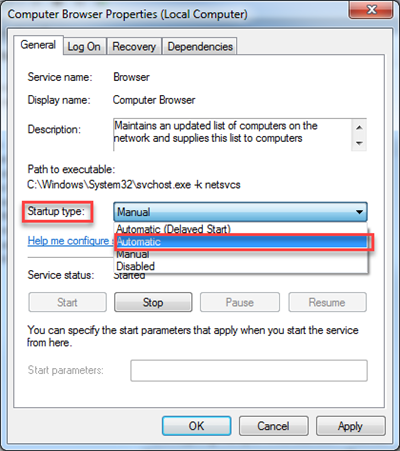
- Select Automatic from the Startup type: drop-down menu
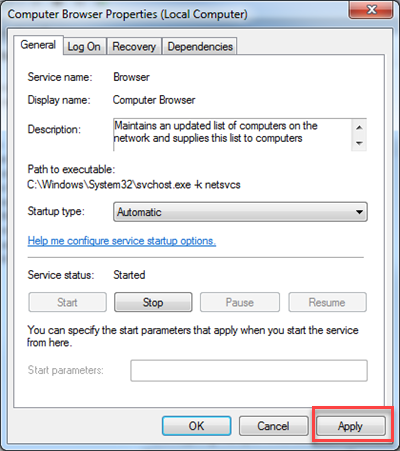
- Click Apply to save the change
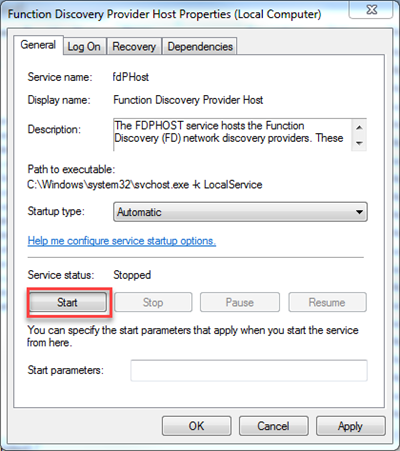
- Start the service if the Service status: shows Stopped.
- Reboot the computer
Ensure the following Windows Services are running and set to Automatic.
Please follow the steps outlined below this list for instructions on how to make changes if needed.
Change Services Instructions
Change the properties to automatic startup any services not currently running.