WD TV has reached its end of support life cycle.
Need more help?
- Answer ID 28893: WD TV End of Support
- Answer ID 28740: Western Digital Product Lifecycle Support Policy
The WD TV Live HD Media Player can be connected to your network using a wired or wireless network connection (using a supported USB Wireless adapter) for access to streaming video, music and online media content.
Note: Depending on your network's configuration you may need to disable or adjust your Firewall settings in order for your WD TV Live Media Player to be seen by your network. Please contact your Firewall manufacturer for assistance doing this.
Based on Firmware Version 1.01.00Wired Network Setup
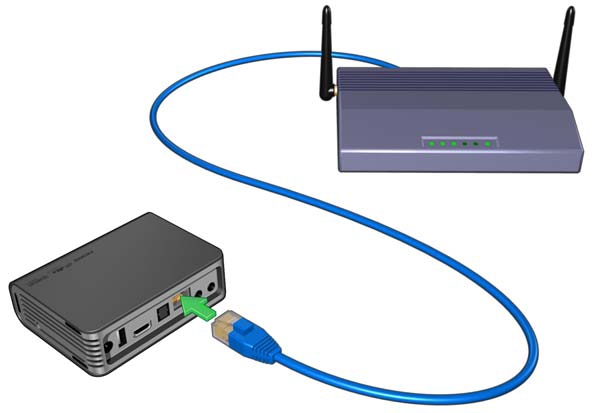
- Plug an Ethernet cable into the Ethernet connector on the media player. Plug the opposite end of the Ethernet cable directly into a LAN port on a router or network switch.
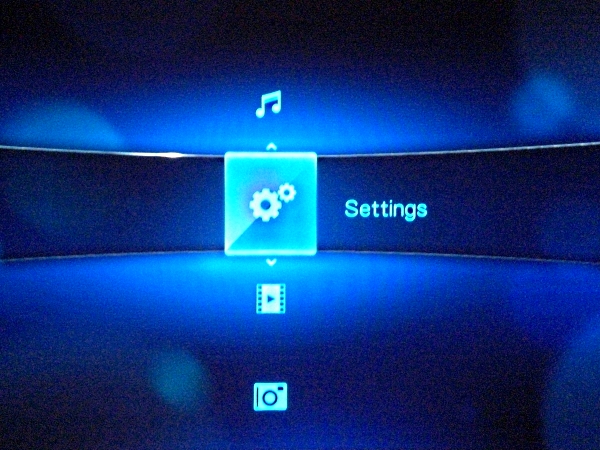
- On the WD TV Live HD Media Player, navigate with the Arrow Buttons to the Settings menu and press the ENTER button.
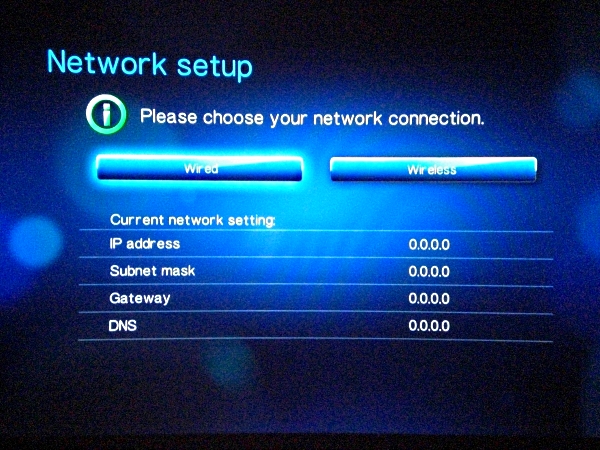
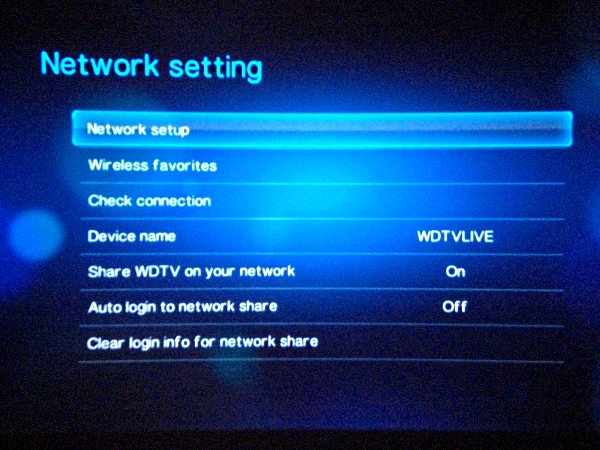
- Next navigate to the Network Settings menu and press ENTER. Select the Network setup option on the screen, and press ENTER again.
- Select the Wired option and press ENTER on the remote.
Note: If you do not have a Wireless USB card attached to the WD TV Live HD Media Player the Wired and Wireless menu will not appear. If this occurs it is OK to skip this step.
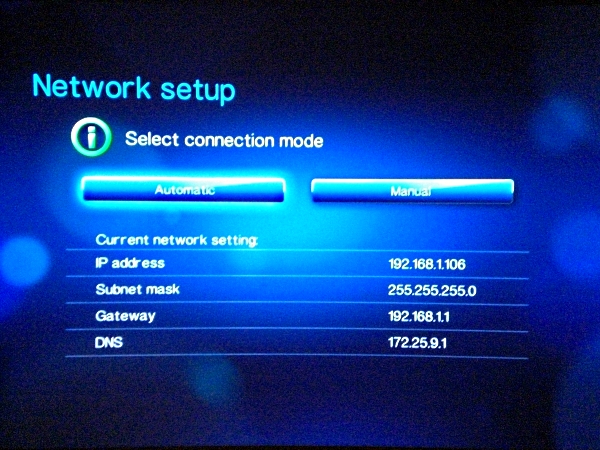
- Next you will need to select a setup configuration option. Select Automatic to have the device attempt to detect your network connection automatically. If you are able to automaticly configure your drive your drive should now be connected to your network. If you are unable to set your network up automaticly you will need to manually enter your network configuration information. You can do this by selecting the Manual option.
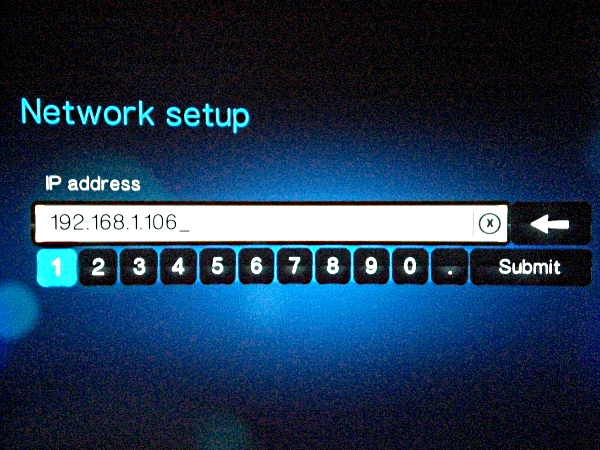
- You will be taken to a list of options to change for your connection. Navigate the Up/Down Arrows on your remote to select IP address, then press ENTER.
- Enter the IP address you would like to enter for the WD TV Live and than navigate to the Submit button and hit ENTER. Repeat the steps above to set the Subnet mask, Gateway, and DNS settings.
- Navigate to the Finish option and press ENTER. Your drive should now be connected to your network and are done with the setup. Otherwise if you are unable to connect, verify that the information entered is accurate and that your firewalls are properly configured.

Wireless Network Setup
Note: In order to connect the WDTV Live HD Media Player wirelessly to your network you must be using a supported router and Wireless USB card. For a list of tested, compatible devices see article Answer ID 5001: RETIRED: WD TV LIVE HD Media Player & WD TV Live Plus HD Media Player: Support Devices.
- Connect a supported USB wireless card (sold separately) to either USB port on your WD TV Live HD Media Player.
- Navigate using the Arrow Buttons on your remote to select Network Settings from the main menu and press ENTER. Next select Wireless and again press ENTER.
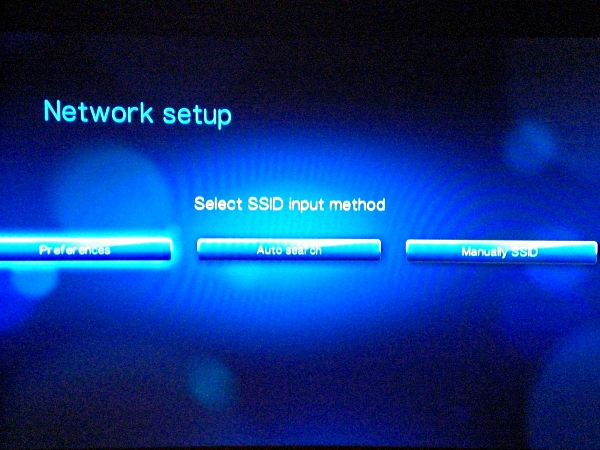
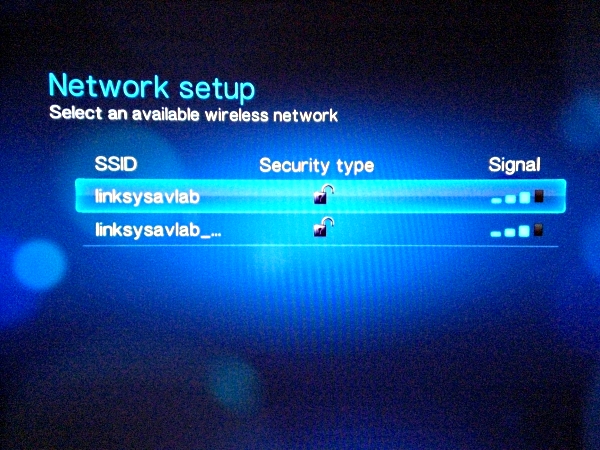
- Next you will need to set the SSID of your network. Select Auto Search to have the WD TV Live HD Media Player search for your SSID. Otherwise select Manually SSID and enter the name and security settings of your wireless network.
- If you selected Auto Search than you will need to select your network. Select the network you wish to connect to. If prompted, enter your wireless security information and select Submit.
- Finally you will be taken to your network set-up options. From here you can set up your basic network settings. Select Automatic if your router has DHCP and you want to automaticly configure your WD TV Live HD Media Players IP settings. If it is able to it will make all the configuration changes and you are done. Otherwise select the Manual option and press ENTER on the remote.
- You will be taken to a list of options to change for your connection. Navigate the Up/Down Arrows on your remote to select IP address, then press ENTER.
- Enter the IP address you would like to enter for the WD TV Live and than navigate to the Submit button and hit ENTER. Repeat the steps above to set the Subnet mask, Gateway, and DNS settings.
- Navigate to the Finish option and press ENTER. Your drive should now be connected to your network. If you are unable to connect verify that the information entered is accurate and that your firewalls are properly configured.
Note: If your card is not recognized or not supported by the WD TV Live HD Media Player, the Wired and Wireless menu will not appear. Make sure your wireless card is on our supported list and functions propely when connected to a PC. If the Wired and Wireless menu still does not appear you will need to contact the technical support department for your region.
| Answer ID | 20781 |
| Published | 08/20/2018 02:56 AM |
| Updated | 10/01/2022 09:30 AM |