IMPORTANT: WD My Book Live End of Support Notice!
WD My Book Live has reached its end of support life cycle.
WDC-21008 Recommended Security Measures for WD My Book Live and WD My Book Live Duo
Need more help?
- Answer ID 28917: WD My Book Live End of Support
- Answer ID 28740: Western Digital Product Lifecycle Support Policy
Description
Time Machine cannot complete a backup because the backup is too large for the backup disk, as shown in the error below:
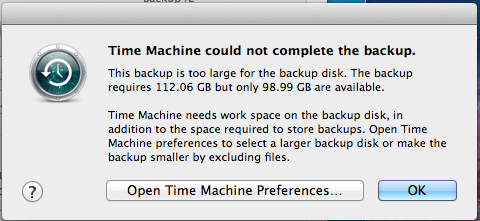
When a Time Machine backup is first created, the backup database, called a 'sparsebundle', is created using the current size limit set on the My Book Live Dashboard (found in Settings, System, Backup Settings). If that size limit is not adequate to store the Time Machine Backup, the backup will fail. The size limit can then be changed on the My Book Live Dashboard, but the size limit on the sparsebundle cannot be edited.
Resolution
The sparsebundle must be deleted and regenerated by Time Machine.
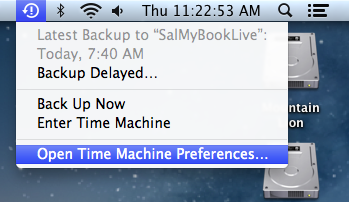
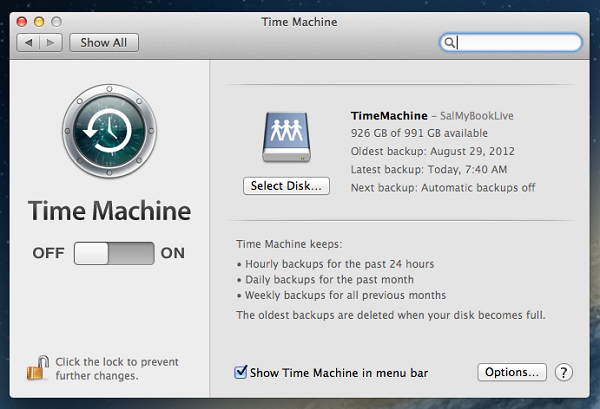
- First, open Time Machine Preferences and turn Time Machine off.
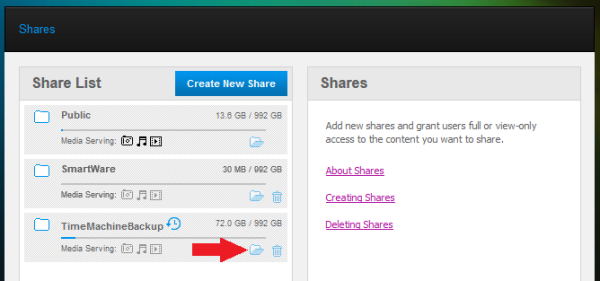
- On the My Book Live Dashboard, click the Shares page. See Answer ID 11525: Access the Dashboard on WD My Book Live and My Book Live Duo for instructions.
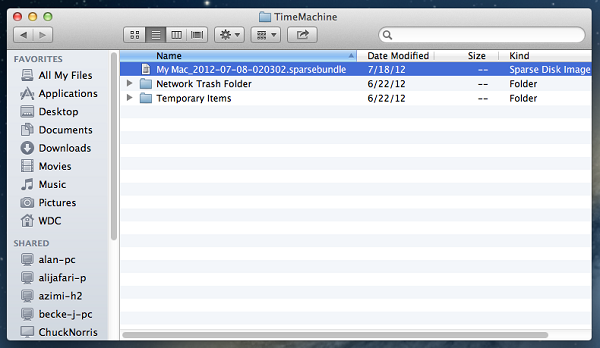
- Click the Open Share button next to the share to which Time Machine is currently set to use. By default, this is the TimeMachineBackup share, as shown in the image below.
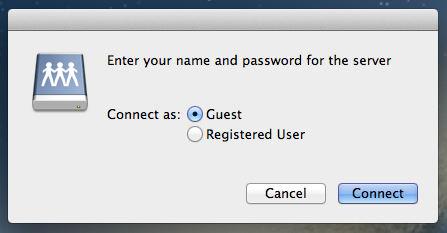
- Connect as Guest.
- Navigate to the Time Machine folder.
- Delete the .sparsebundle folder referring to the computer on which the aforementioned error appeared.
- On the My Book Live Dashboard, click the Settings page.
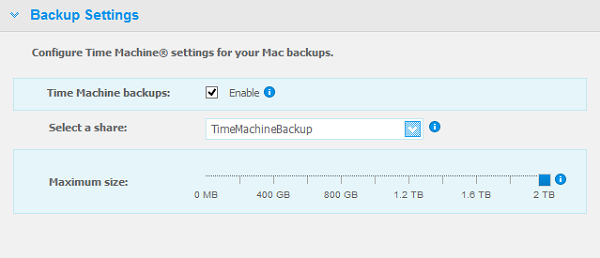
- Scroll down and click Backup Settings, then set the Maximum size to the maximum capacity of the drive.
- Time Machine may now be reactivated and a new backup started. See Answer ID 2374: RETIRED: How to Use macOS Time Machine Backups to WD Network Attached Storage (NAS) for more information. After the backup is started, the Maximum size setting can be adjusted.
 | Oracle Java Runtime Environment is required. Install if asked. See www.java.com for more information. |
 |
Critical: The following procedure is data destructive and cannot be undone. Once the process begins, ALL THE DATA IN THE TIME MACHINE BACKUP WILL BE LOST! |